This technical guide explains how to install Matrix Booking’s Microsoft 365 add-in. The guide is aimed to be used by your IT team:
Overview
You can install and use Matrix Booking’s Microsoft 365 add-in, which provides a room finder app that provides greater search flexibility, room suggestions, and applies access and booking rules from Matrix Booking. The add-in can be used for organisations’ users or targeted sub-groups in Outlook in a browser or on the Windows or macOS Outlook apps. This software can be installed from the Microsoft 365 Admin Center or Add-in app area.
Since its inception, our Microsoft 365 add-in has required a minimum of the following Outlook versions:
-
Outlook via Microsoft 365
-
Retail perpetual Outlook 2016 and later
-
Volume-licensed perpetual Outlook 2021
Note: all the above require Version 1910 (Build 12130.20272) or higher. The minimum version required is dictated by the support for “Outlook add-in API requirement set 1.8”, where “Outlook add-in” means an add-in for Outlook and not our add-in for Outlook’s desktop app. For more information, see Microsoft’s guidance on Outlook client support.
The versions that our Microsoft 365 add-in doesn’t support are:
-
Volume-licensed perpetual Outlook 2019
-
Volume-licensed perpetual Outlook 2016
-
Perpetual Outlook 2013
-
Any versions older than the above
Install the add-in for administrators
To install the add-in for multiple users in your organisation, you’ll need to access your Microsoft 365 Admin Center. To deploy the add-in for one or more users, you can paste the link of where the manifest is. To install the add-in:
-
Open the Microsoft 365 Admin Center in your browser. Select Show All... if it doesn’t appear.
-
Select Settings.
-
Select Integrated apps.
-
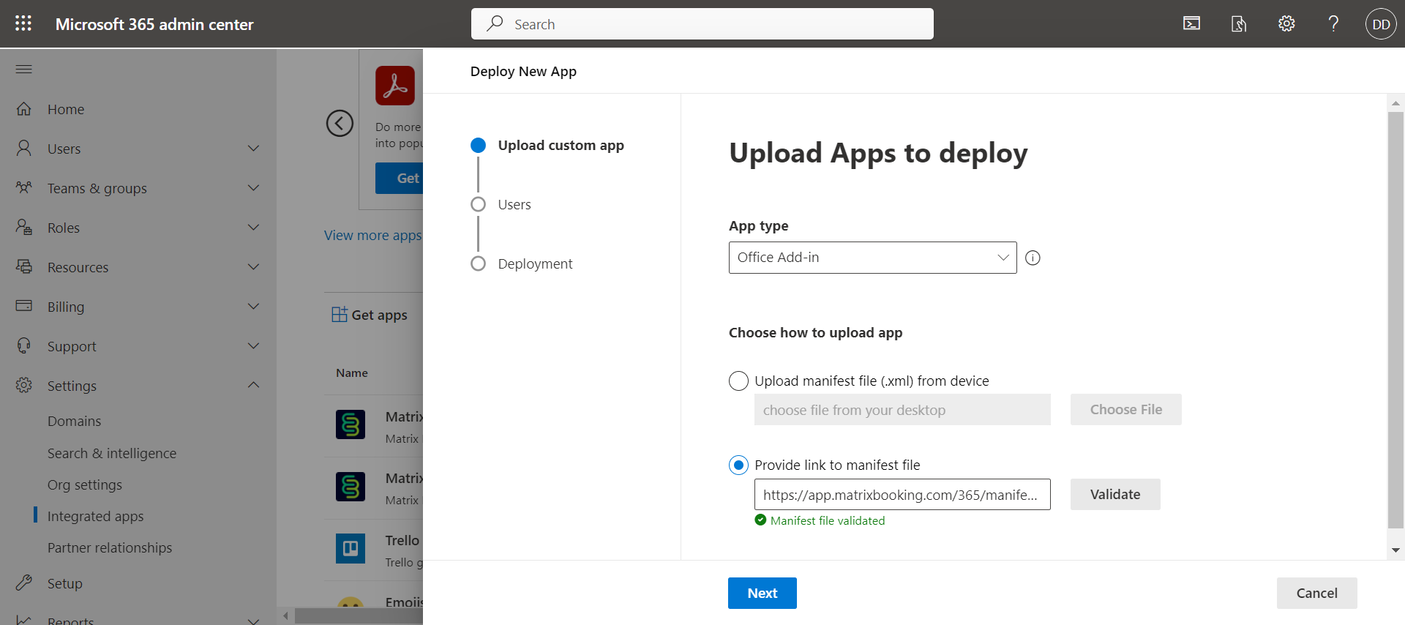
Select Upload custom apps. The Upload custom app tab in the Deploy New App screen will appear.
-
Select Provide link to manifest file.
-
Enter https://app.matrixbooking.com/365/manifest.xml and make sure to include the
https://. -
Select Validate. It will try to upload and validate the file and confirm when the file is validated.
-
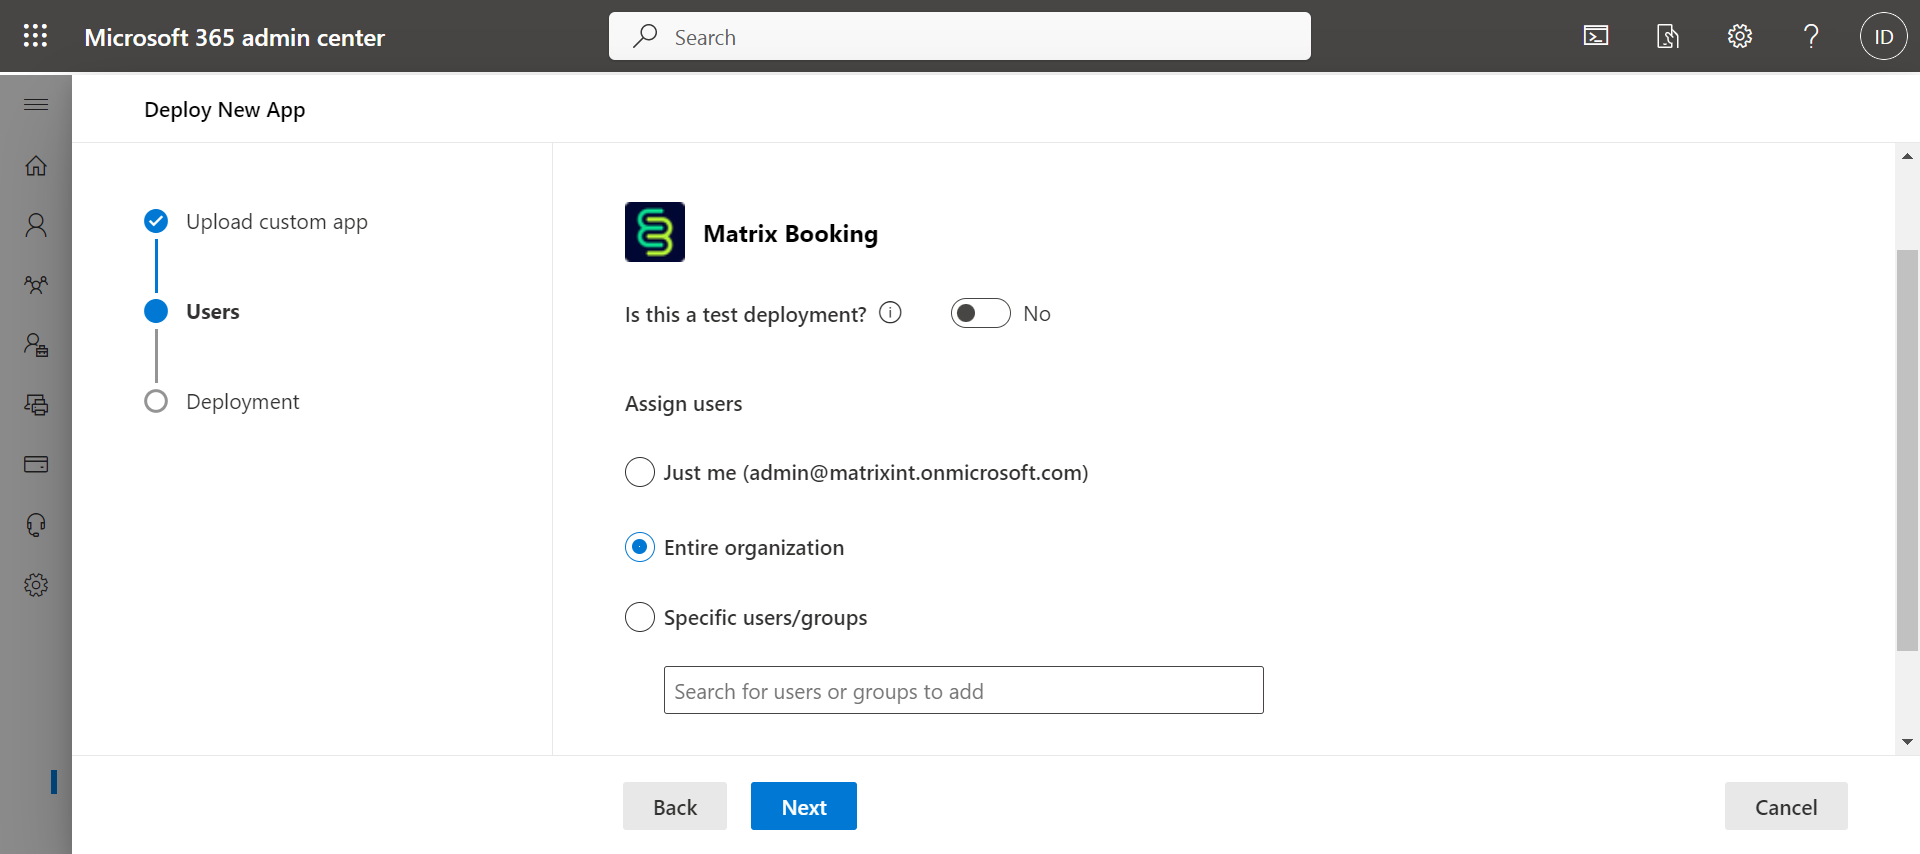
Select Next after choosing how you want to upload the app. The Users tab will appear.
-
Select one of the choices from the Assign users list depending on the level of access your organisation allows.
-
Select Next. The Deployment tab with the Permissions section will appear.
-
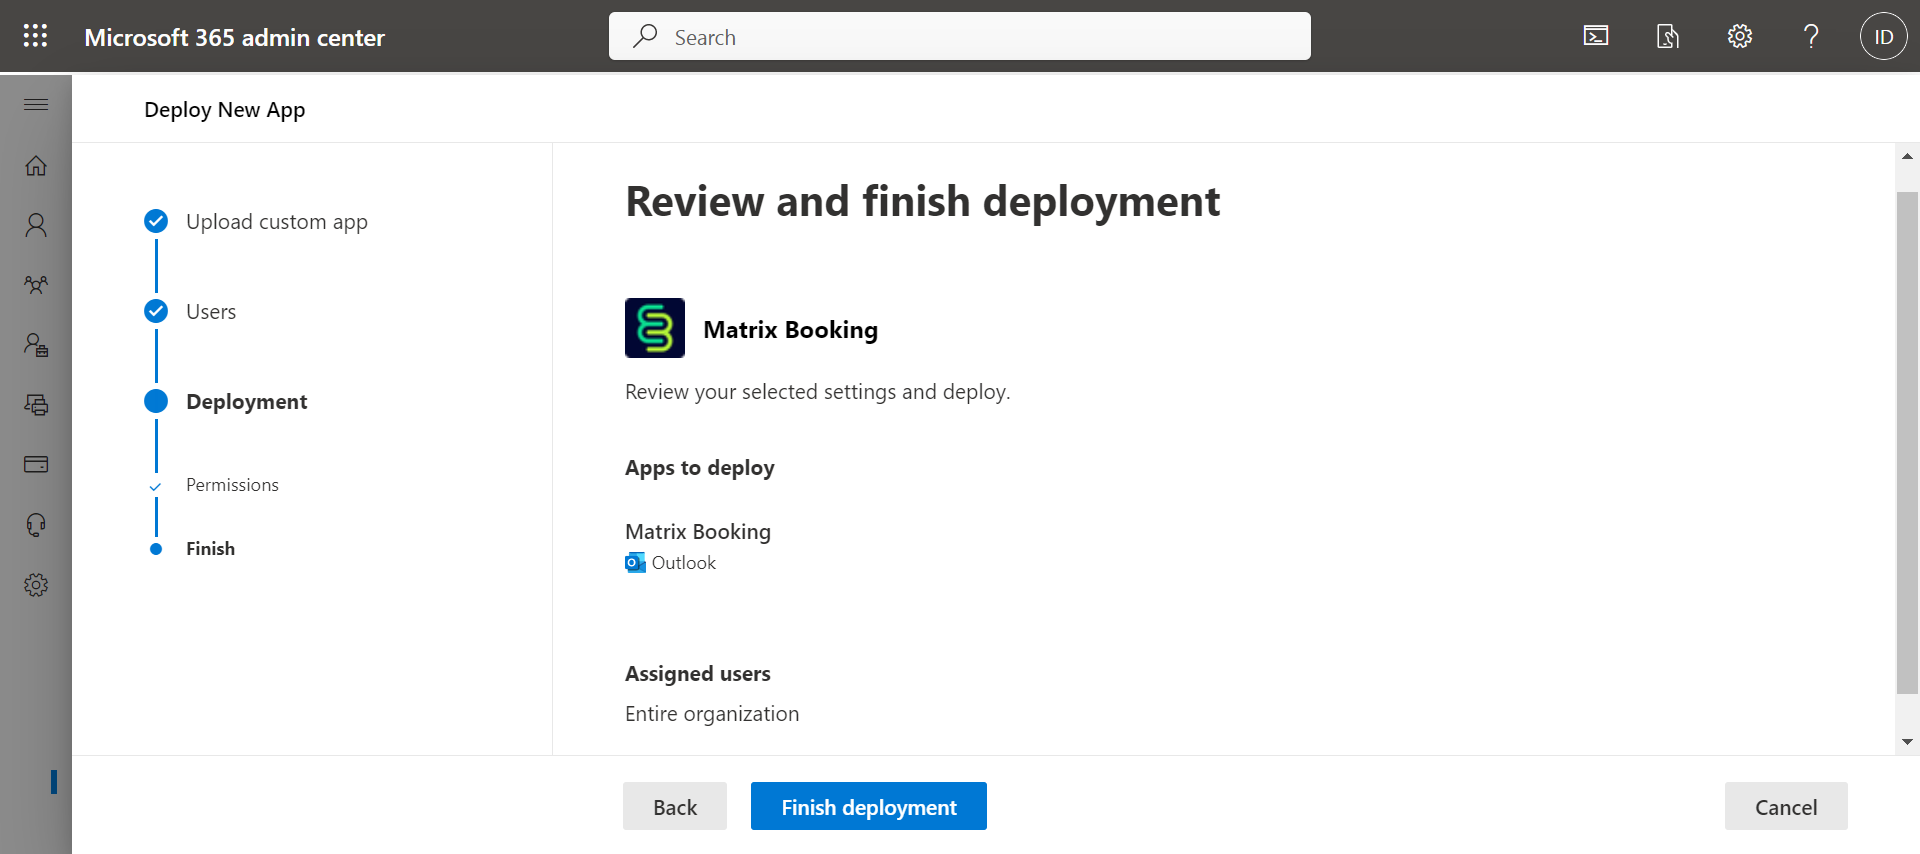
Select Matrix Booking under App Permissions and Capabilities to read them.
-
Select Next.
-
Select Finish deployment.
Note: if you have any issues setting this up, raise a support ticket.
Get the add-in for users
To get the add-in after it has been installed:
-
Download the manifest file at app.matrixbooking.com/365/manifest.xml
-
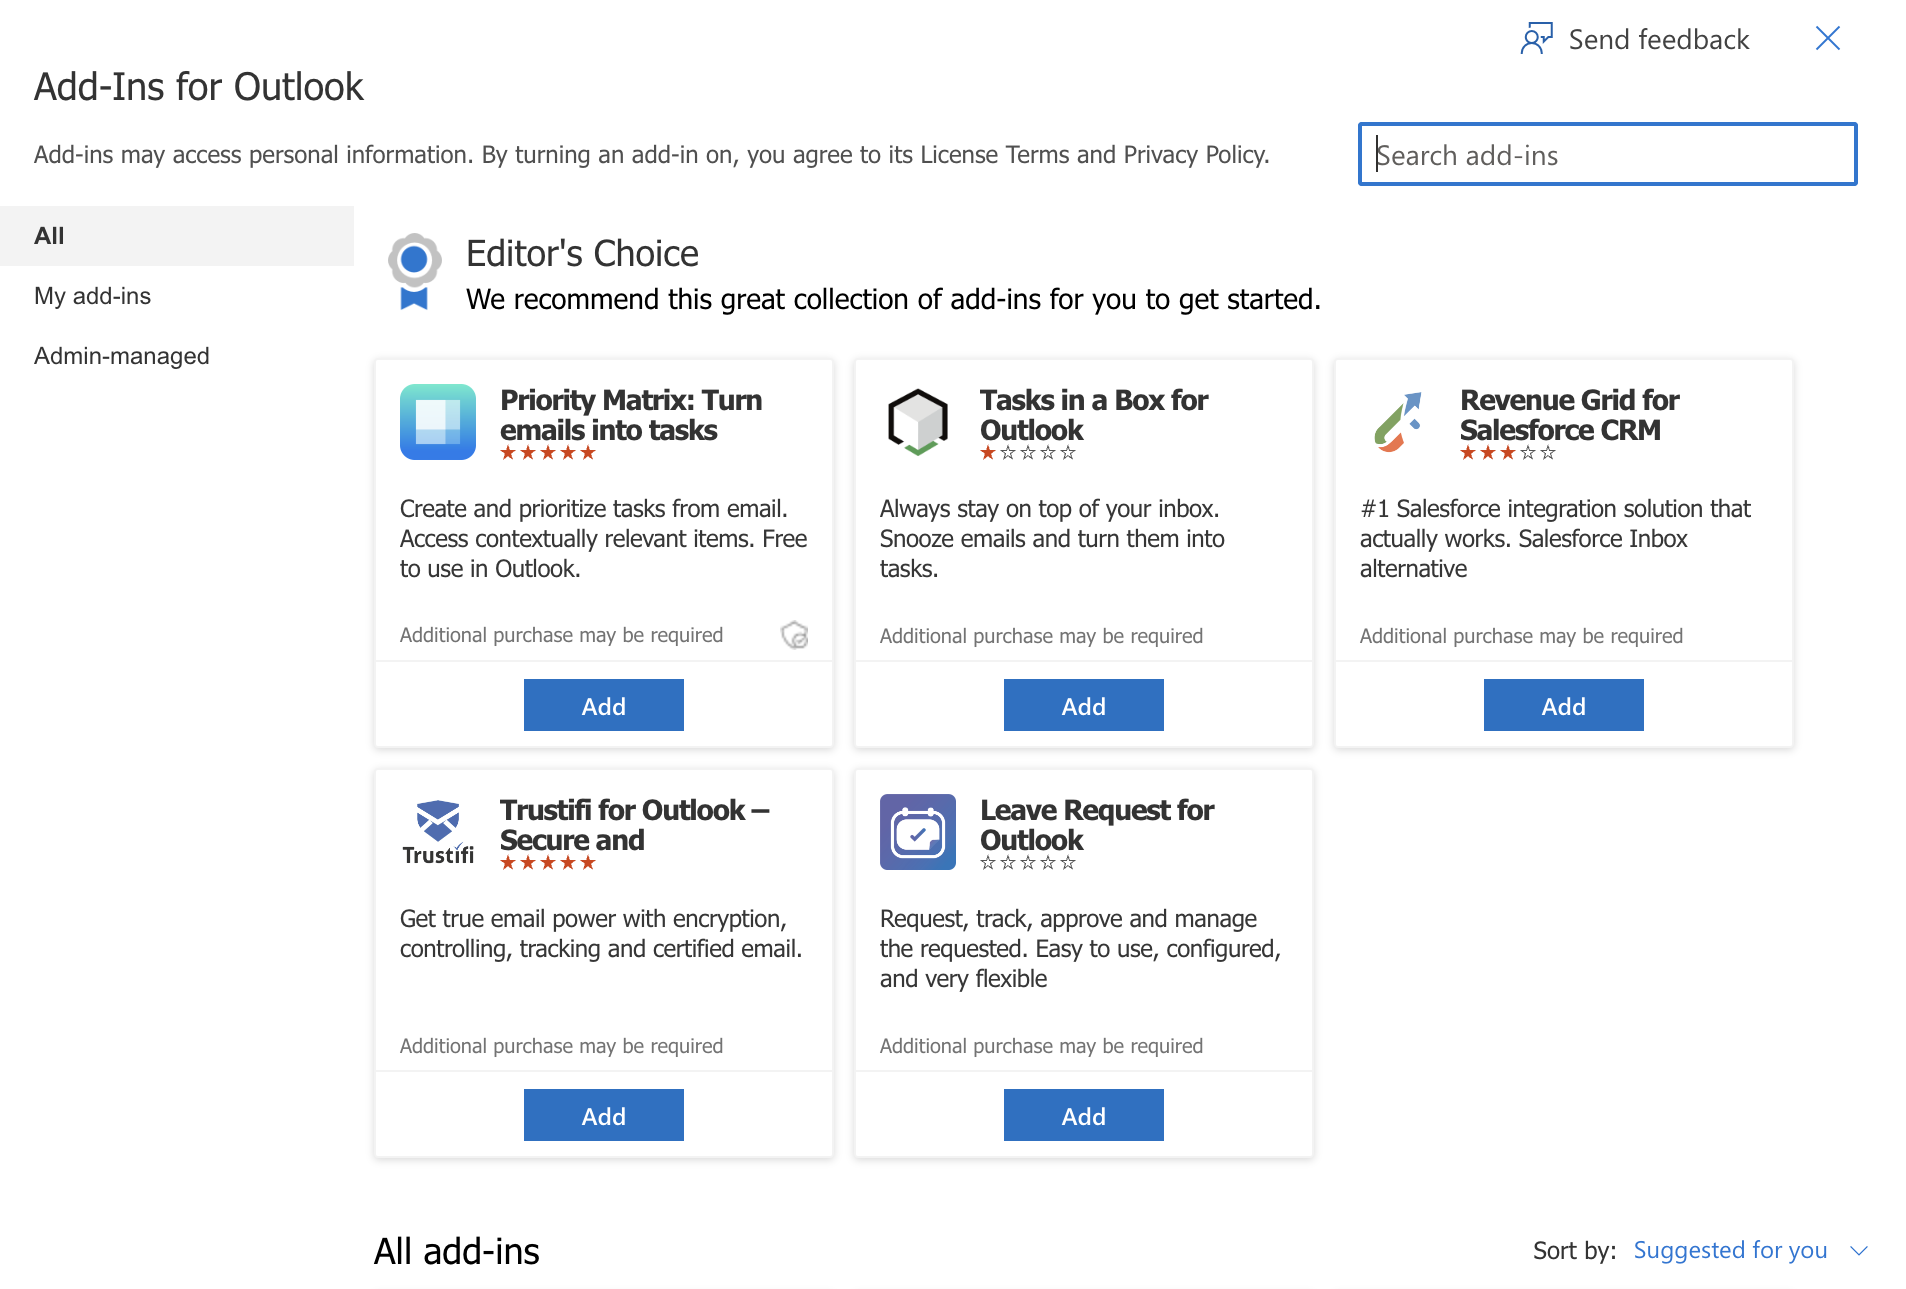
In your preferred browser, go to https://aka.ms/olksideload. This opens Outlook on the web and loads the Add-Ins for Outlook dialog after a few seconds.
-
Select My add-ins in the side menu.
-
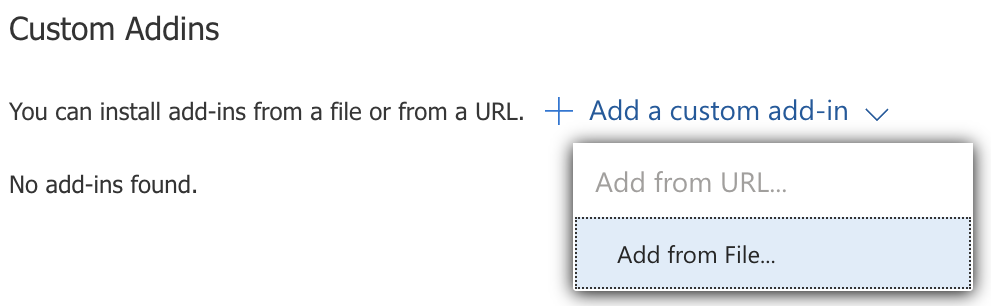
In the Custom Addins section, select Add a custom add-in. A dropdown list will appear.
-
Select Add from File… Your native file explorer will open.
-
Navigate to and select the manifest you downloaded in step 1.
-
Select Open.
Notes:
-
Installing custom add-ins from an XML file is currently only available through the Add-Ins for Outlook dialog.
-
The Add from URL option isn’t available to install a custom Outlook add-in. As a workaround, open the URL in your preferred browser to download the add-in file and use the Add from File… option to install it.
-
For more information, see Microsoft’s guidance on using add-ins.