This technical guide explains how you can use the SCIM (System for Cross-domain Identity Management) Standard to provide a user identity management solution between Matrix Booking and your chosen employee directory. For more information, see SCIM integration overview.
Contents
-
Register your organisation for SCIM integration in Matrix Booking
-
Manage users and groups for the SCIM integration in Entra ID
Register your organisation for SCIM integration in Matrix Booking
The first step to using SCIM is to register your application for SCIM Integration. You can do this as an Organisation Admin. However, we may need to allow it for your organisation so if you can’t follow the steps below, contact your Account Manager. To register your organisation for the SCIM integration:
-
Select Admin.
-
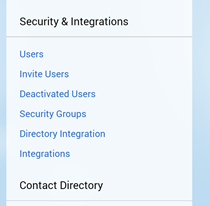
Select Integrations under the Security & Integrations section from the side menu.
-
On this page, you should see an integration banner relating to SCIM as below. Select the Add SCIM Integration button.

-
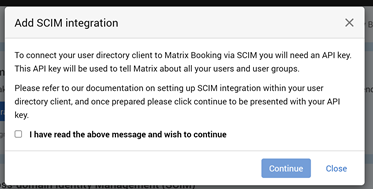
A message detailing the use of an API Key will appear. This is the key we use to allow requests to come from your SCIM Client to Matrix Booking and make requests on behalf of your organisation.
-
Read the message.
-
Select the I have read the above message and wish to continue tick box to confirm you have read the message.
-
Select Continue.
-
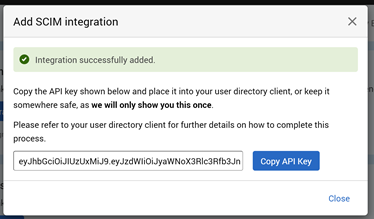
You have successfully added SCIM Integration to your organisation – you’ll be given an API Key in the text box.
Warning: you can’t get this API Key again – copy it and keep it safe.
Set up SCIM integration in Microsoft Entra ID
Create an Enterprise Application
Before you can activate SCIM provisioning you need to create a new Enterprise Application. If you already have an existing Enterprise Application set up, you can skip to this step. Currently, Matrix Booking isn’t a Gallery application, so it will need to be a custom application:
-
Log in to the Microsoft Azure Portal as an Administrator.
-
Select Enterprise Applications from the side menu.
-
Select add a new Enterprise Application.
-
Give the application a name and choose to integrate with a non-gallery application.
-
Select Create.
For more information, see Microsoft’s guidance on how to create an Enterprise Application.
Manage users and groups for the SCIM integration in Entra ID
Set up authentication for SCIM provisioning
Now that you have an Enterprise Application, you can set up SCIM Provisioning with the API Key you received earlier in Matrix Booking:
-
Go to your application.
-
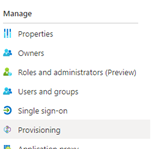
Select Provisioning from the side menu.
-
Select the Get Started button
-
Select a Provisioning Mode of Automatic (this means that we’re told about any changes to users and groups in the Enterprise Application).
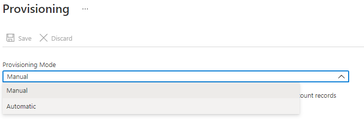
-
Expand the Admin Credentials area.
-
Enter a URL of
https://app.matrixbooking.com/api/v1/scimand the API key that you got when registered for SCIM Integration in Matrix Booking into the Secret Token box.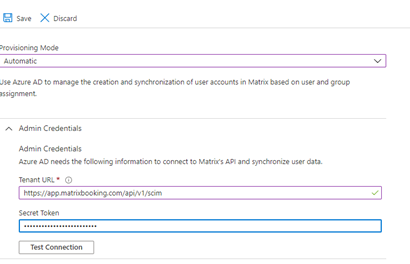
-
Select the Test Connection button to ensure that we can authenticate your request successfully (if you see an error message, check the API Key you entered or contact our Support Team).
-
Once the Test Connection comes back successful, select the Save button to save this provisioning setup.
For more information, see Microsoft’s guidance on setting up SCIM provisioning.
Provision users in Entra ID
Once you have successfully set up provisioning in Entra ID and have an authorised connection to Matrix Booking you can begin to add users into your Microsoft Azure Enterprise Application, there are some steps to carry out to ensure you send us the correct information so read and follow the sections below.
User field mappings
For a user to be added to Matrix, there are certain fields from the SCIM Specification that we require, and there are others that we’ll accept and map into your Matrix users. Entra ID offers you the flexibility to map values from your Entra ID into these fields from the SCIM Specification and also to add custom fields which we support too. find below instructions on how to customise mappings from Microsoft Azure into SCIM fields:
-
Go to the Provisioning section of your Enterprise Application.
-
Select to Edit attribute mappings under the Manage Provisioning menu.
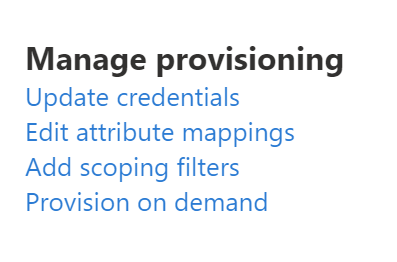
-
This will bring you to a provisioning settings page where below the Mappings header, you’ll see the Groups and Users Mappings links.
-
Select Provision Azure Active Directory Users.

-
You’ll see a list of mappings, similar to the image above, from your Entra ID Attributes to the customappsso Attribute.
-
On this page, you can delete mappings that you don’t want to send us via SCIM, add new mappings, update existing mappings, and add new custom mappings.

-
See the table showing the fields that Matrix Booking supports. Ensure that only these attributes are present.
-
If you need to add a new Mapping, select Add New Mapping at the bottom of the map.
-
This will bring up the edit Attribute pane where you can choose the Entra ID Source Attribute, any default values you’d like to use, and the target attribute you want to populate.
-
If you need to edit a mapping, simply select the attribute you’d like to update.
-
This will bring up the same page described in the previous point for you to update.
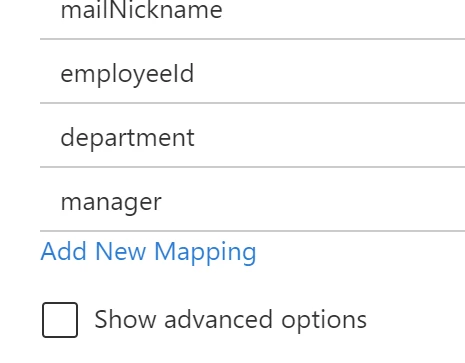

-
If you need to add a custom mapping to support Contact Number, Access Card Numbers, and Cost Code provisioning, you’ll need to:
-
Select the check box to Show advanced options.
-
Select Edit attribute list for customappsso.
-
Add new mappings at the bottom of the page.


-
-
We have added support for the key-value none that can be sent via SCIM to allow a custom attribute to be removed.
-
Currently, Entra ID doesn’t support the sending of null values so we’re using this keyword to suffice as a removal of a value.
-
The way to ensure we send this is to use the Microsoft Azure switch statement to ensure you send the none value – Switch(IsPresent([field]), "none", "True", [field]).
-
Add users to be provisioned
Once the mappings are correct as above, you can add users to your application by following these steps:
-
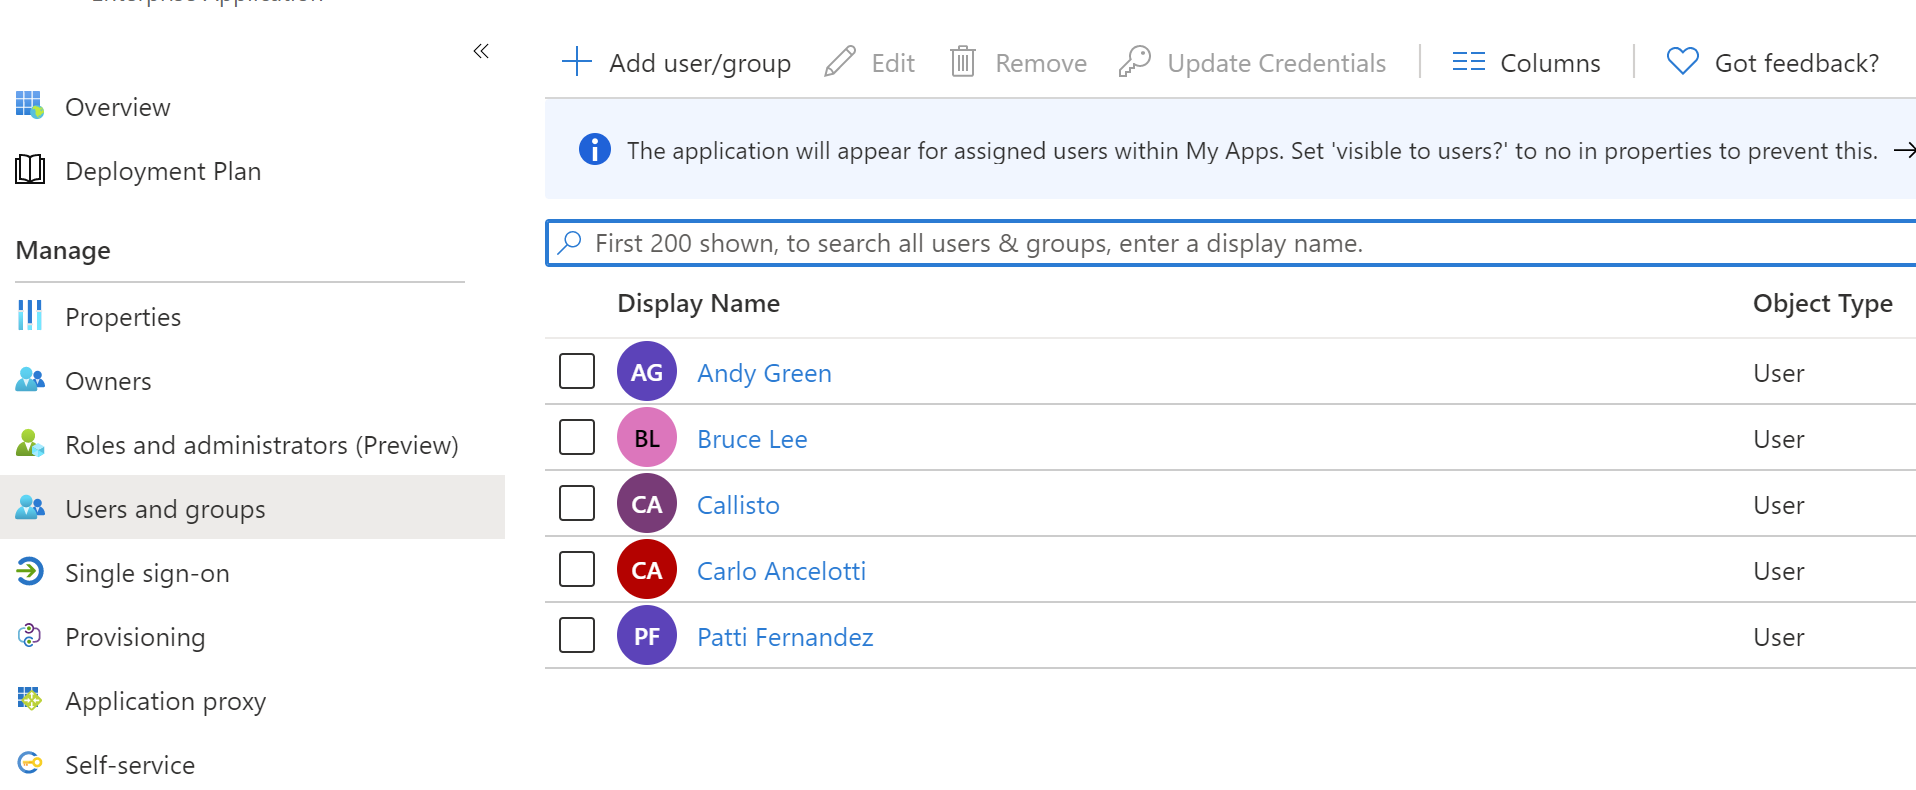
Go to the Users and Groups section of the Enterprise Application.
-
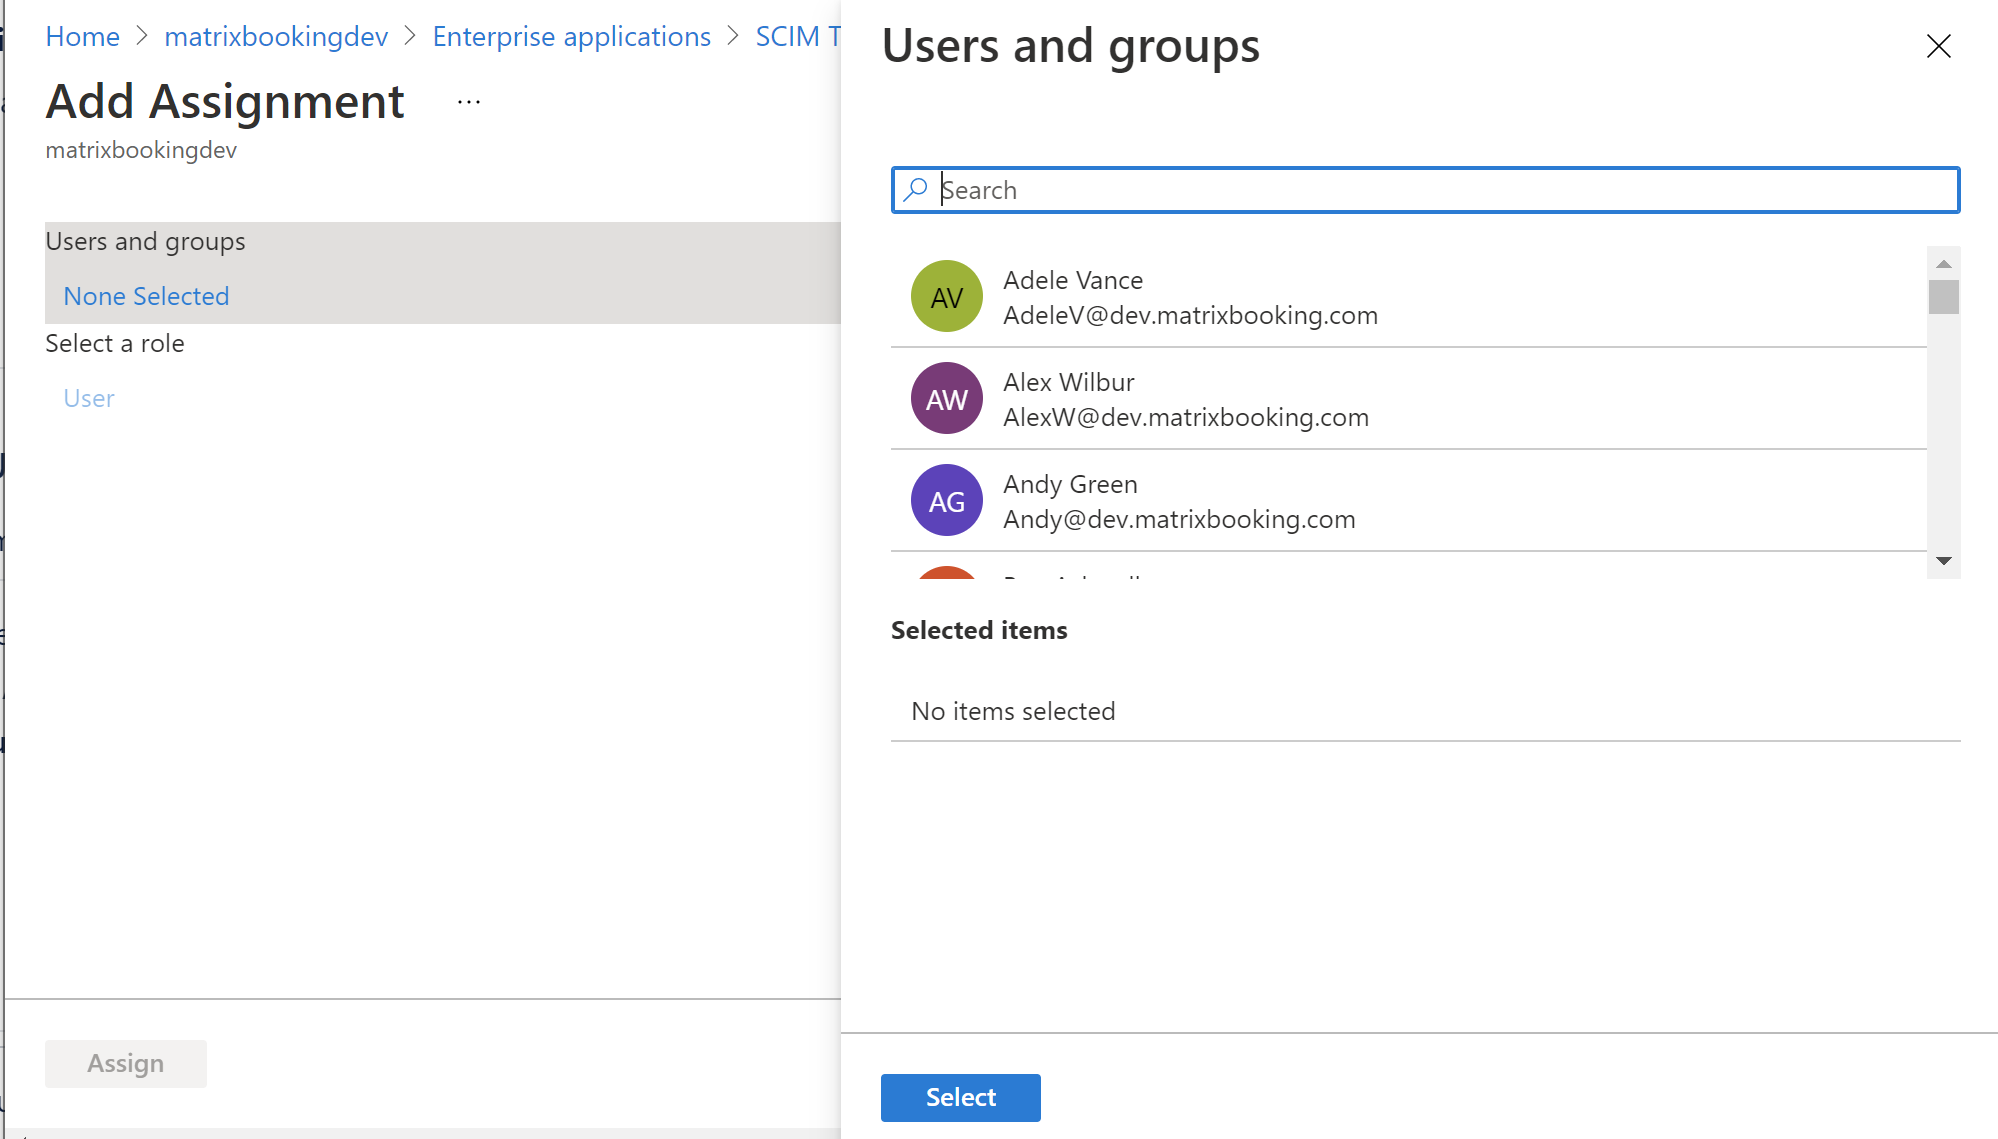
Select Add User/Group.
-
Select the user you wish to add and assign them to the application.
-
Once assigned, they will be provisioned the next time that your Entra ID cycles through its provisioning.
Notes:
-
Theses are the fields that are supported by Matrix Booking.
-
For more information, see Microsoft’s guidance on how to manage user for the SCIM integration.
Remove users that have been provisioned
To remove a user, you need to go to the user list in the Enterprise Application (shown below) or from your main Entra ID Screen:
-
Go to the Users and Groups section of the Enterprise Application.

-
Select a user and choose remove from the top screen.
Provision user groups in Entra ID
You most likely won’t want to be adding users individually. You’ll likely want to add users from groups, which Entra ID supports static and dynamic groups. However, it doesn’t support nested user group provisioning. For a group to be added to Matrix, there are certain fields from the SCIM Specification that we require to map to a Matrix Group. We have made this to be the default settings so you won’t need to make any changes here to the mappings for Active Directory Groups.
Add user groups to your Enterprise Application
Groups are added to your application by following these steps:
-
Go to the Users and Groups section of the Enterprise Application.
-
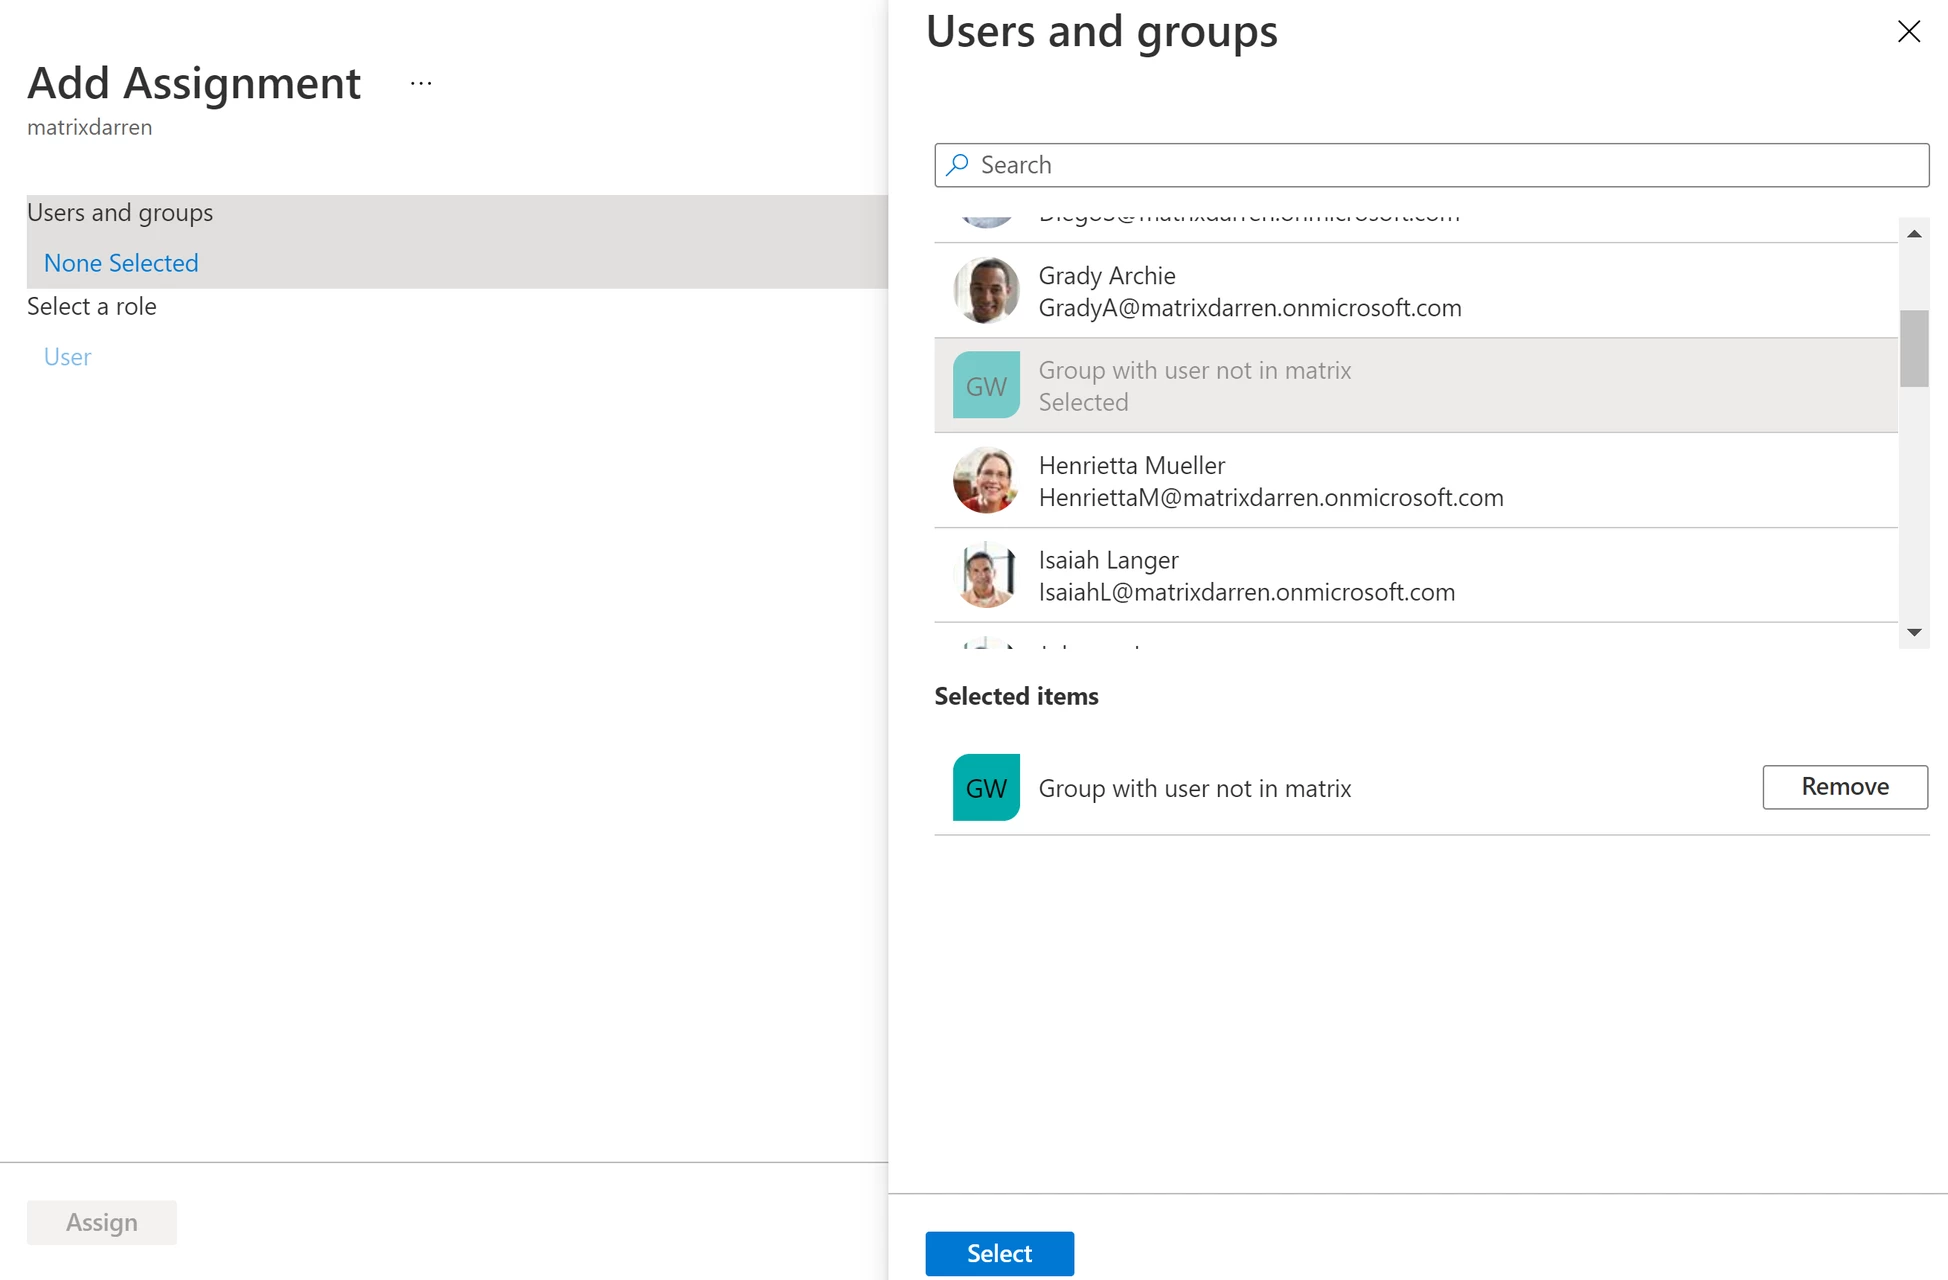
Select to Add User/Group.

-
Select the group you wish to add and assign to the application.
-
Once assigned, the group and any members of the group will be provisioned the next time that your Entra ID cycles through its provisioning.
Note: for more information about the fields that Matrix Booking supports, see SCIM integration overview.