This page describes how you can turn cost codes on or off, display cost code information you want, have a dropdown of all your organisation’s cost codes, and validate cost codes against an approved list of them:
Booking category selector
-
Underneath the Time zone section, your booking categories can be selected. For example, Meeting Rooms.

-
As the Time zone section is above the booking category selector, it’s not affected by the booking category selector.
-
All settings below the booking category selector are specific to the booking category that you select (for example, Meeting Rooms).
-
Make sure that you’ve selected the right booking category before making any changes to your settings.
Cost codes
We have 2 pieces of information relating to cost codes:
-
Cost codes – the code itself.
-
Cost code description – a description of the cost code so that you select the right one.
There are 3 ways in which cost codes can be entered when making a booking:
-
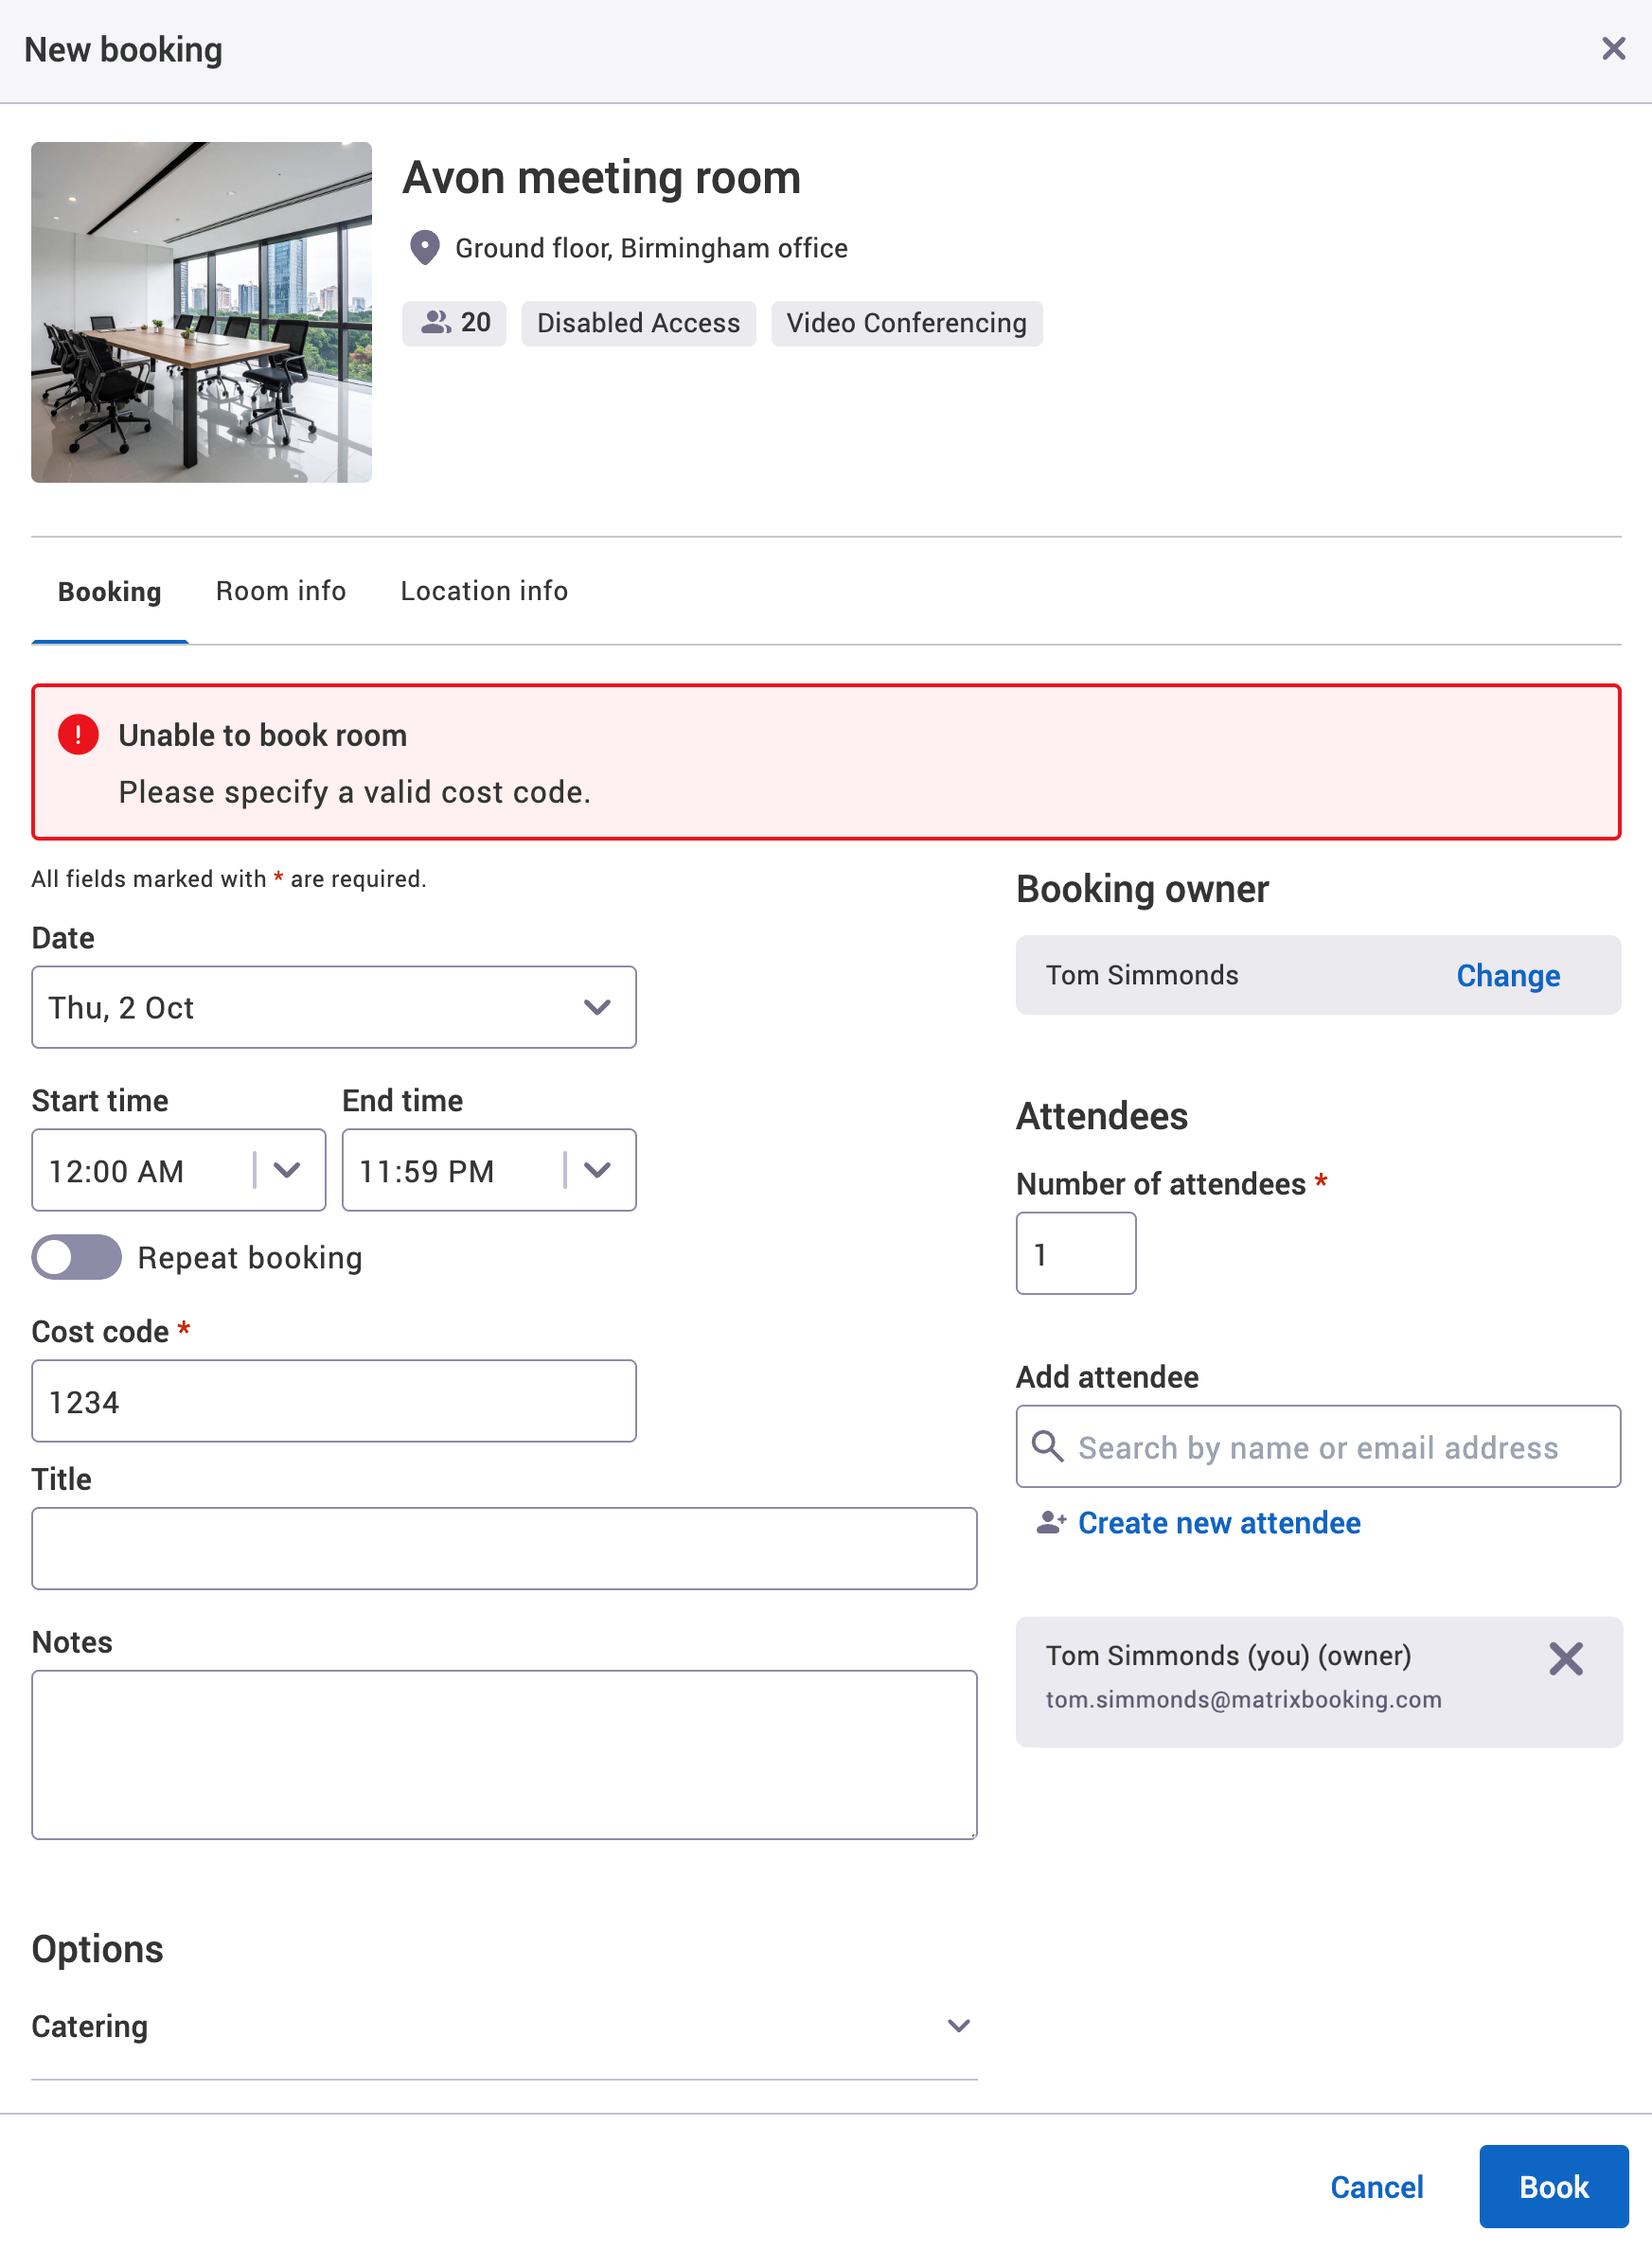
Manually enter a cost code without validation (free text).
-
Manually enter a cost code with validation and it will be checked against your list of cost codes.
-
Select a cost code from a dropdown (with or without validation).
For more information on the second and third options, see Set up cost codes.
Notes:
-
You can set up cost codes without having either the list or validate features switched on. However, it’s recommended that they are switched on to allow your users to select the correct cost codes that your organisation may have in place. Without the features switched on, manually entry of the cost code will be the only option available to your users.
-
Cost codes for bookings and booking options (for example, catering) aren’t dependent on one another and you can choose to have 1 on and the other off. As such, they must be set up separately.
-
Cost codes set up at a particular level in the hierarchy are inherited by the levels below it (for example, cost codes set up for a floor will also be set up for all the floor’s zones and resources).
-
If cost codes are made to be mandatory after setting up our Microsoft 365 integration, but the user’s default cost code hasn’t been set and they make or edit a booking via Microsoft 365, this will be rejected by Matrix Booking as Matrix Booking needs the cost code to book the resource successfully.
Switch on cost codes
You can set up cost codes without having either the list or validate features switched on. Manually entering a cost code can be done after completing the Set up cost codes for bookings steps.
To set up a list of cost codes either for the dropdown or validation methods:
-
Raise a change setup support ticket and state whether you want either:
-
“The cost code list feature.”
-
“The cost code validate feature.”
-
-
You can also ask for your administrator’s to add your cost codes.
Our Support Team will contact you once cost codes have been turned on for your organisation. Once you have confirmation that the feature you selected has been switched on, there are further setup steps so that standard users can use cost codes with the features turned on.
Cost code list
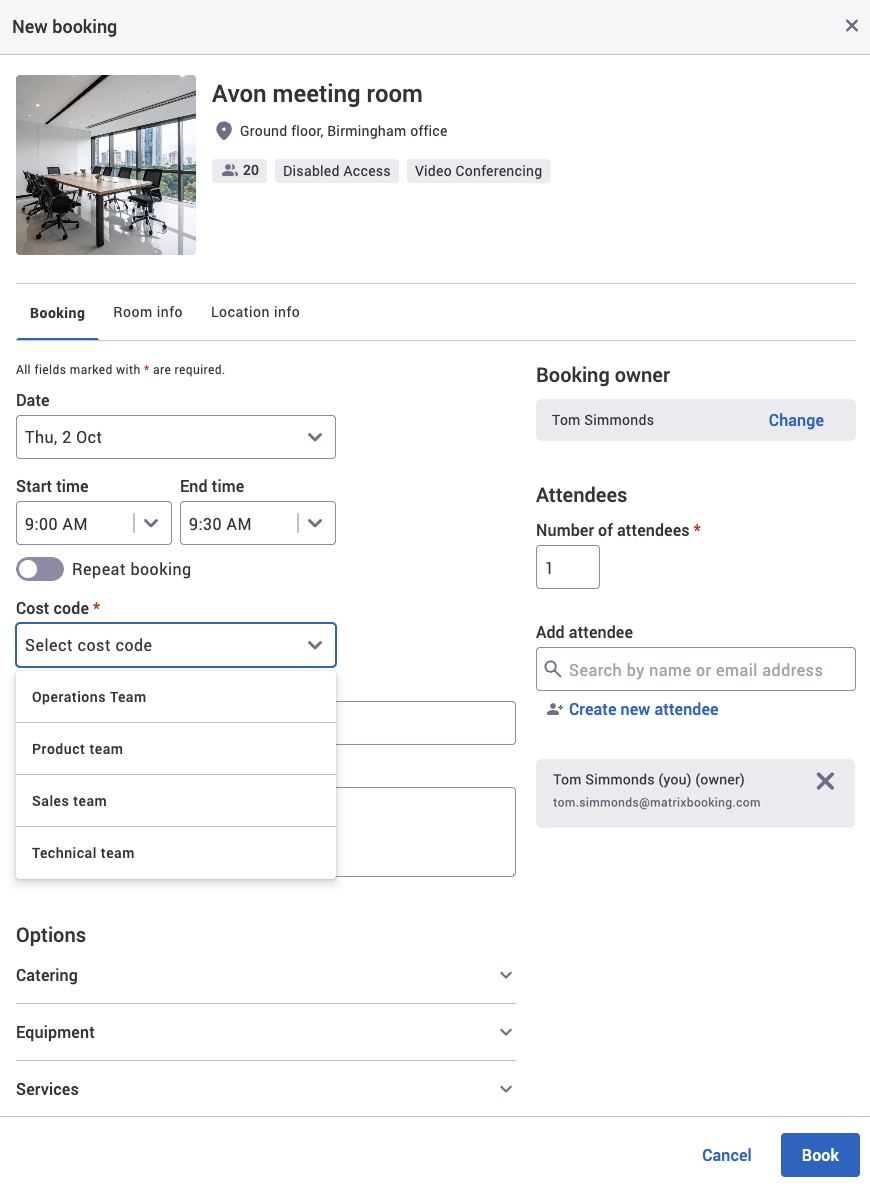
The cost code list feature allows you to have a dropdown that lists all of your cost codes when you’re making a booking.
You could tell us your cost codes are mandatory and that you have 2 cost codes “internal” and “external”. That way, you have a way to classify meetings should you need to.
This can be switched on without having to switch on the cost code validate feature. To get the cost code list feature switched on for your organisation, follow the Switch on cost codes steps.
Notes:
-
Cost code dropdowns don’t appear in Outlook or on mobile devices currently.
-
dropdowns can be made available when making a basket booking or when a user sets their default cost code in their profile – when making a booking on behalf of another user, the cost code of the booking organiser is assigned to the booking by default, including basket bookings.
Cost code validate
The cost code validate feature ensures that if a cost code is entered in manually and is incorrect, it won’t be accepted because it doesn’t match (can’t be validated against) your organisation’s list of cost codes.
This can be switched on without having to switch on the cost code list feature. To get the cost code validate feature switched on for your organisation, follow the Switch on cost codes steps.
Set up cost codes for bookings
To set up cost codes for bookings:
-
Select Admin in the navigation bar.
-
Select Locations and resources under the Location Settings section in the side menu.
-
Select Edit hierarchy. The Locations and resources hierarchy will appear.
-
Select Edit next to the location or resource you want to change. The Edit [Location or Resource] dialog will appear with the General tab selected by default.
-
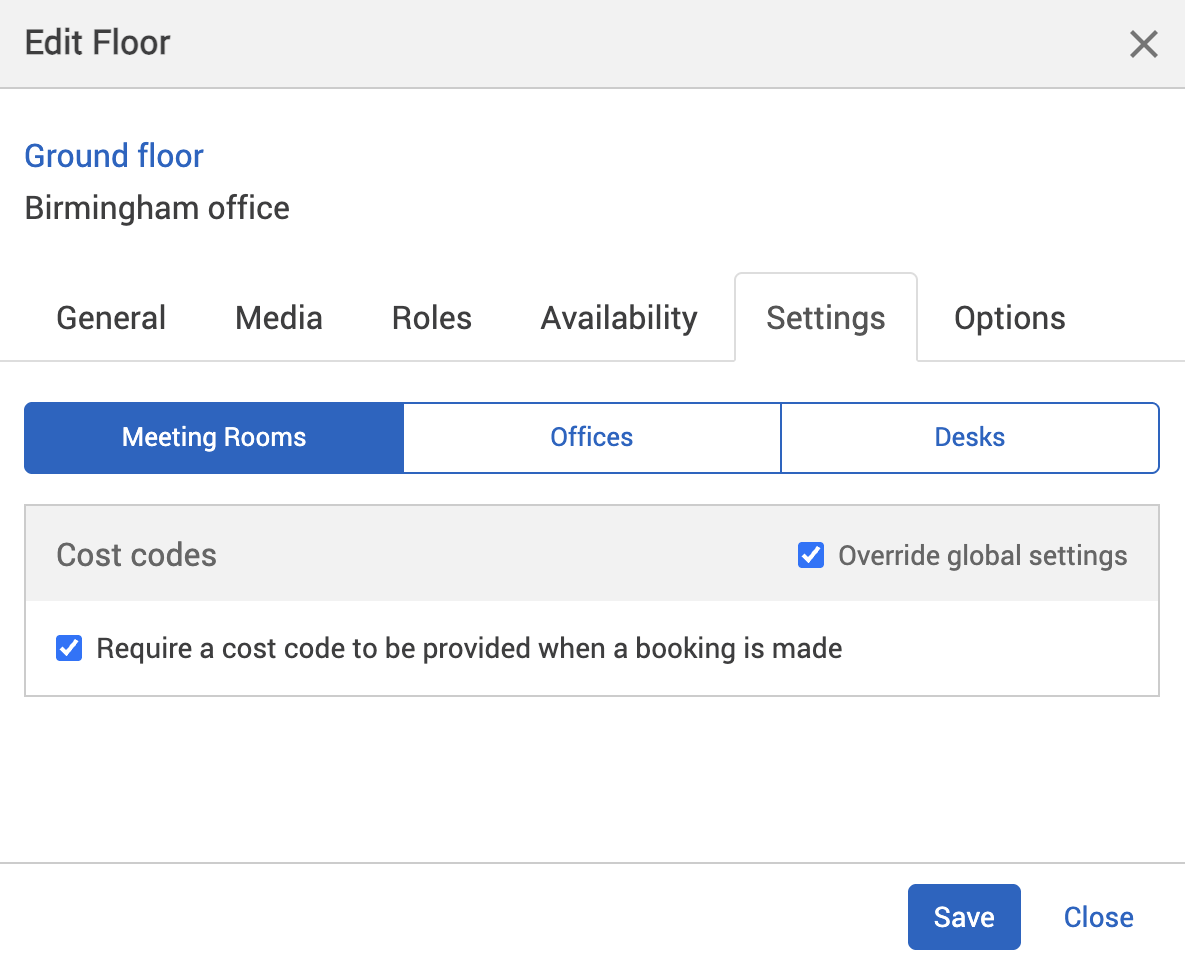
Select the Settings tab.
-
Select the correct resource using the booking category selector.
-
Select the Override global settings or Override [location or resource] checkbox under the Cost codes section.
-
Check if the Require a cost to be provided when a booking is made checkbox is greyed out. If it is, this means that this setting is inherited from a higher level in your resource hierarchy. You may have it switched on at that level for a reason.
-
The Require a cost to be provided when a booking is made checkbox will be automatically selected for you.
-
Select either of the following and the dialog will close to return you to the Locations and resources hierarchy:
-
Save to keep you changes.
-
Close to discard your changes.
-
-
Select Save changes.
Add cost codes
Once you’ve been told by our Support Team that cost codes can be added by your administrators, you can add your cost codes. You can do this by 1 of 2 ways:
-
Manually add each cost code – recommended for a small number of cost codes.
-
Import your cost codes from a spreadsheet – recommended for a large number of cost codes.
Manually add cost codes
To manually add cost codes:
-
Select Admin in the navigation bar.
-
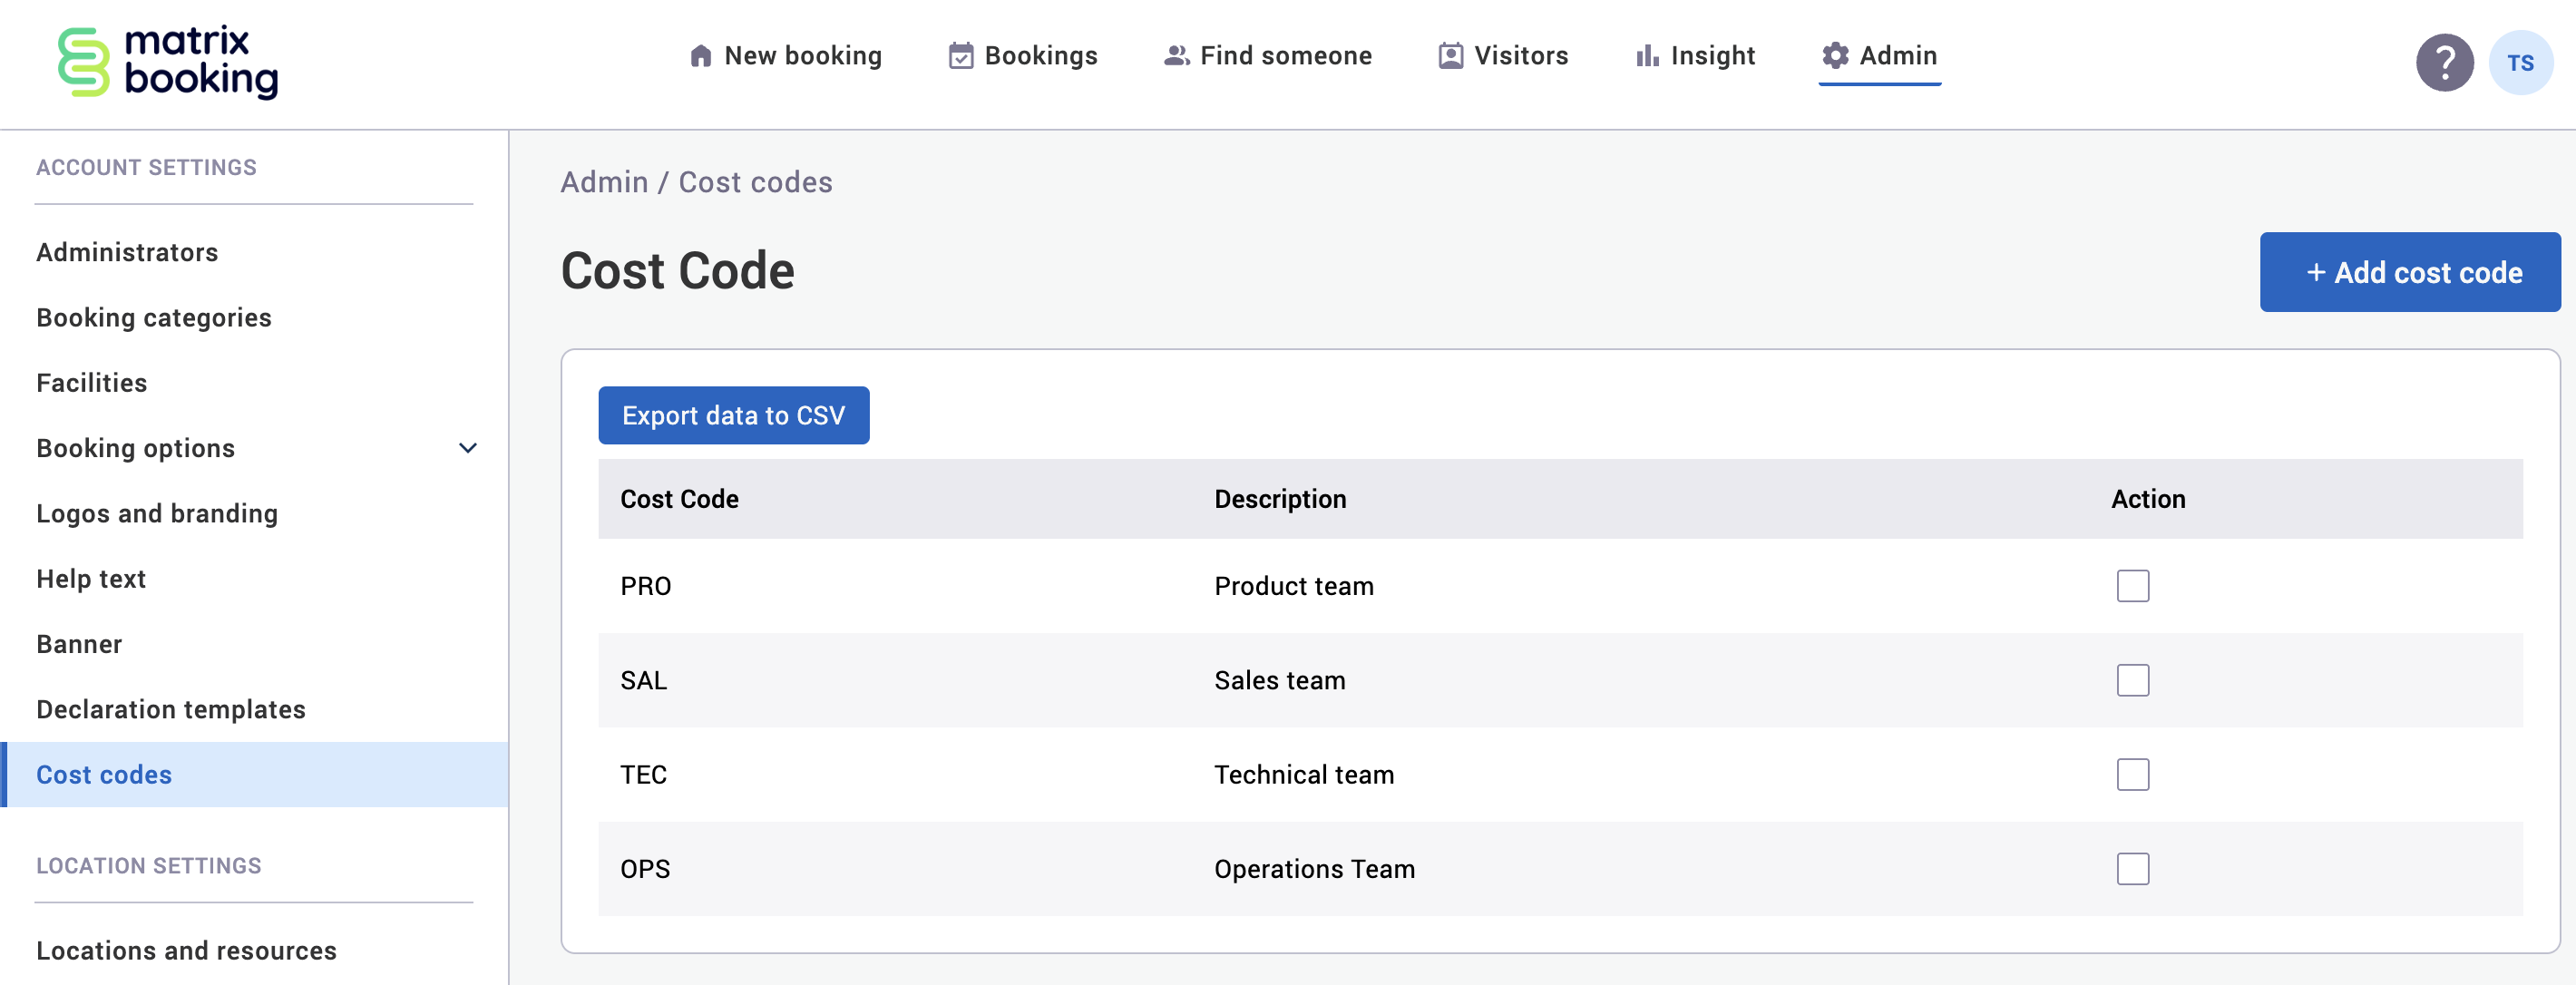
Select Cost Codes under the Account Settings section in the side menu.
-
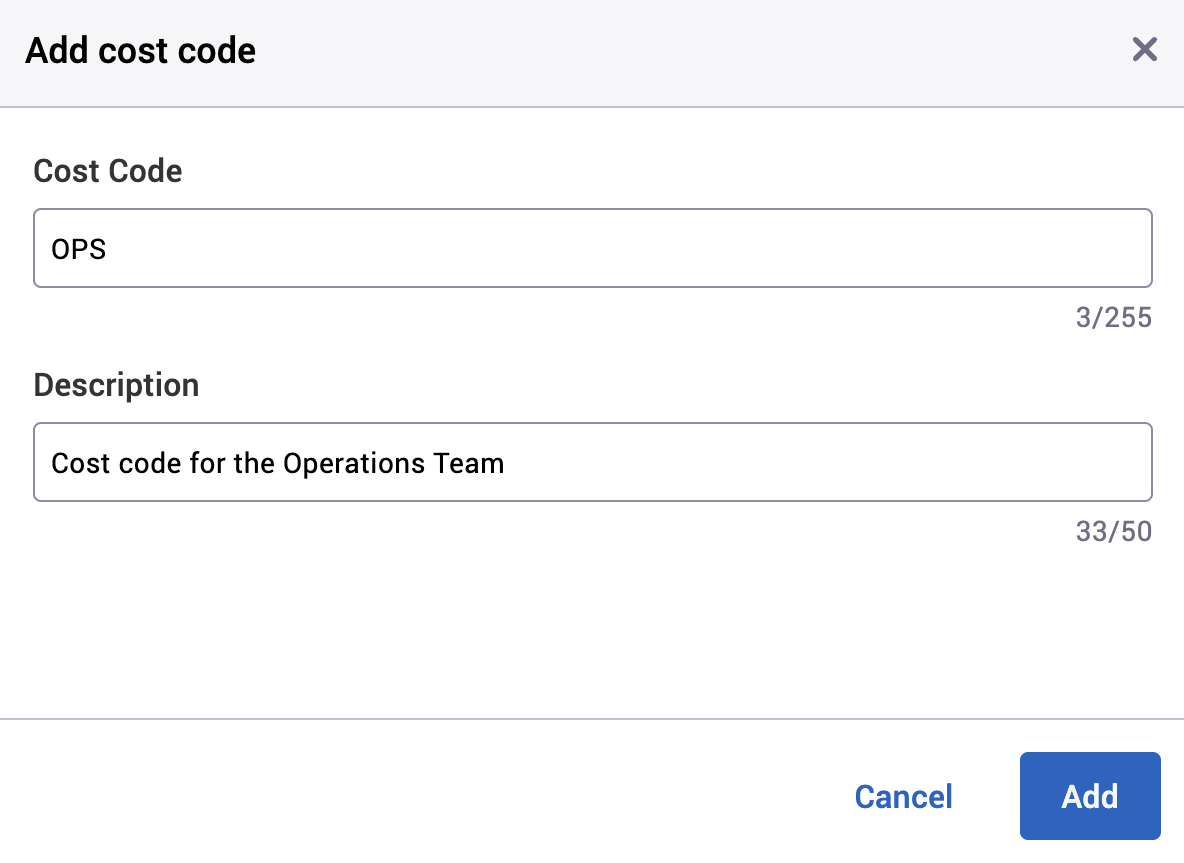
Select + Add cost code. The Add cost code dialog will appear.
-
Enter your cost code in the Cost code text box.
-
Enter the description of your cost code in the Cost code description text box.
-
Select Add. The dialog will close.
-
To add more cost codes, repeat steps 3 to 6.
-
To export your list of cost codes as a spreadsheet, select Export data to CSV.
Import cost codes
To import your cost codes
-
Create a simple spreadsheet with 2 columns:
-
Cost code.
-
Cost code description (columns label in spreadsheet but not required for importing cost codes).

-
-
In Matrix Booking, select Admin in the navigation bar.
-
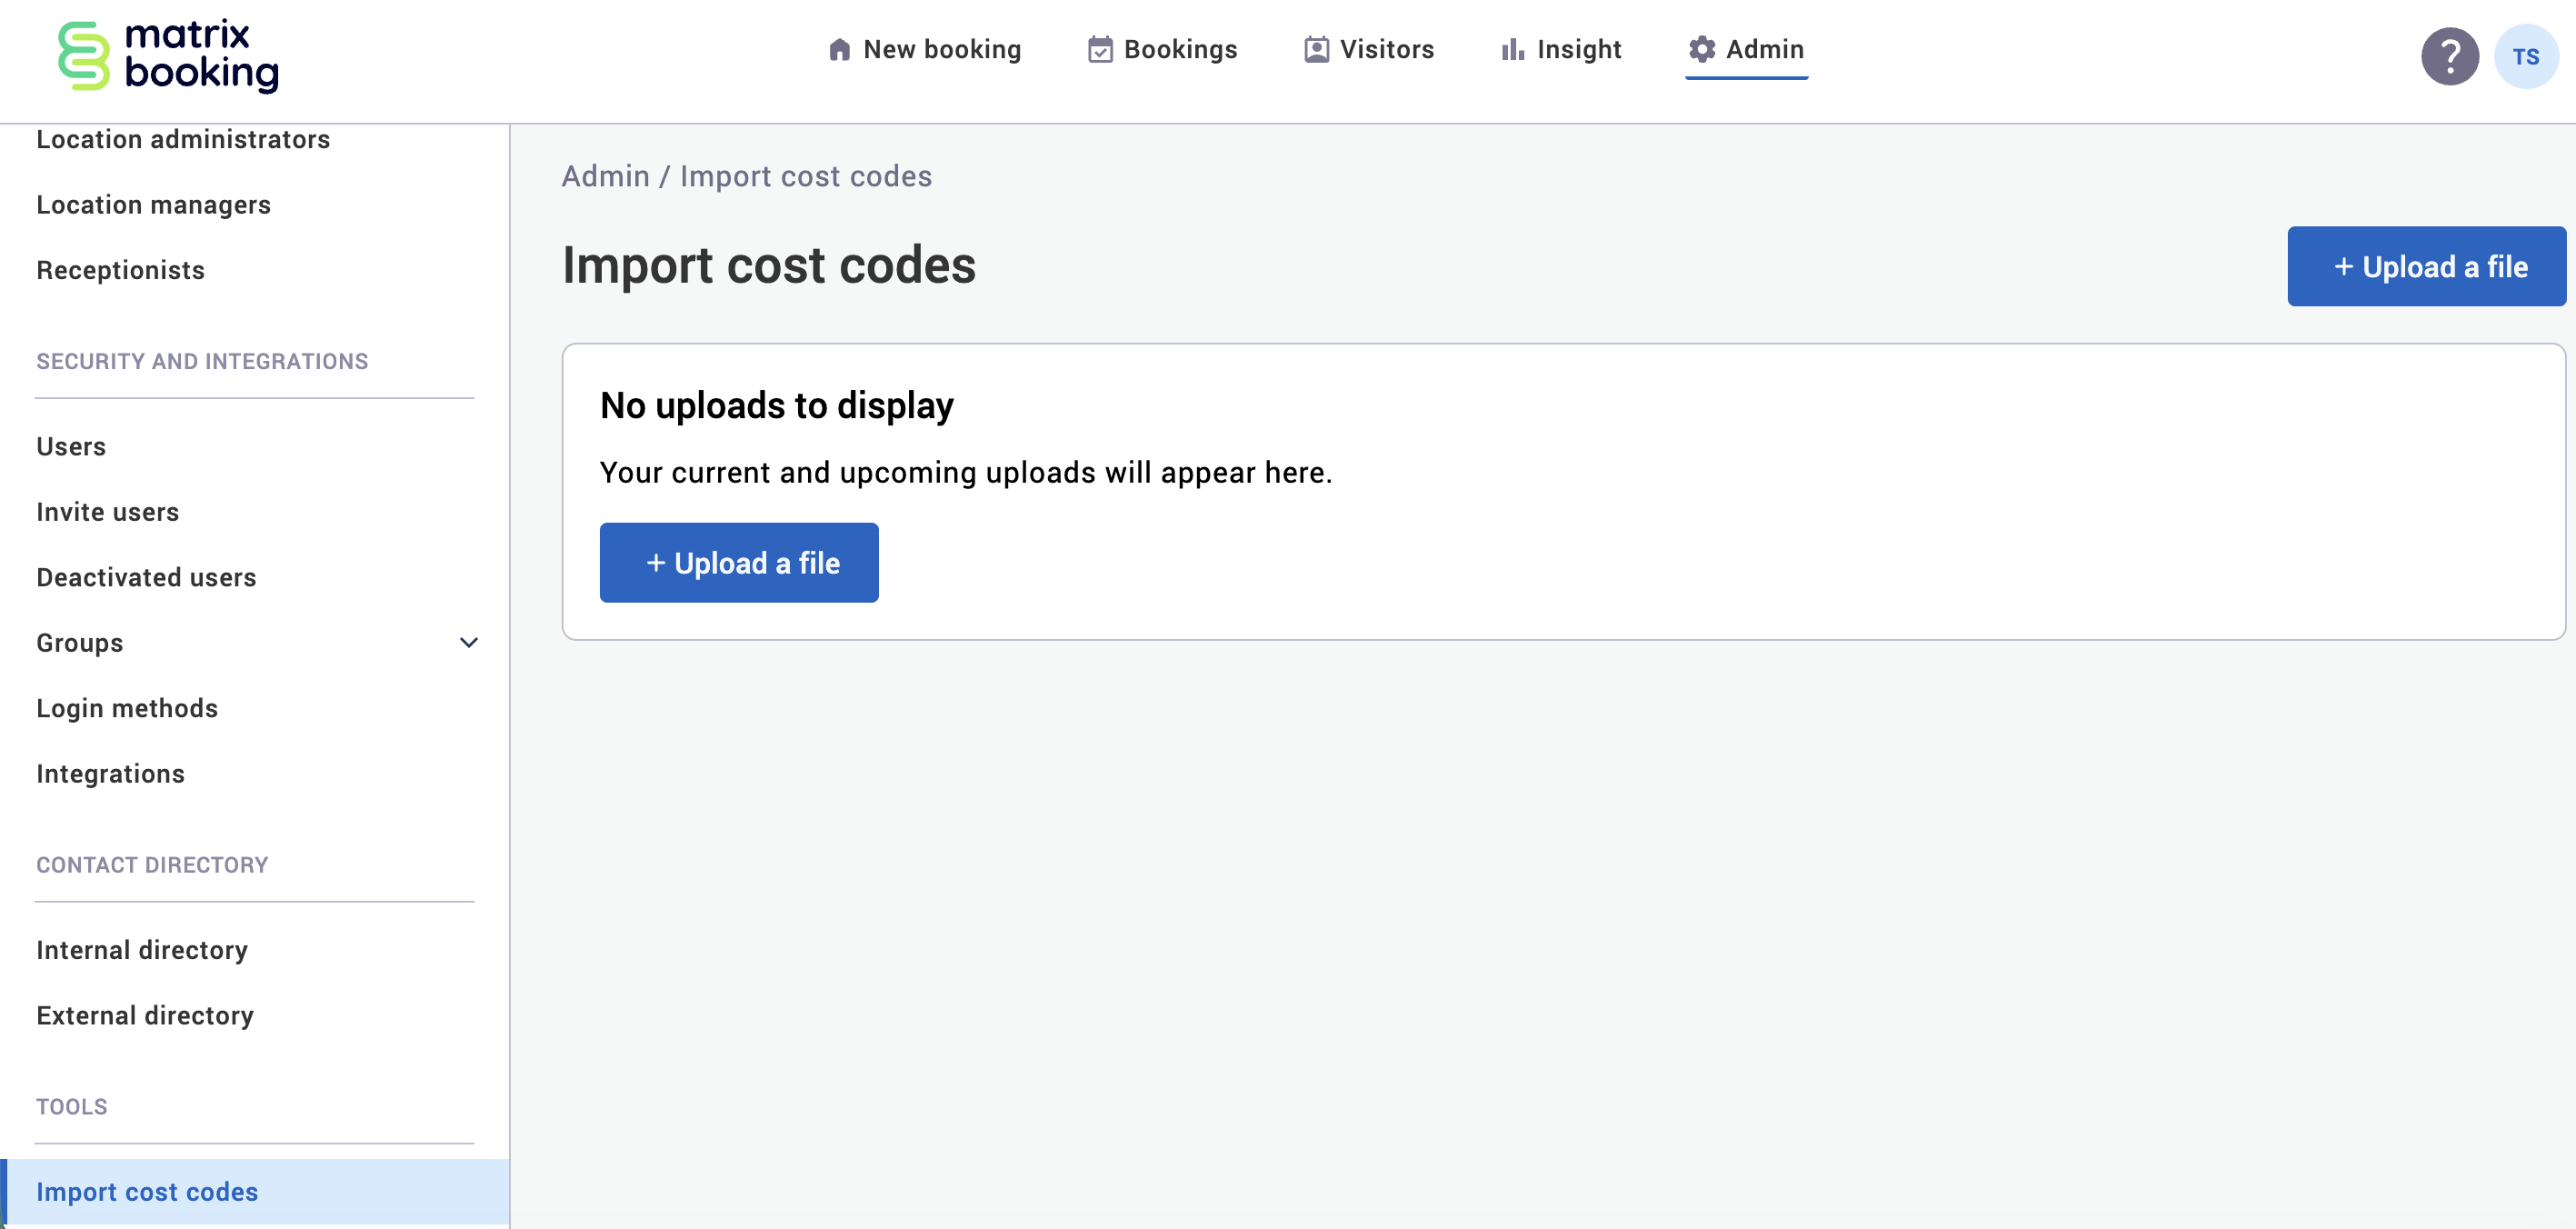
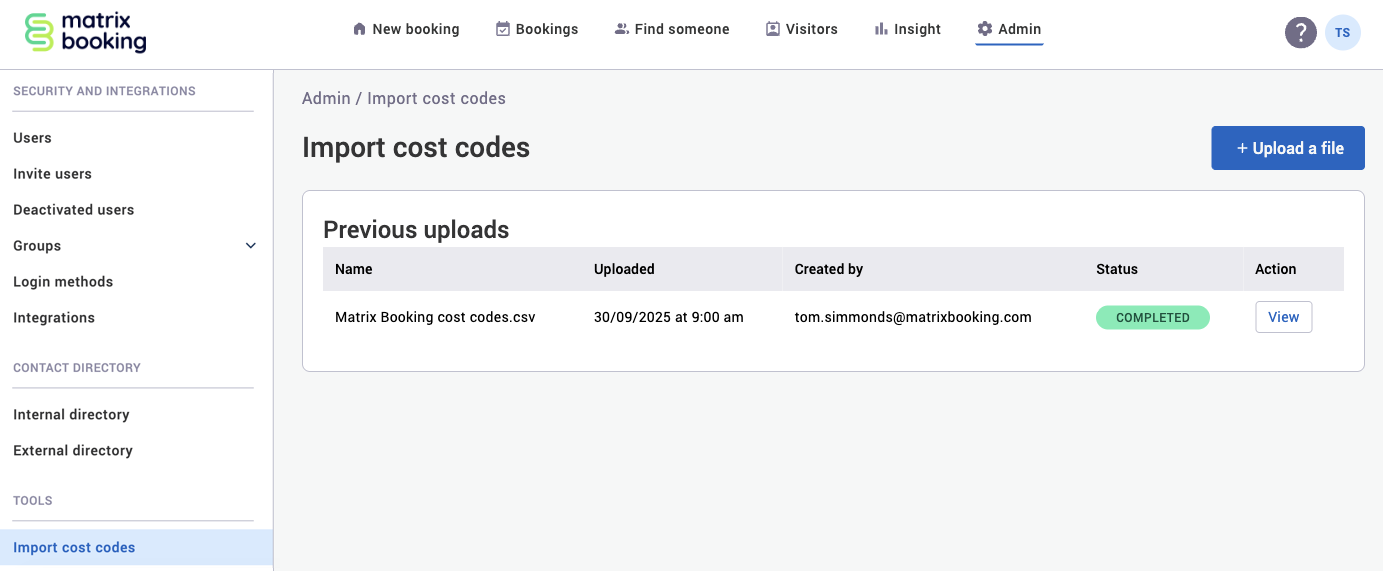
Select Import cost codes under the Tools section in the side menu.
-
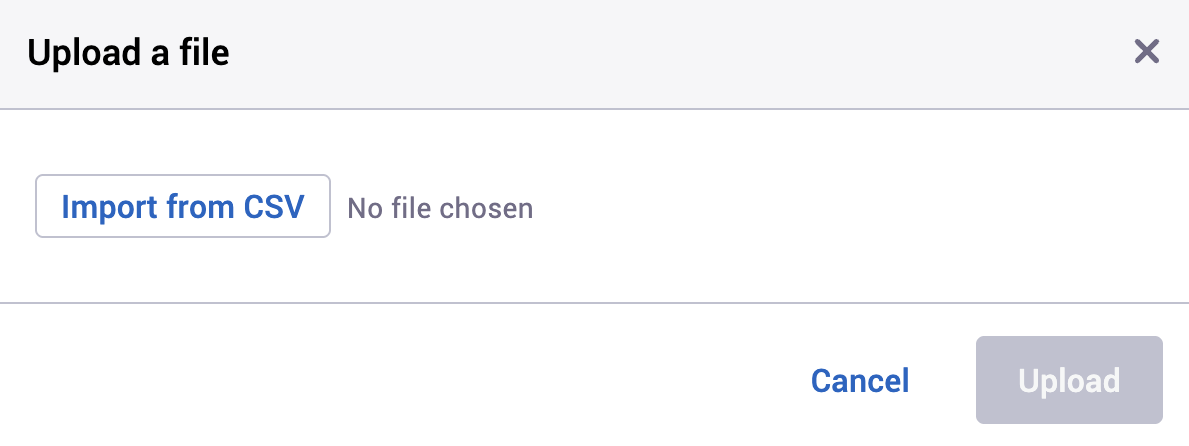
Select + Upload a file. The Upload a file dialog will appear.
-
Select Import from CSV… Your file explorer or equivalent will appear.
-
Find your spreadsheet and select it.
-
Select Open. This may be different for different file explorers. The file explorer will close.
-
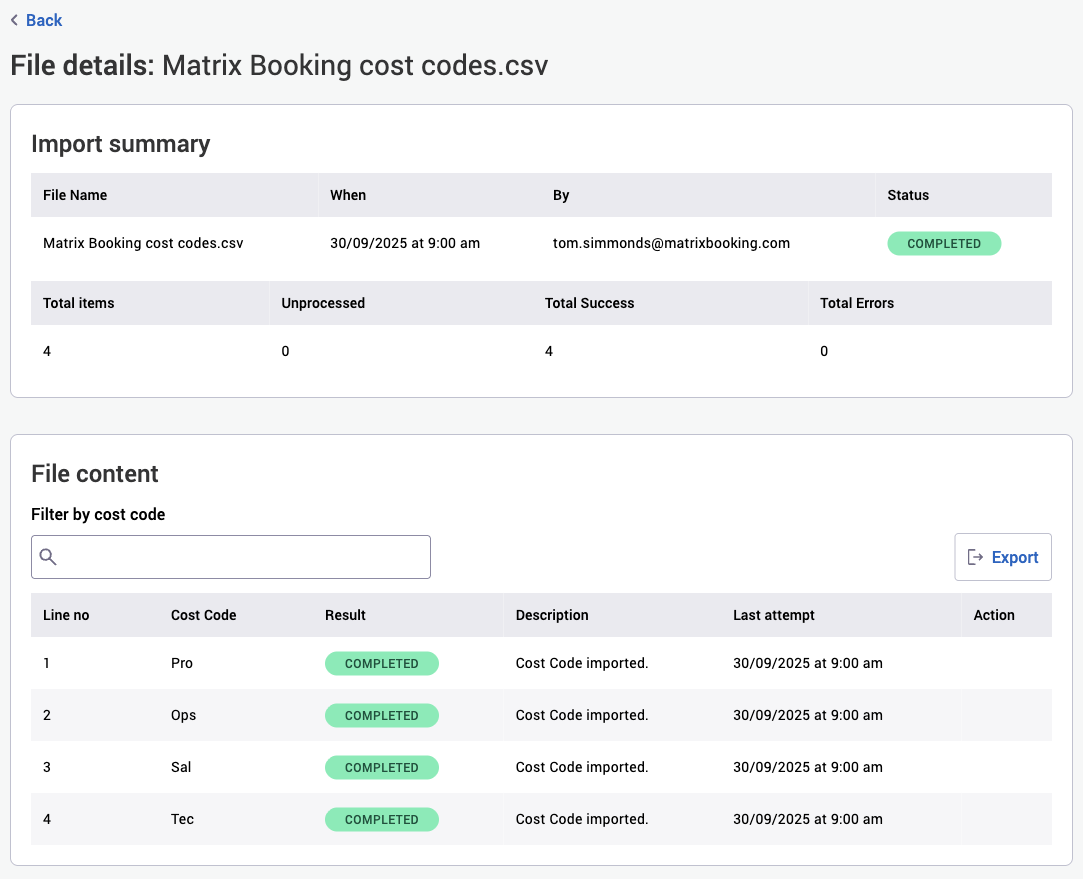
Select Upload file. The dialog will close and the File details screen will appear.
-
The Import summary and File content will appear to give you key information about the imported cost codes (for example, who imported the cost codes and the number of errors as a result of importing the spreadsheet).
-
To export these results, select Export.
-
To return to the Import Cost Codes screen, select Back.
-
On the Import Cost Codes screen, the Previous uploads section will appear with a history of any previously imported lists of cost codes.
-
To see the Import summary and File contents of an import, select View next to the import.
Note:
-
Make sure that your spreadsheet is saved as a
.csvfile. Other files will be greyed out and can’t be selected. -
The summary will be exported as a
.csvfile. -
Your list of cost codes will be imported and can viewed on the Cost codes screen.
-
If you delete or replacing any cost codes, this won’t affect any historic bookings. The cost code used for a past booking will appear as the same cost code.
-
If any error messages occur, look at the Import summary to identify what the errors are and amend your spreadsheet. If the error continues, raise an administrator issue support ticket.
Set up cost codes for booking options
Depending on the type of booking option, you may need to set up a provider first.
Before adding a provider to your organisation in Matrix Booking, speak with them to about their notification period. To add a new provider:
-
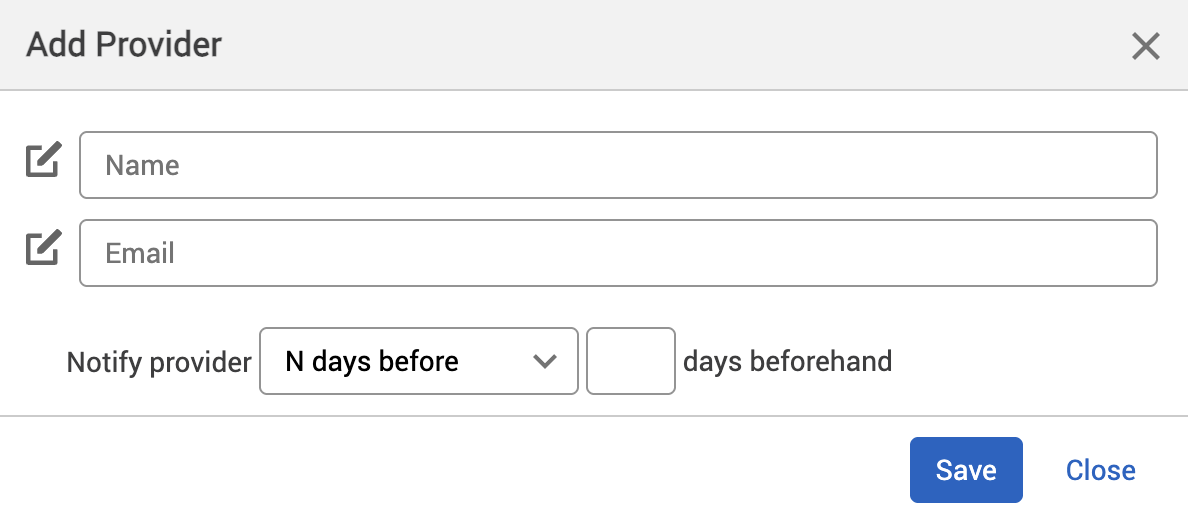
Select New Provider and the Add Provider dialog box will appear.
-
Enter the details of the provider.
-
Select the Notify provider dropdown to let your provider know either:
-
on booking changes.
-
on day of booking.
-
N days before (where N is a number).
-
-
Select the number of days use the up and down buttons or enter the number in the days beforehand text box
-
Select either of the following and the dialog will close:
-
Save to keep your changes.
-
Close to discard your changes.
-
Notes:
-
Only 1 email address per provider can be entered. If more than one is added, none of the email addresses will receive any notifications. However, there is a workaround to get over this if the provider needs more than one email address for requests.
-
The provider’s email address is optional.
-
You and your provider need to agree on the time they need to be notified by. The provider will be emailed with the request at the time you set.
-
If you select:
-
on day of booking, they will receive an email for the day of the booking only (not the day the booking was made).
-
on booking changes, they will receive an email each time a change is made to the booking.
-
N days before, they will receive an email N days before only and not another on the day of the booking.
-
To set up a cost code for a new booking option:
-
Select either the:
-
New Catering Option button.
-
New Equipment Option button.
-
New Services Option button.
-
-
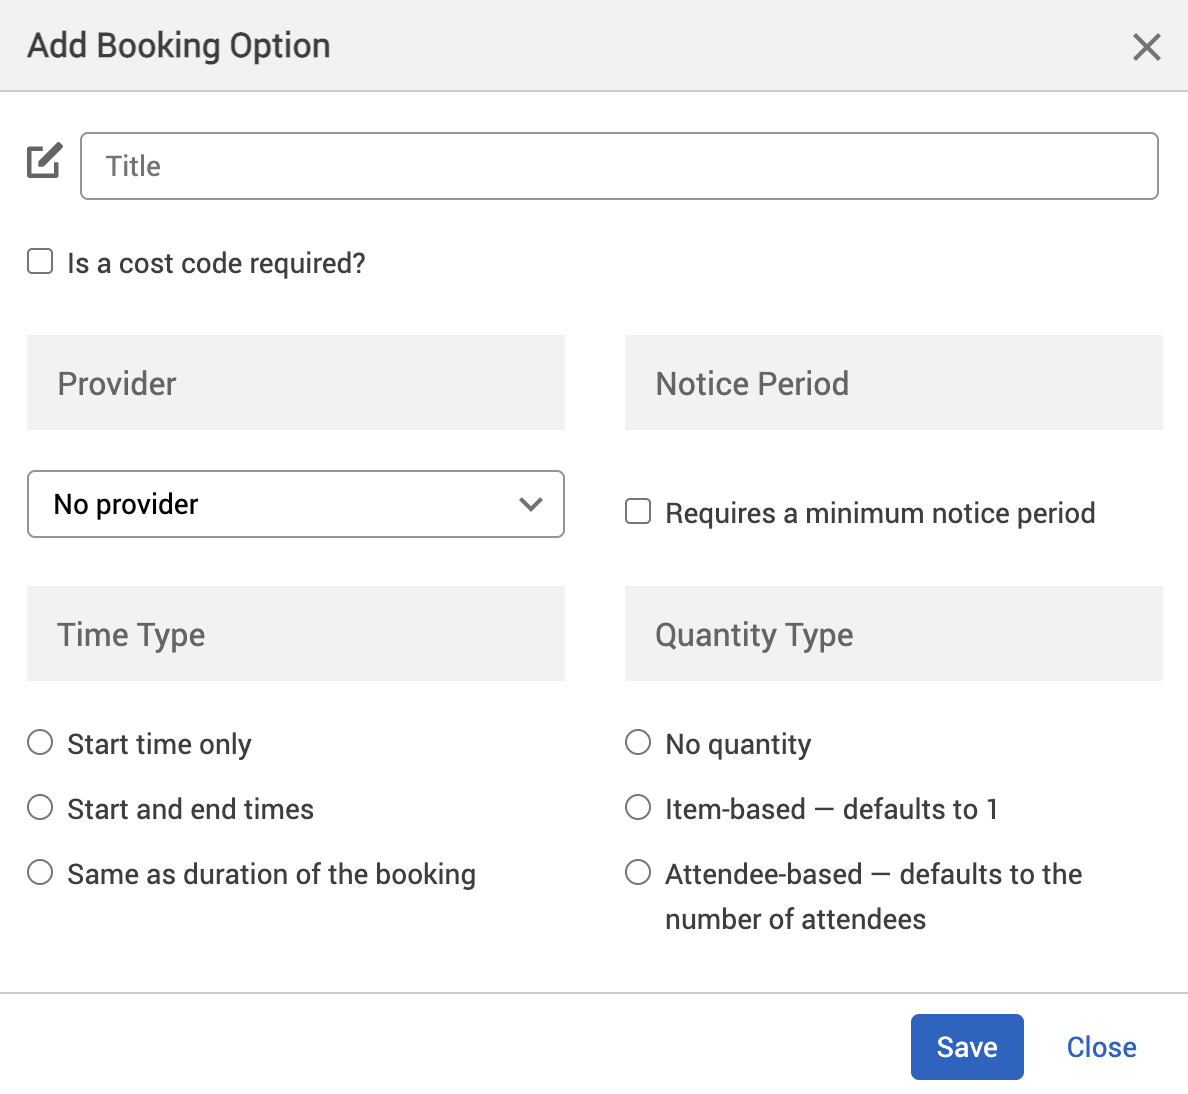
The Add Booking Option dialog box will appear.
-
Enter the title of the option in the Title text box. For example, “Fish and chips.”
-
Select the checkbox if a cost code is required.
-
Select the Provider of your option from the Provider dropdown under the Provider section.
-
Select the checkbox under the Notice Period section if a minimum notice period is required by your option provider.
-
If selected, a text box and dropdown will appear.
-
Enter the number of minutes, hours, or days are needed for your provider to prepare the option for you.
-
Under the Time Type section, select when you want your option available by either selecting:
-
Start time only.
-
Start and end times.
-
Same as duration of the booking.
-
-
Under the Quantity Type section, select the amount of your option you want available by either selecting:
-
No quantity (for example, audio/visual (A/V) assistance).
-
Item-based – defaults to 1 (for example, 1 flip chart).
-
Attendee-based – defaults to the number of attendees (for example, 20 attendees means 20 hot meals).
-
-
Select either of the following and the dialog will close:
-
Save to keep your changes.
-
Close to discard your changes.
-
These choices for the Time Type and Quantity Type depend on the type of option that is being defined. Any bookings made in less than the specified time period will not be able to add that option (for example, catering requires 24 hours notice and the booking was made 12 hours before the meeting, that booking couldn’t add the catering option).
Notes:
-
Settings from a location or resource that’s higher in your hierarchy will be inherited by locations and resources below it. These settings will appear greyed out in the locations or resources lower in the hierarchy. If they are, this means that these settings are inherited from a higher level in your resource hierarchy. You may have them switched on at that level for a reason.
-
Changing the settings described above may affect other features you have for your organisation.
Where cost codes are used
Cost codes are used in 4 places:
-
When making a booking.
-
When selecting a booking option for your booking.
-
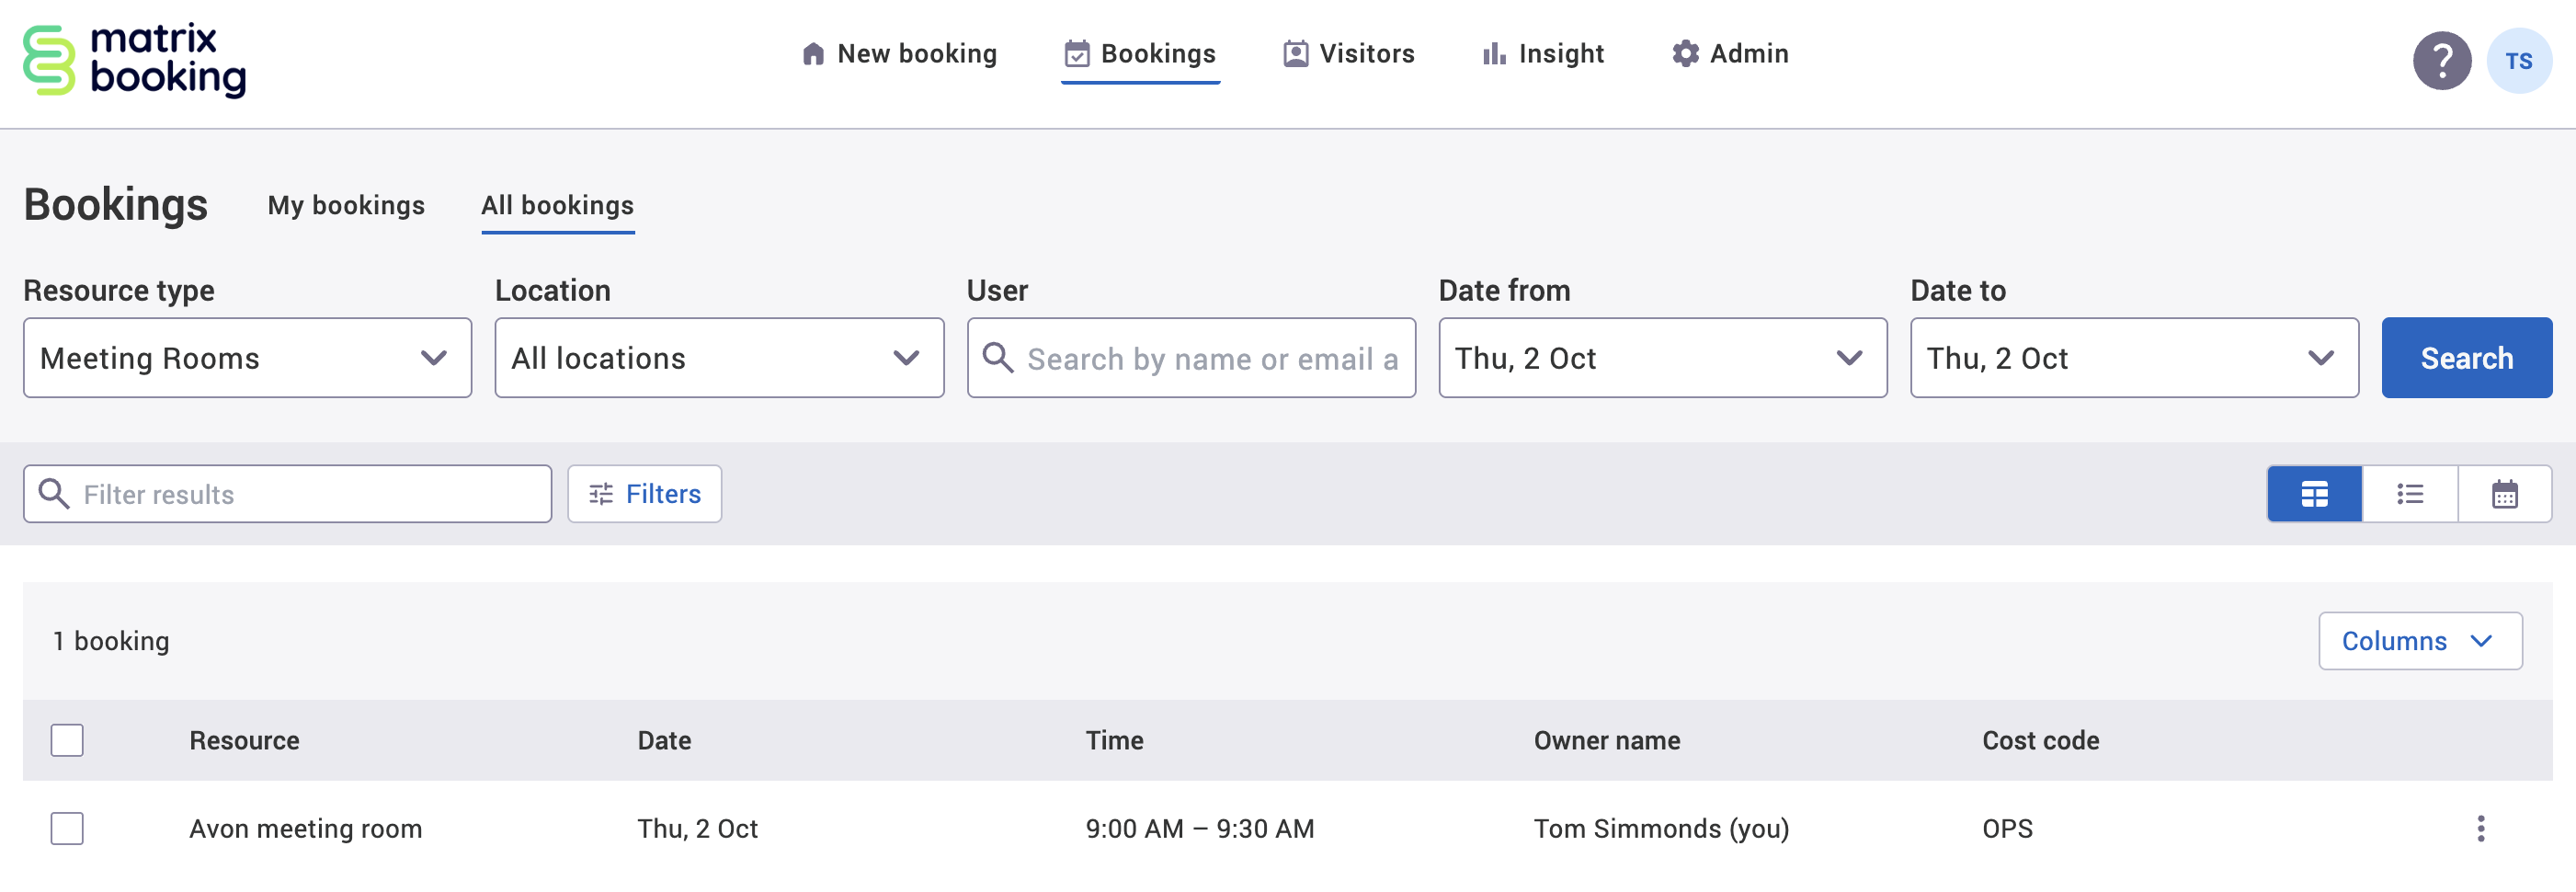
In the Bookings screen.
To see the data and statistics on the cost codes being used in your organisation:
-
Select Bookings in the navigation bar.
-
Select the All bookings tab.
-
Enter the details of the resource type, location, user, and date range you want to search.
-
Select Search.
-
Add further search parameters by entering a filter in the Filter results search bar or the Filters dialog.
-
Select View as table.
-
Select the Columns dropdown.
-
Select the Cost Codes checkbox.
-
Select Done.
-
The Cost Code column will appear for all bookings based on your search parameters.