This technical guide explains the steps required to set up our bidirectional Microsoft 365 integration. For more information on our integration, see Microsoft 365 integrations overview:
Set up our integration in Entra ID
There are several steps needed to set up our Microsoft 365 integration, on both the Microsoft and Matrix Booking sides. Some steps need to be done by your IT team, some by your Matrix Booking administrators, and some steps by our Support Team.
In Microsoft Azure and Microsoft 365 Admin Center, your IT team need to:
Matrix Booking can use Entra ID applications for SSO and Entra ID sync. If you’re using either our SSO or Entra ID integrations, you need to set up the integrations first.
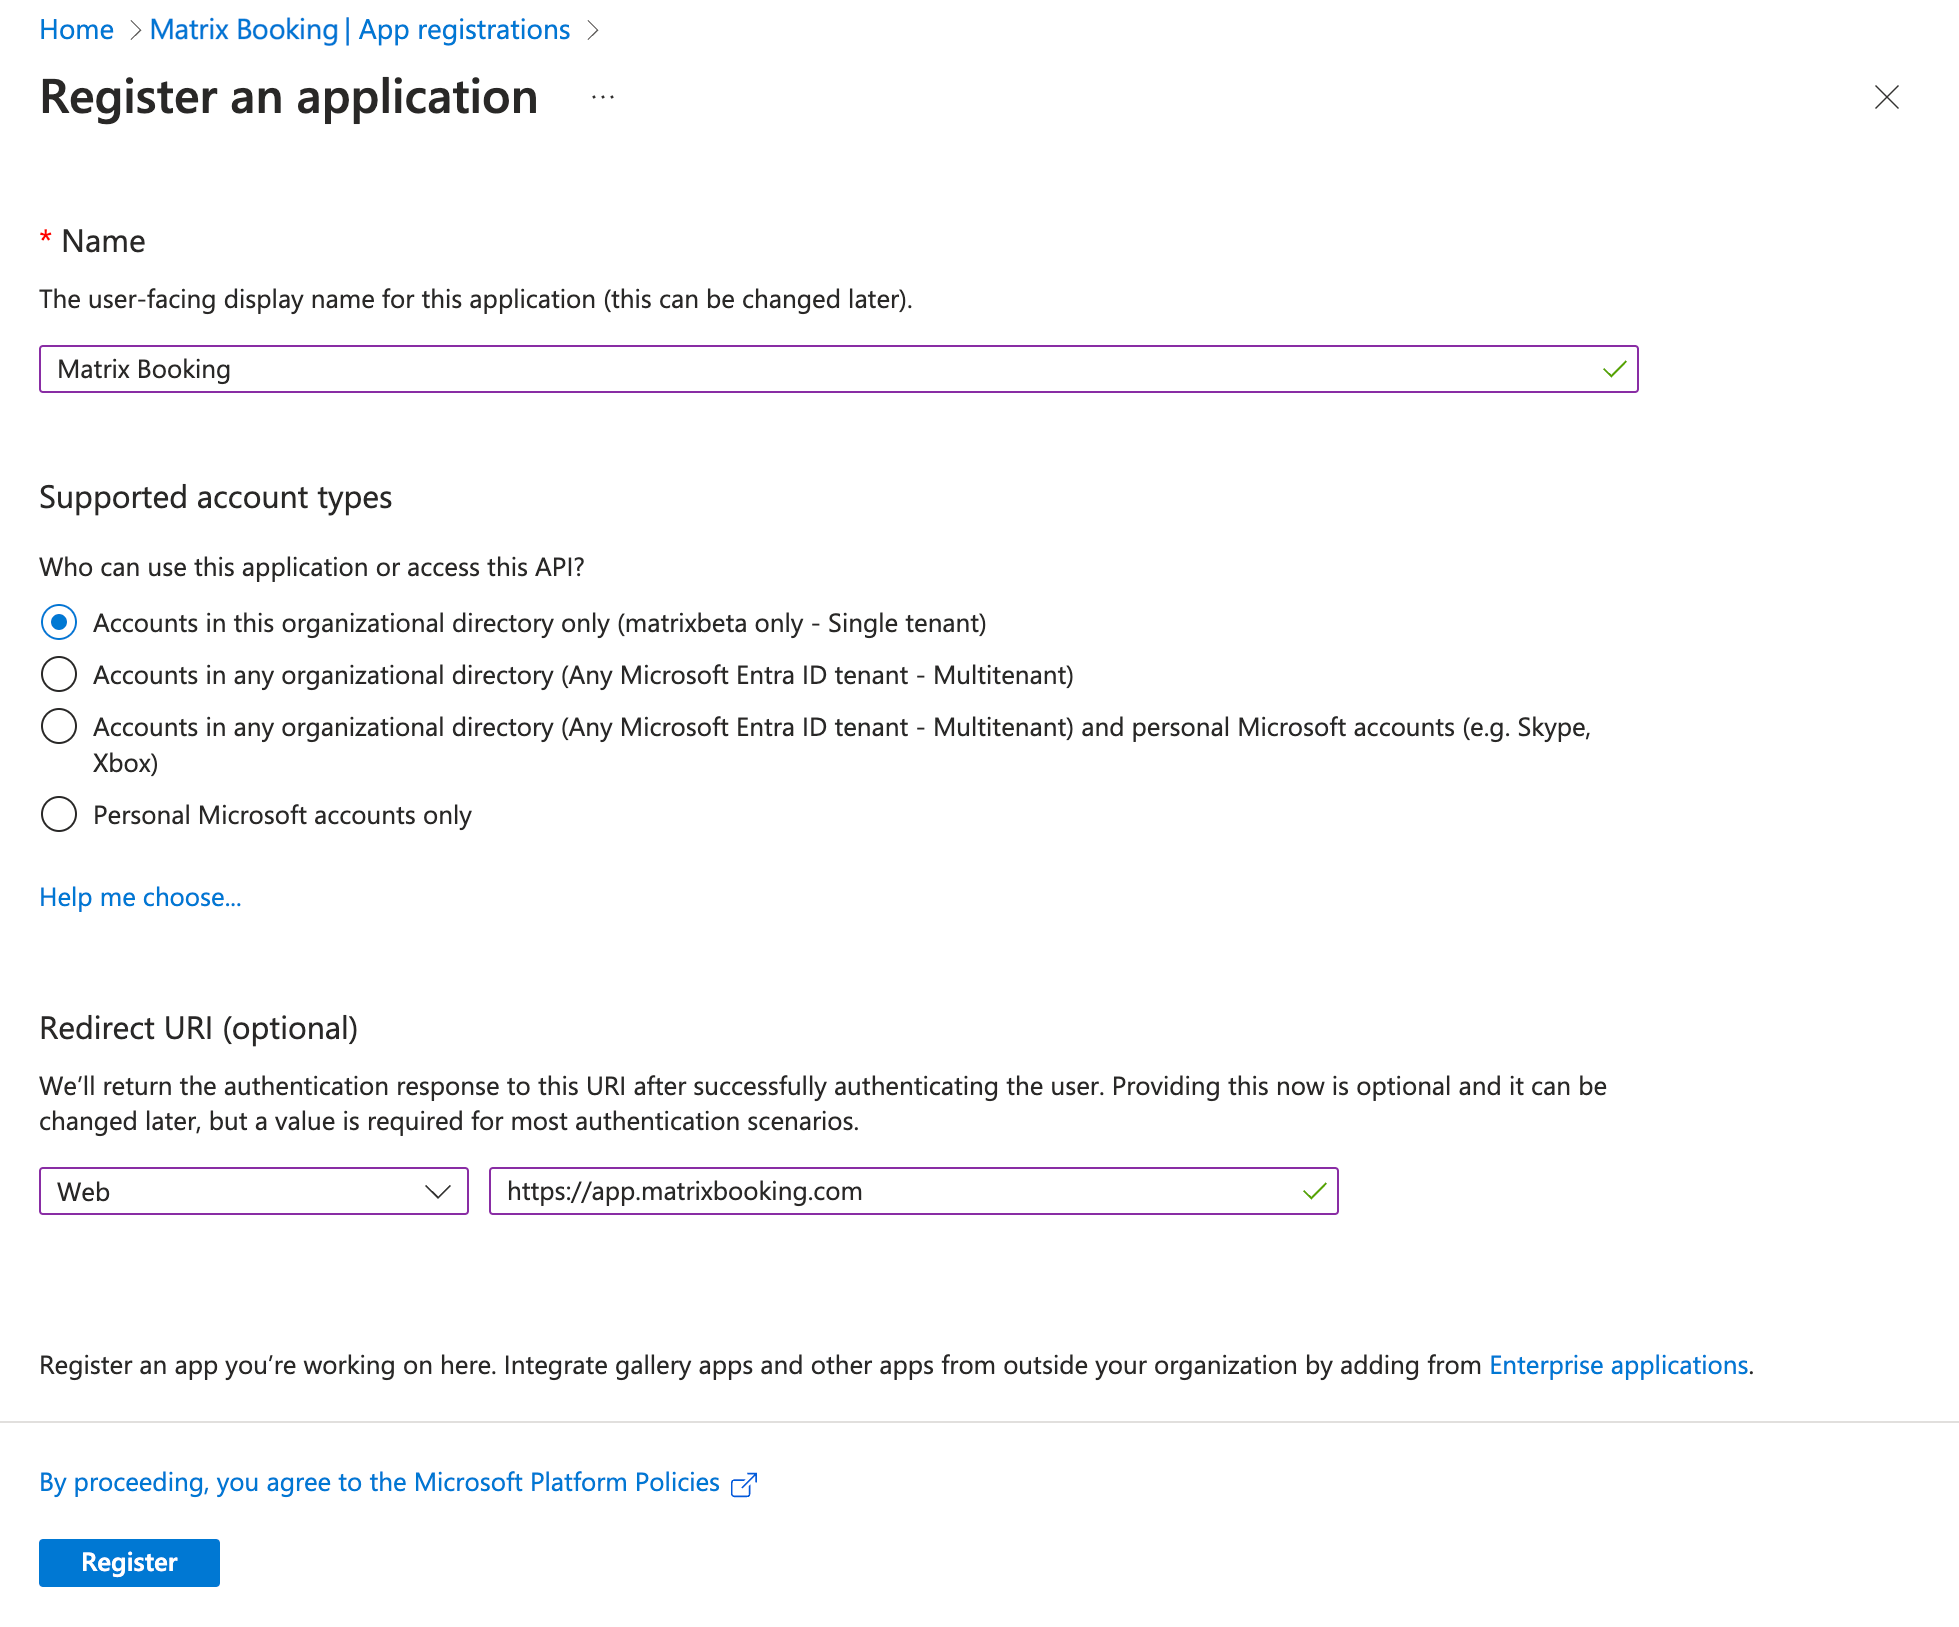
For SSO to work, make an Enterprise Application for Matrix Booking. It will have the API permissions needed so that you can add our Microsoft 365 integration to it.
You can set up SSO afterwards, but you’ll have 2 separate applications.
-
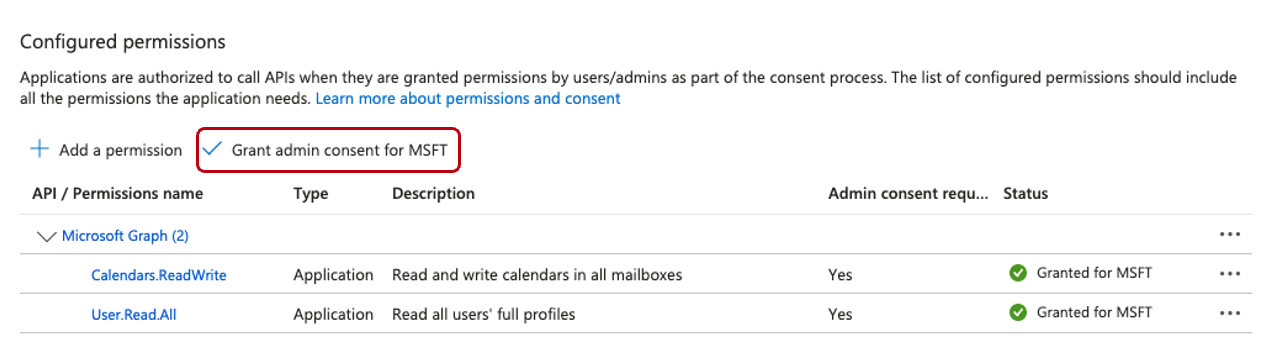
Set the required permissions - ensure that “Grant admin consent” has been clicked.
-
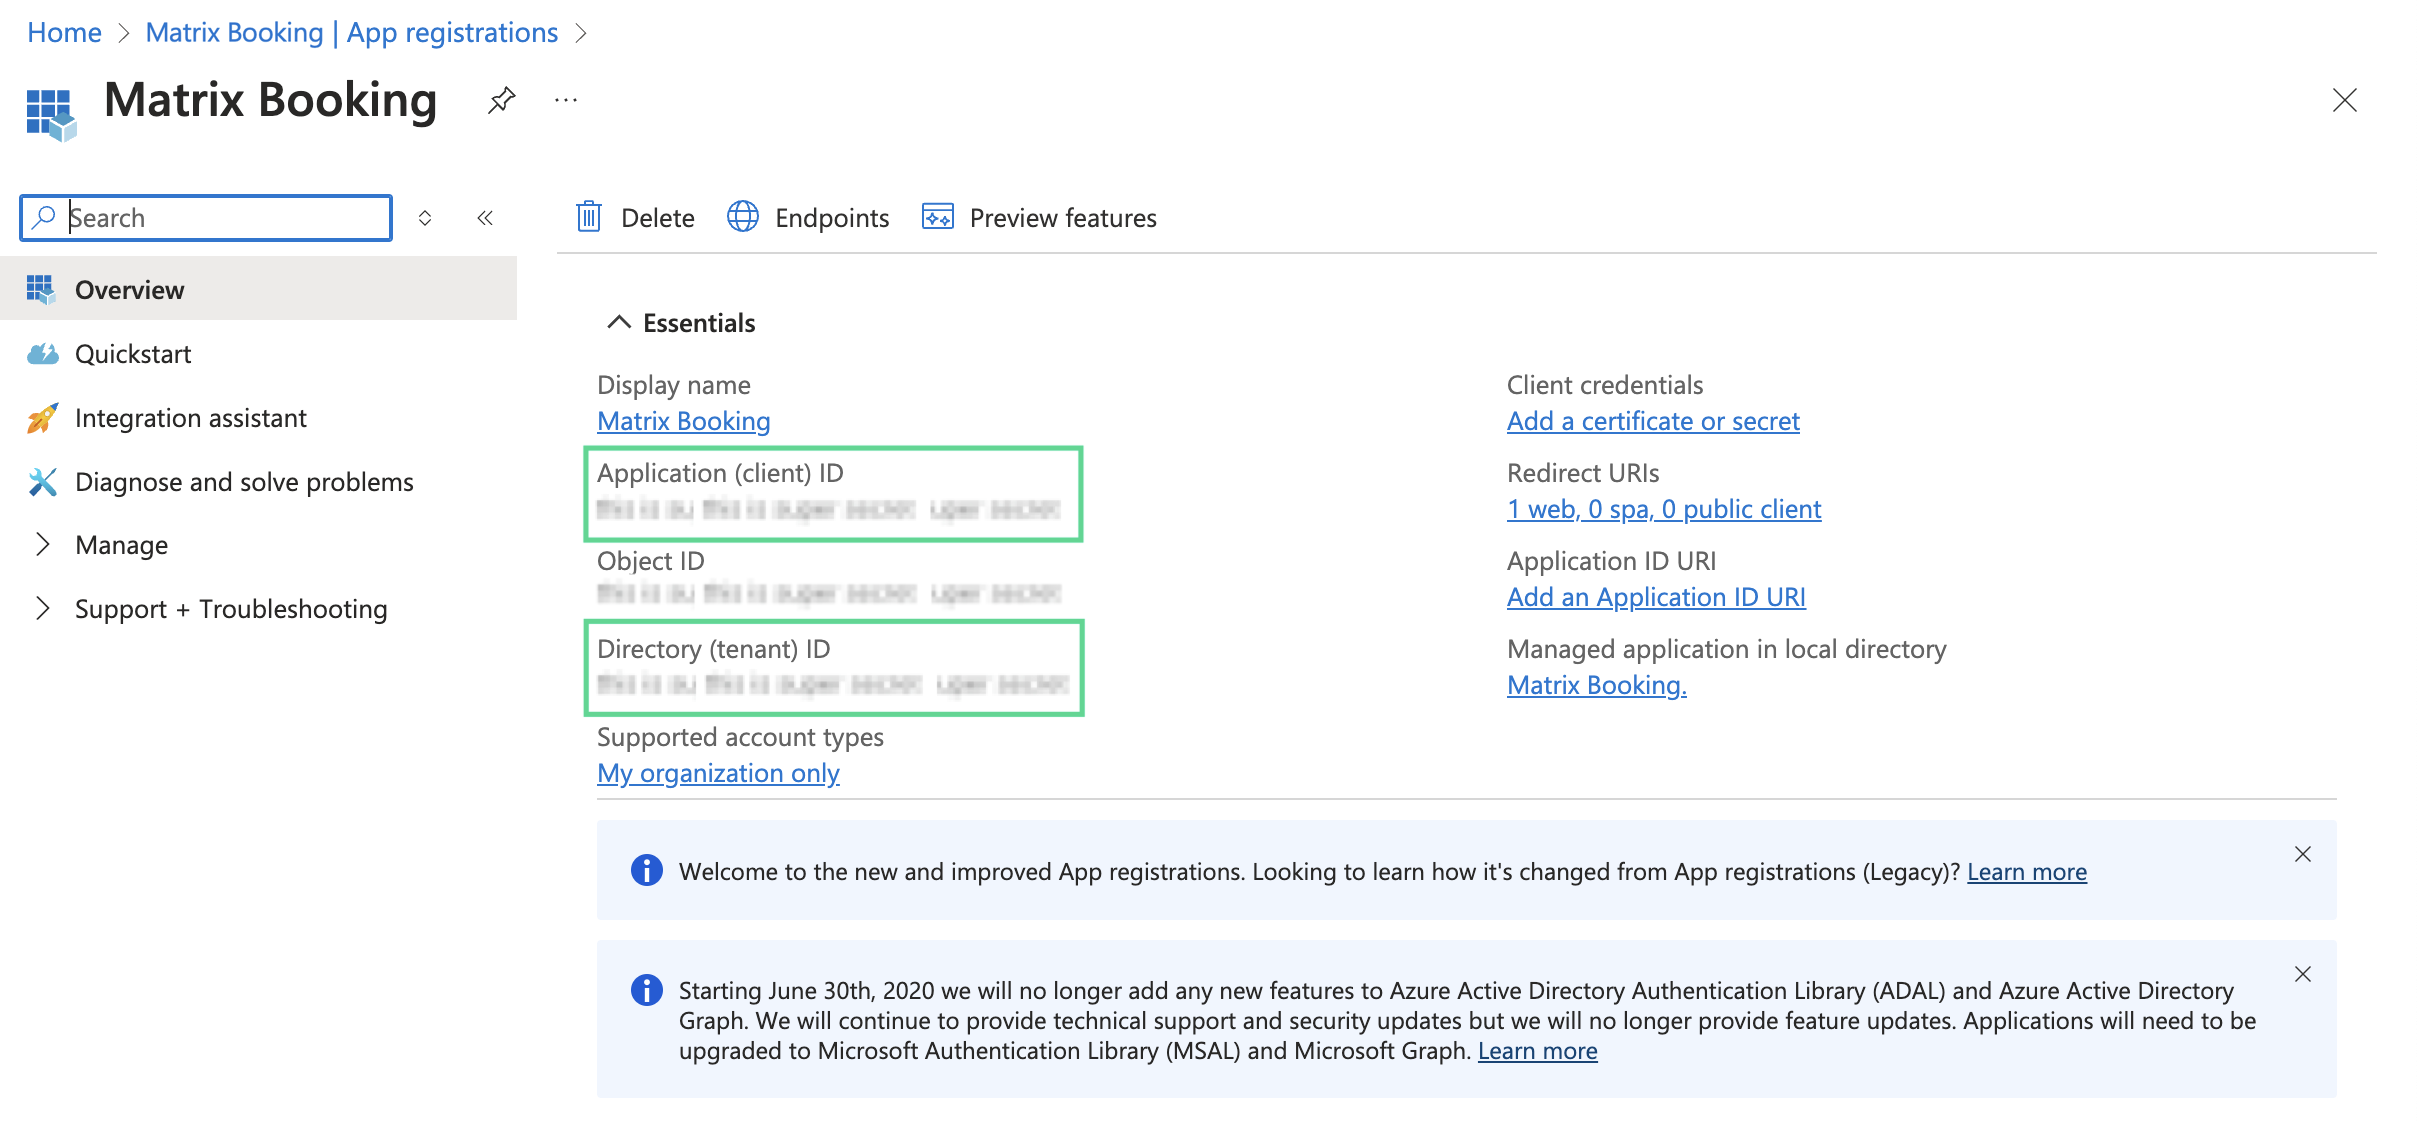
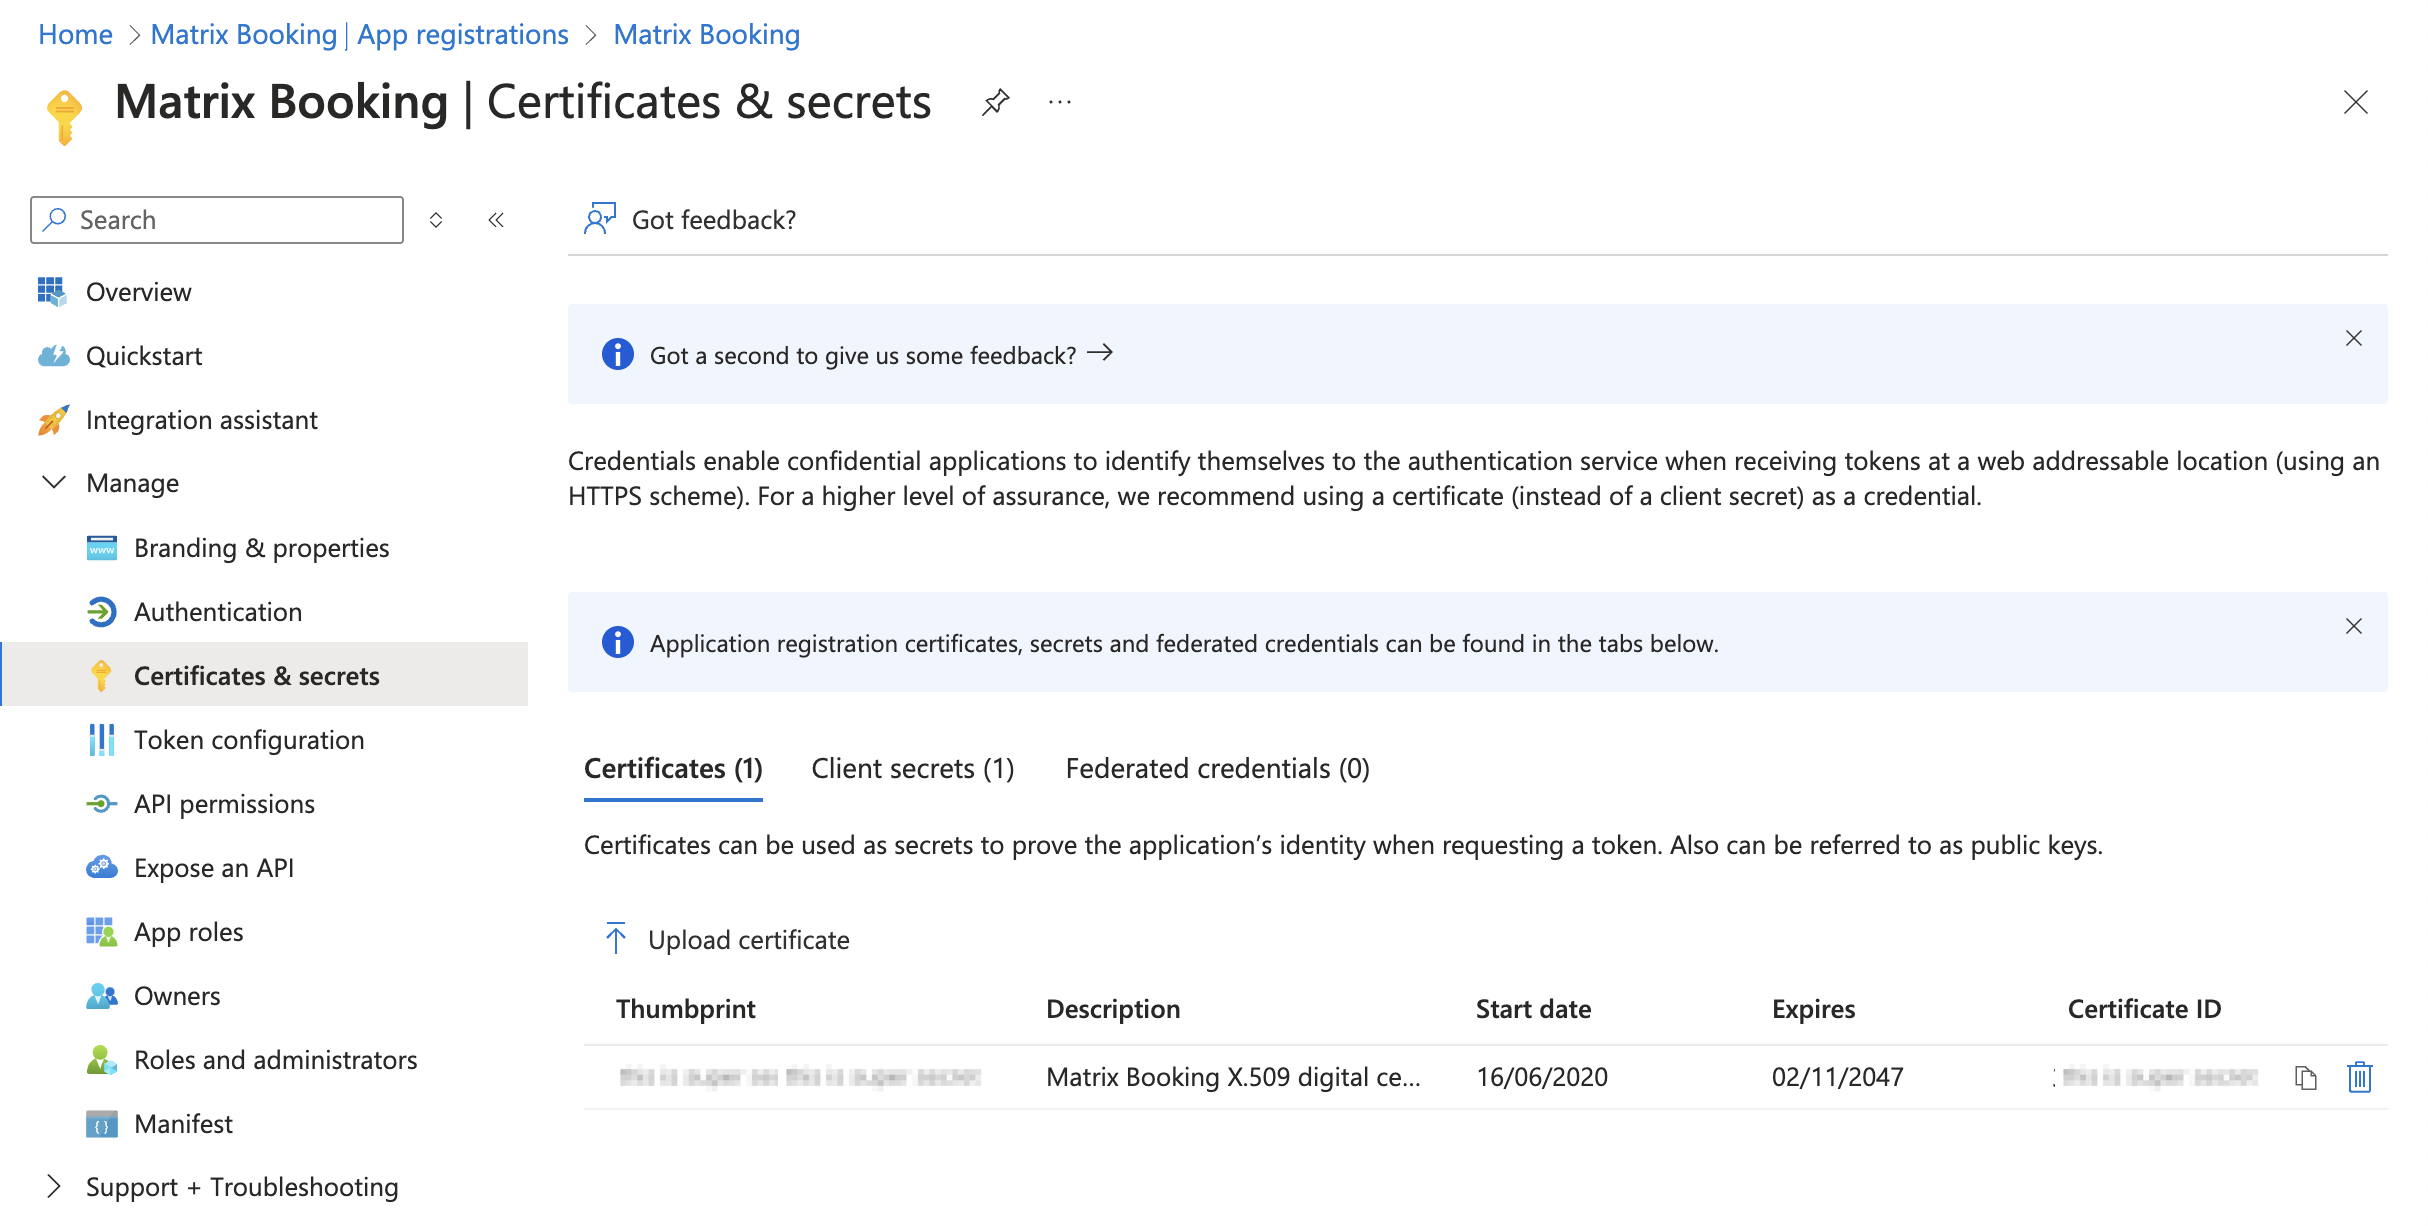
Give the required information to Matrix Booking.
-
-
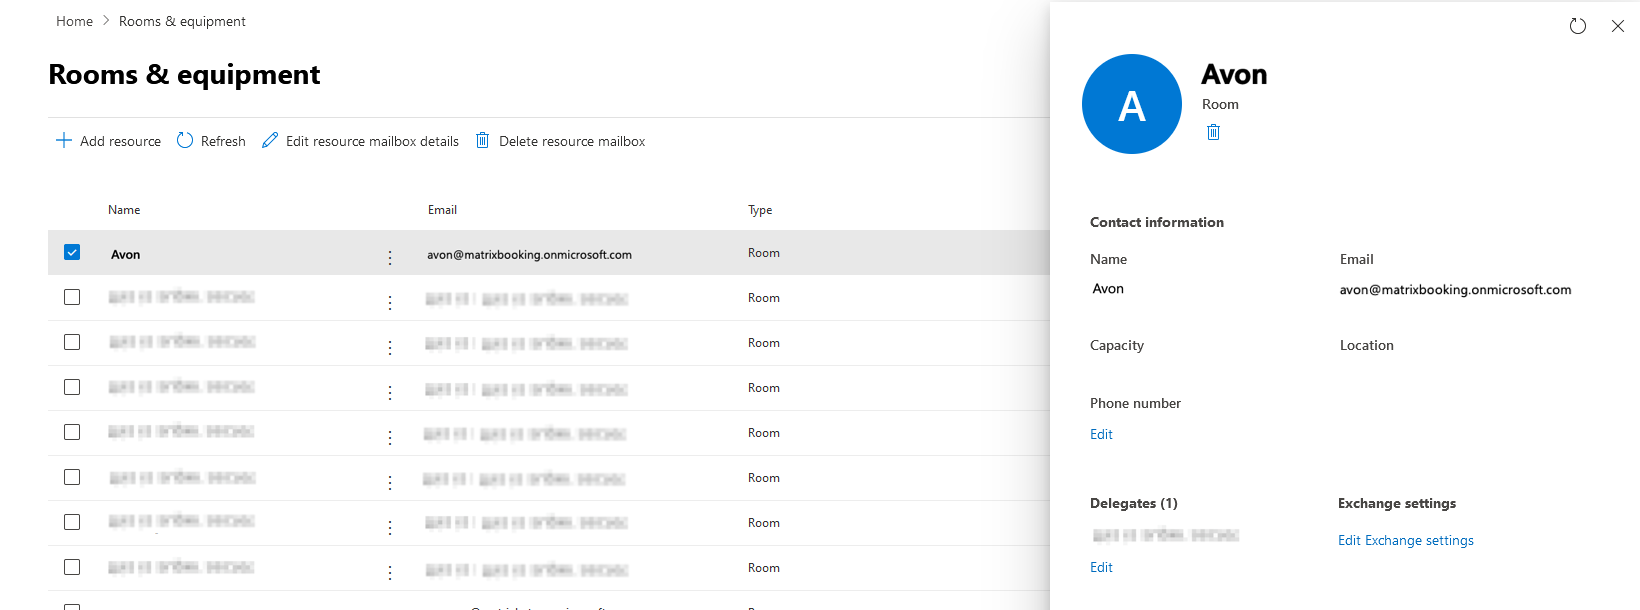
Get the Microsoft resource’s email address.
Finish integration setup in Matrix Booking
Once you have been informed that we’ve set up your integration, your Matrix Booking administrator will be able to link Matrix Booking resources with Microsoft 365 resources using Matrix Booking.
Warning: the following steps assume that the resource has previously been added to Microsoft 365 and also to Matrix Booking. These steps need to be performed for each resource that will be synchronised.
Sync any existing future bookings
Note: if you add any new resources to your Locations and resources hierarchy, we recommend that you link them to your Microsoft 365 resources (rooms).
If our Microsoft 365 integration was set up correctly, any future bookings against any rooms should have been synced.
If you’re not seeing your (or any) future bookings in one of the systems (either Matrix Booking or Microsoft 365), you need to:
-
Raise a support ticket to let us know:
-
If you’re using either Matrix Booking or Microsoft 365 as your “master” resource booking system where the future bookings currently reside.
-
The date you want the sync to happen.
-
The date range of bookings you want synced.
-
-
Our Support Team will run the forward booking sync for you so that your future bookings appear in both systems.
Update the Matrix Booking resource
Notes:
-
If you have future bookings in either calendar, follow the Sync any existing future bookings steps and leave the Update the Matrix Booking resource steps below.
-
For step 10, only the primary SMTP (the default email address used to send and receive messages) can be used in the Calendar Resource text box. Secondary SMTPs, alias, or proxy addresses can’t be used.
To update your Matrix Booking resource with the Microsoft resource’s email address, as a Matrix Booking administrator:
-
Select Admin in the navigation bar.
-
Select Locations and Resources under the Location Settings section in the side menu.
-
Select Edit hierarchy. Your Locations and Resources hierarchy will appear.
-
In the Find location search bar, begin to enter the resource’s name. The resource’s name within Matrix Booking might not be the same as within Microsoft 365.
-
Go to your matching resource.
-
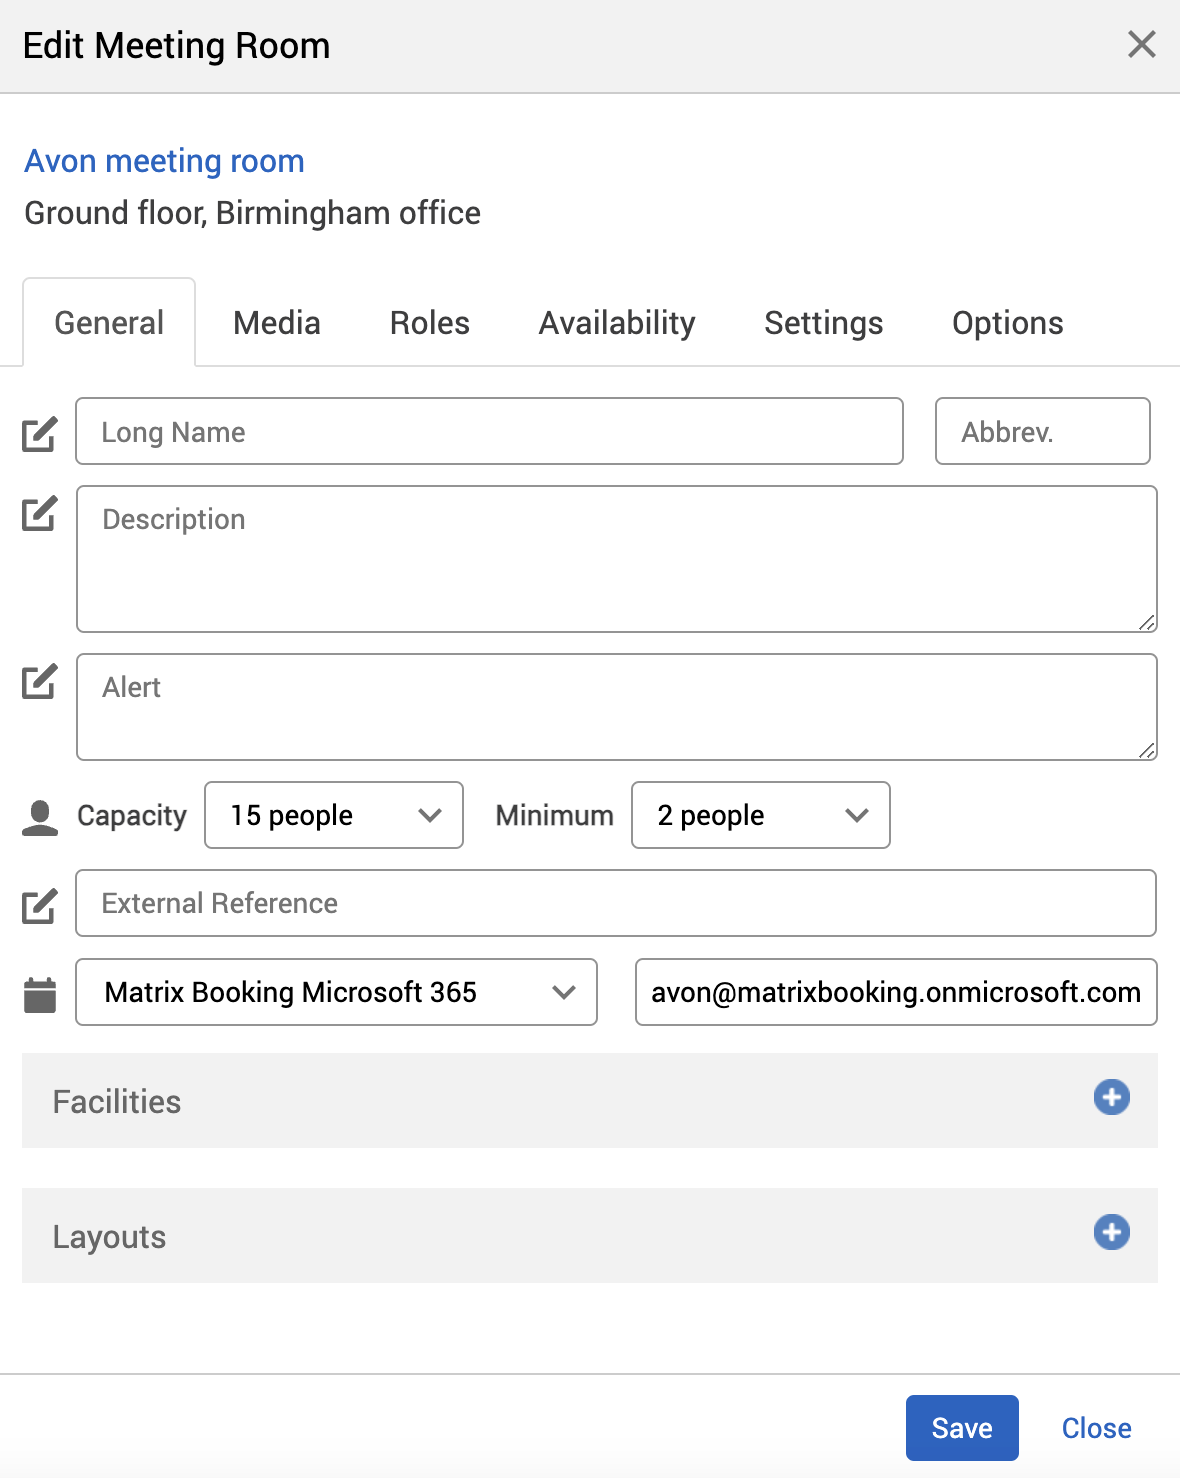
Select the Edit button next to your resource. The Edit [resource] dialog will appear.
-
If No calendar provider appears in the Calendar dropdown, the resource isn’t associated with a Microsoft 365 resource.
-
Select the Calendar dropdown.
-
Select the chosen calendar provider. This will have been added by the Matrix Booking Technical Team (for example, Matrix Booking Microsoft 365).
-
In the Calendar Resource text box, enter the email address of the Microsoft 365 resource that you obtained.
-
Select Save.
-
Repeat the Get the Microsoft resource’s email address steps and Update the Matrix Booking resource steps for each resource you wish to keep synced between Matrix Booking and Microsoft 365.
You should now be able to make bookings in either Matrix Booking or Microsoft 365.
Get our add-in
If you want your colleagues to use our Microsoft 365 add-in, ask your IT team to install it for them.
Delink a resource from Microsoft 365
To delink a Matrix Booking resource from Microsoft 365 integration so bookings are no longer synchronised:
-
Select Admin in the navigation bar.
-
Select Locations and Resources under the Location Settings section in the side menu.
-
Select Edit hierarchy. Your resource hierarchy will appear.
-
Go to your chosen resource.
-
Select the Edit button next to your resource. The Edit [resource] dialog will appear.
-
Select the Calendar provider text box. A dropdown will appear.
-
Select No calendar provider.
-
Select Save.
This can only be done if Matrix Booking hasn’t received any webhook notifications (or resource synchronisation messages) for the resource from Microsoft 365. If there are such messages, the following error will be displayed in the Edit [resource] dialog:

In this case, the resource synchronisation messages will need to be manually deleted. If you want these messages deleted, raise a support ticket.