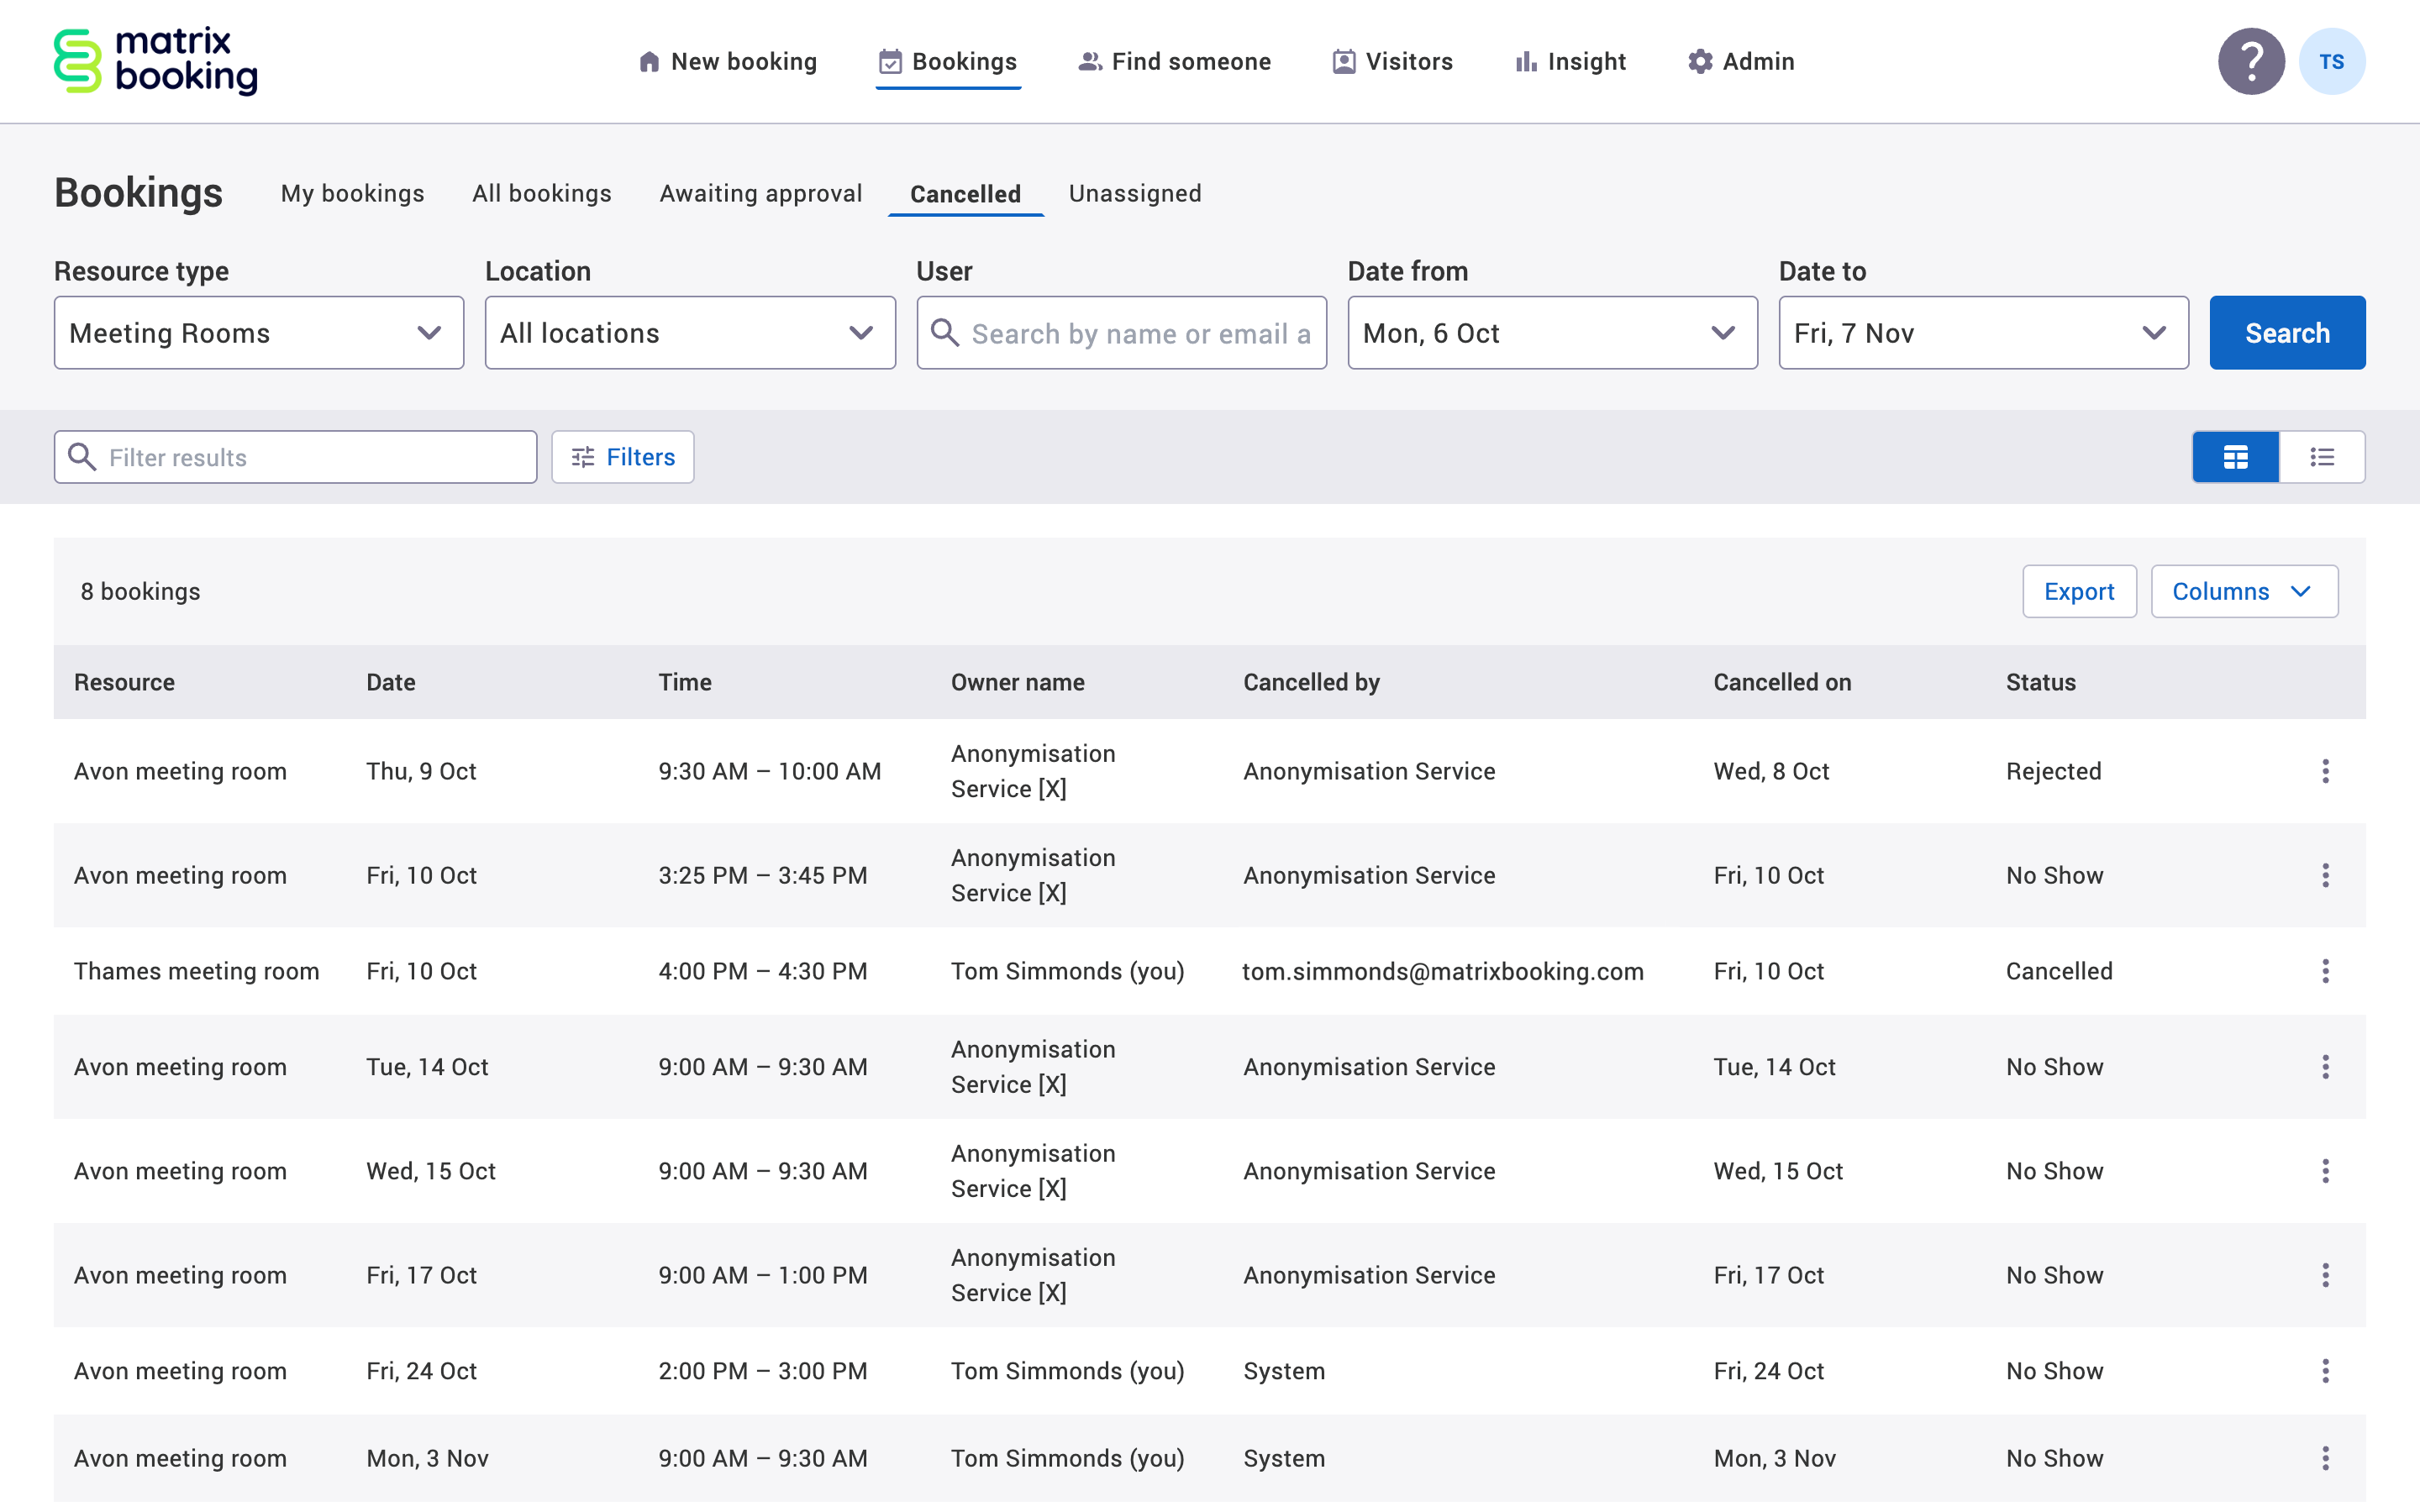
This page describes how to use the Cancelled tab in the Bookings screen:
Access the Cancelled tab
To access the Cancelled tab:
-
Select Bookings in the navigation bar. The Bookings screen will appear.
-
Select the Cancelled tab. The Cancelled tab will appear.
-
Select the view you want:
-
Table view
-
List view
-
-
Select the resource type using the Resource type dropdown to filter your search on that resource type.
-
Select the location using the Location dropdown to filter your search on that location.
-
Enter a user name or email in the User search bar to search for their bookings.
-
Select the date range using the Date from and Date to dropdowns.
-
Enter a filter you want in the Filter search bar.
-
Select the filters you want.
-
Select the columns you want (where applicable).
-
Select Search to view the results based on your search parameters and filters.
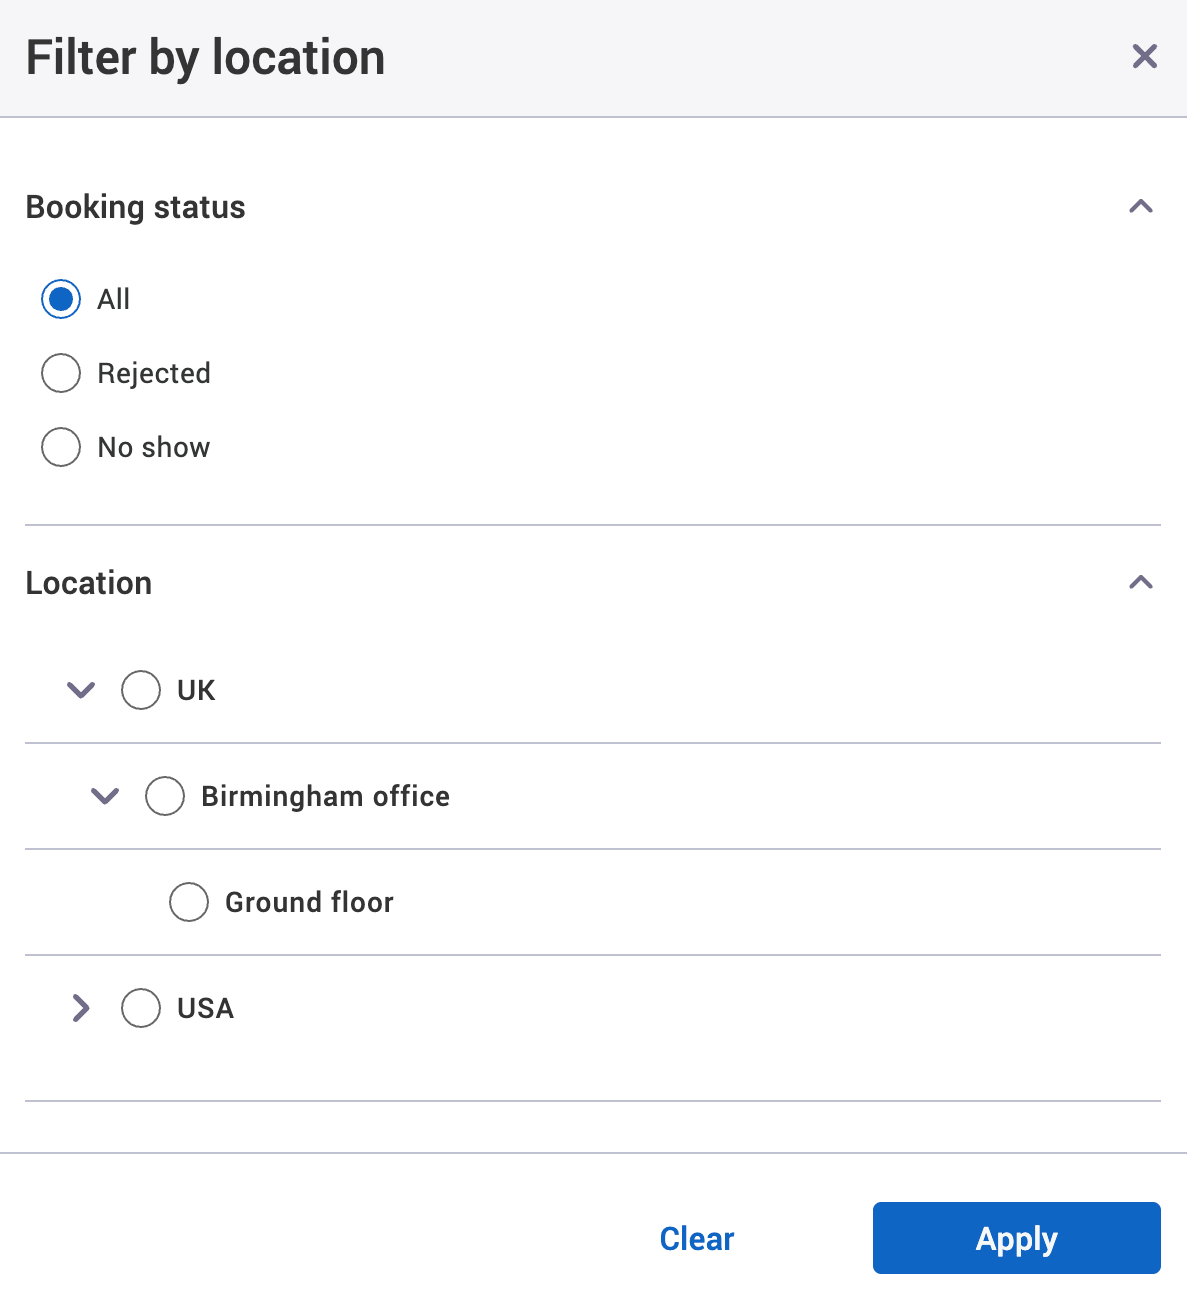
Filters
You can filter on the:
-
Booking status:
-
All
-
Rejected
-
No show (auto-cancel)
-
-
Location
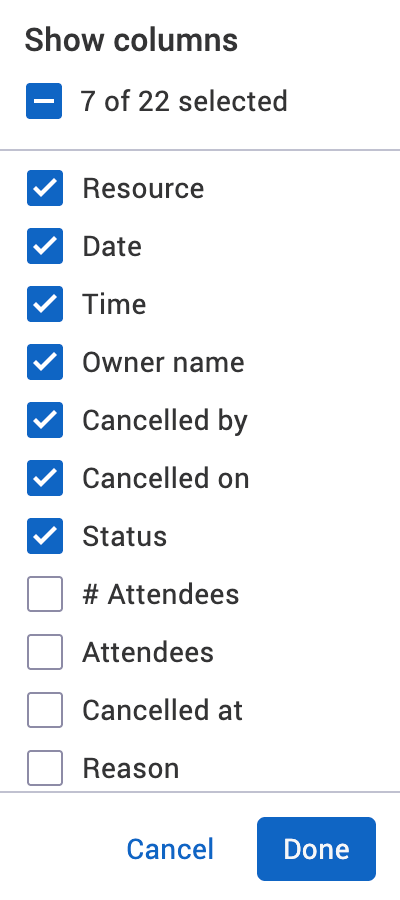
Choose columns filter
In the View as table, the full list of Choose Columns ▼ filters is as follows:
-
Resource (selected by default)
-
Date (selected by default)
-
Time (selected by default)
-
Owner name (selected by default)
-
Cancelled by (selected by default)
-
Cancelled on (selected by default)
-
Status (selected by default)
-
# Attendees (number of attendees, selected by default)
-
Attendees
-
Cancelled at
-
Reason – the reason why a booking was cancelled or rejected
-
Cost code
-
Group
-
Location
-
Site
-
Building
-
Floor
-
Zone
-
Owner email
-
Notes – further information provided by the booking owner
-
Requests – booking options asked for by the booking owner (for example, catering)
-
Requests with times – booking options asked for by the booking owner at a specific (for example, catering at lunchtime)
Booking status definitions
There are different statuses that bookings can have:
|
Status |
Definition |
|---|---|
|
BOOKED |
A booking that has been approved by a location manager or above, or accepted by the Matrix Booking system. |
|
AWAITING APPROVAL |
A booking that has been made and is waiting for approval by a location manager or above. If not approved in time or rejected, this status will remain for the booking. |
|
CHECK IN NOW |
A booking that can be checked in to. |
|
CHECK-IN REQUIRED |
A booking that can’t be checked in to as the check-in window hasn’t elapsed. |
|
CHECKED IN |
A booking that’s been checked in to, but hasn’t started. |
|
IN PROGRESS |
A booking that has started. |
|
CANCELLED |
A booking that was rejected, or manually or automatically cancelled (due to the booking not being checked in). |
If a booking is approved, the status will move from AWAITING APPROVAL to either BOOKED, CHECK IN NOW, or CHECK-IN REQUIRED depending on your setup.
If a booking is rejected, cancelled, or auto-cancelled due to a “no show”, the booking will be removed from the tab. The booking then will then appear in the Cancelled tab.
If a booking becomes unassigned, the booking will have whatever status it had at the time of the user’s deactivation, but there will an [X] next to the user’s name in the booking information panel.
When a booking has been anonymised, it will display the booking owner name as Anonymisation Service [X] and their email address will also be anonymised.
Export search results
As a location manager, location administrator, or administrator, you can export your search results as a .csv file. To do this:
-
Enter your search parameters and filters.
-
Select the Table view.
-
Select Export. This will bring up the file explorer on your computer (for example, Finder on Apple Macs).
-
Select Save (or equivalent) in the location you want the file saved.
Limitations
The Cancelled tab limitations are:
-
The Cancelled tabs are limited to the first 5,000 entries for all Cancelled and populates the tab based on the search parameters you selected.
-
Bookings that were ended early won’t appear in the Cancelled tab because the booking had taken place.
-
The system can’t allow a booking to be edited, rejected or cancelled bookings from the Cancelled tab – you can only view cancelled bookings.