Booking options are the additional items that can be added to a booking. This page explains the different booking options available and how to add them to a resource, such as a room:
Access for service providers
You can set up a providers with their own login to Matrix Booking. To give providers access to Matrix Booking, add your service provider as a new user.
Note: it’s also possible to create a booking option without a provider for those instances where no provider is needed.
Access the Booking options screen
-
Select Admin in the navigation bar.
-
Select the Booking options dropdown under the Account Settings section in the side menu. The Booking options dropdown will appear in the side menu.
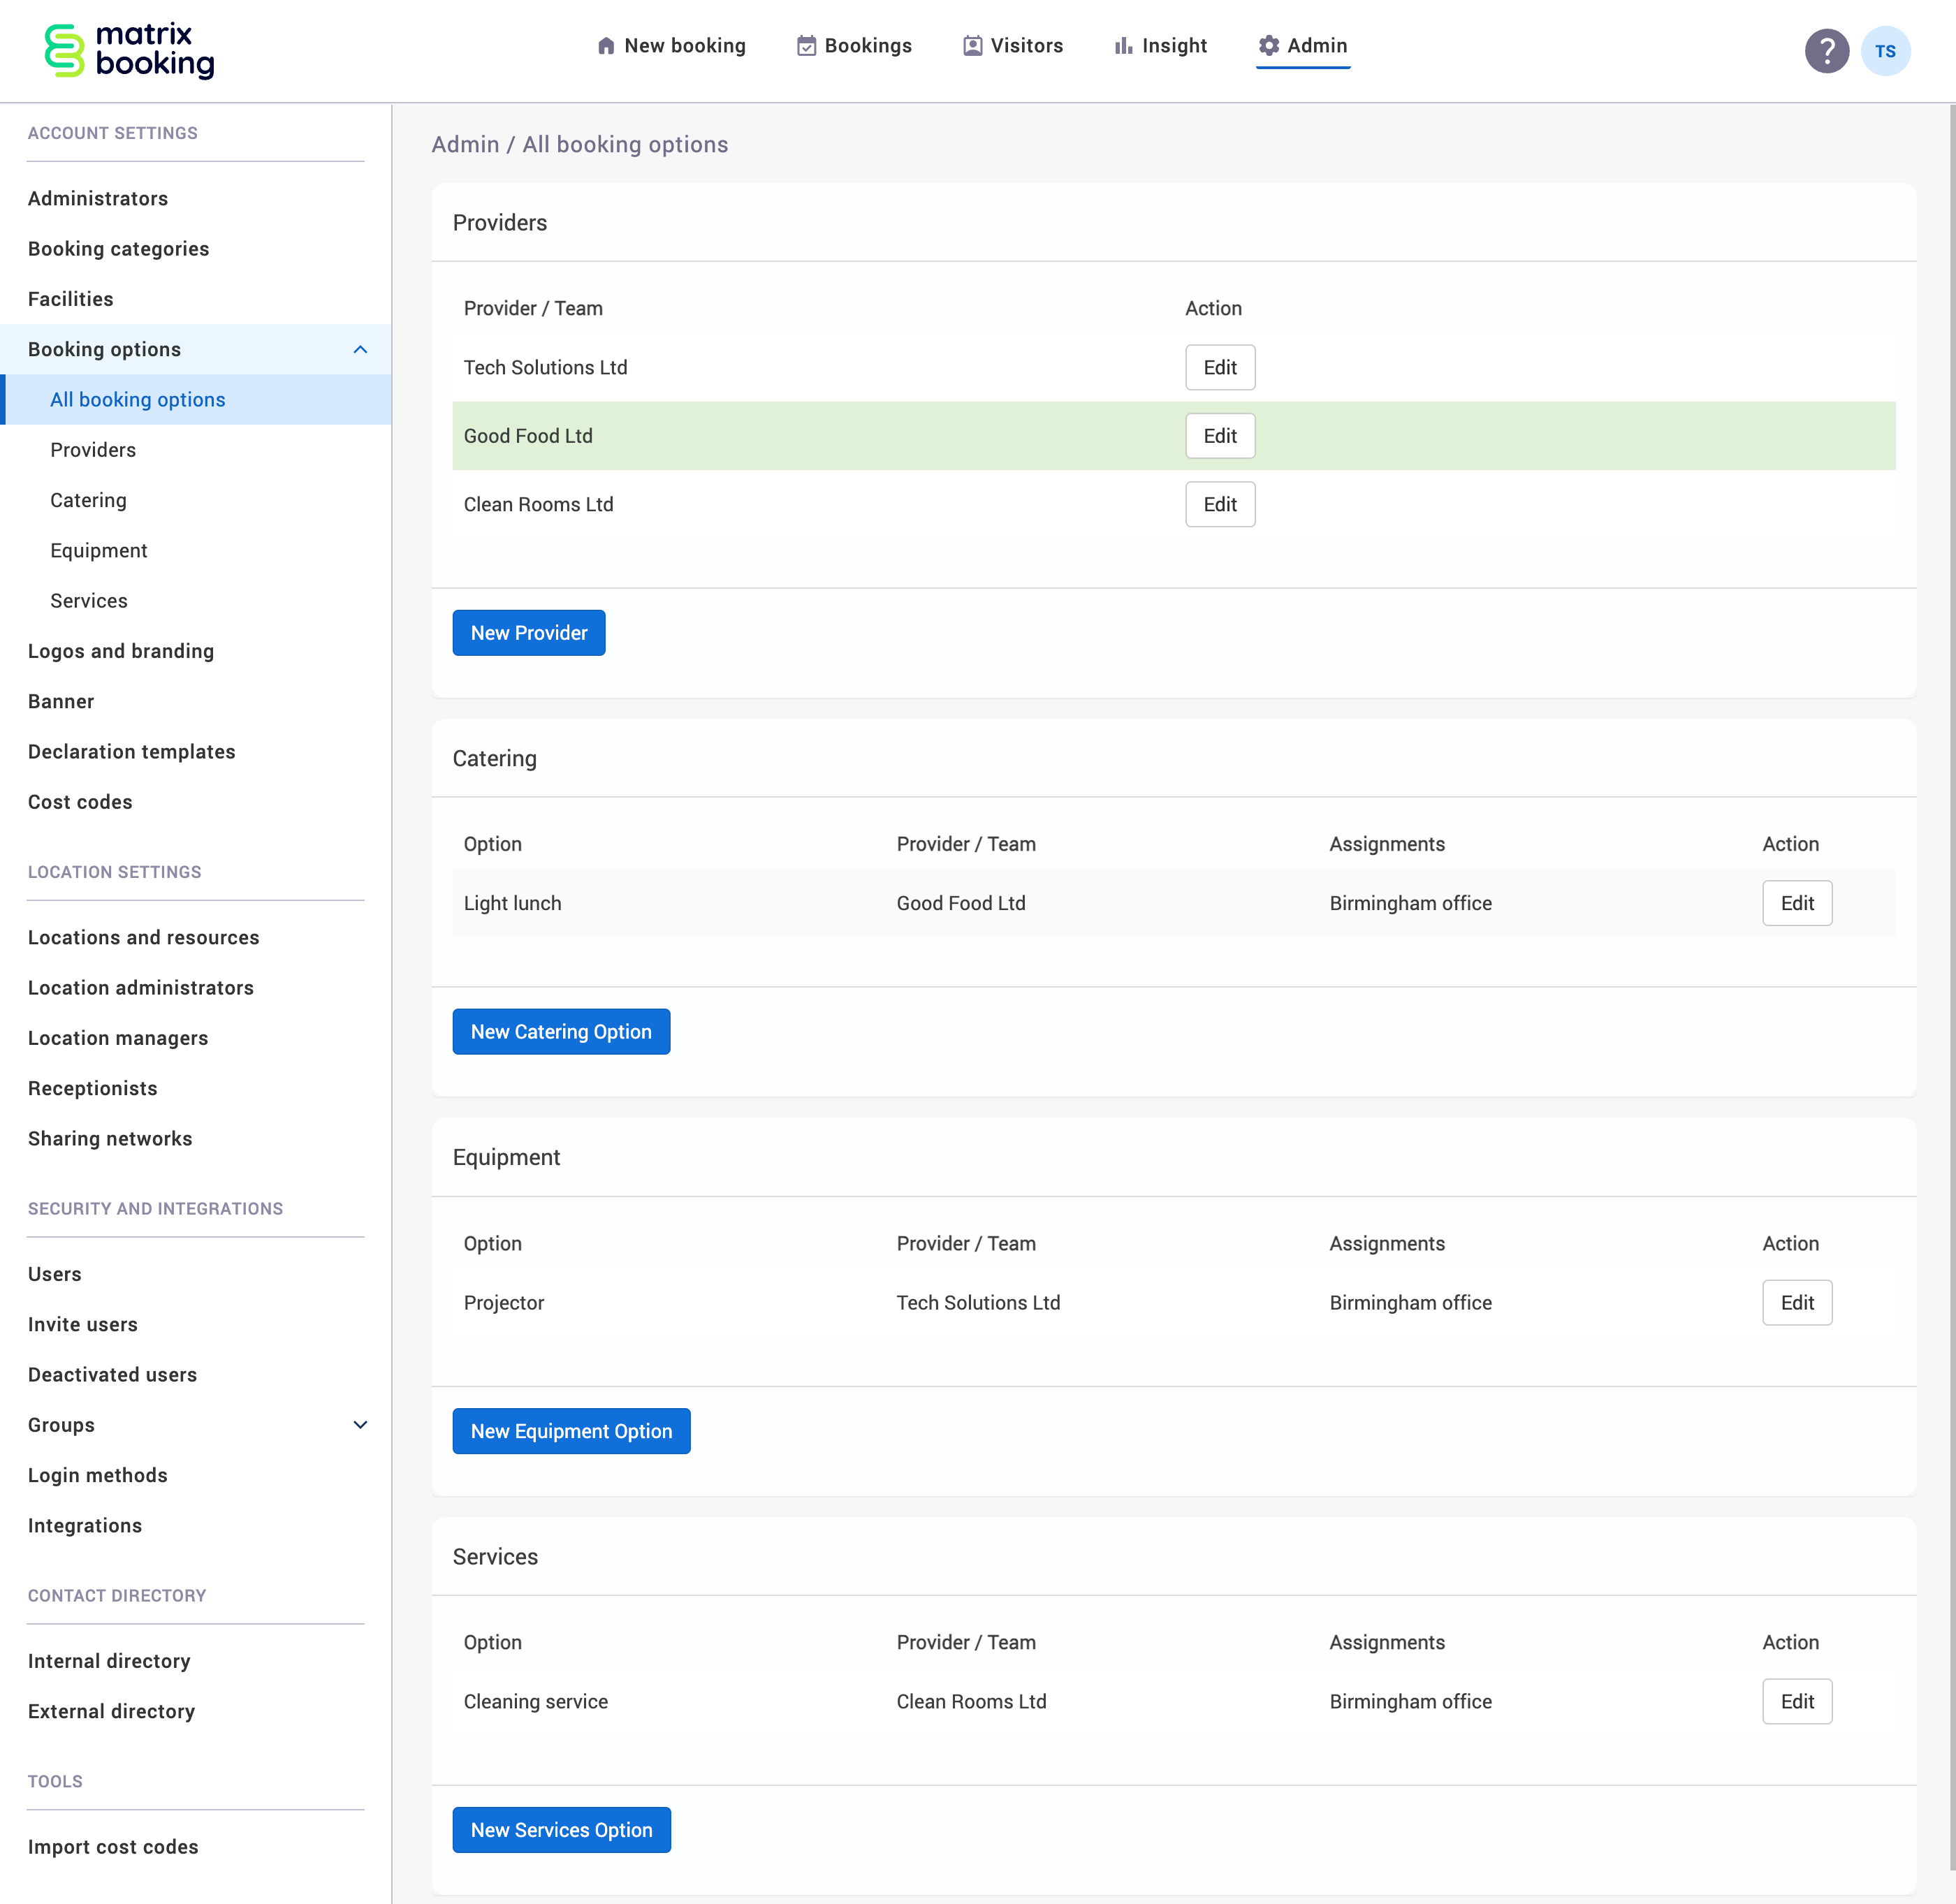
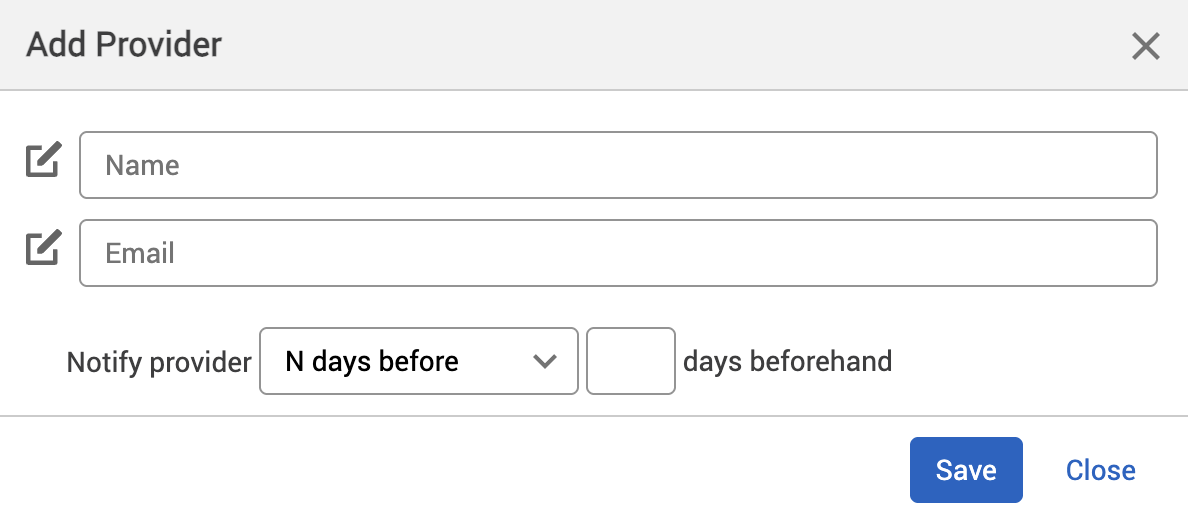
Add a new provider
Before adding a provider to your organisation in Matrix Booking, speak with them to about their notification period. To add a new provider:
-
Select New Provider and the Add Provider dialog box will appear.
-
Enter the details of the provider.
-
Select the Notify provider dropdown to let your provider know either:
-
on booking changes.
-
on day of booking.
-
N days before (where N is a number).
-
-
Select the number of days use the up and down buttons or enter the number in the days beforehand text box
-
Select either of the following and the dialog will close:
-
Save to keep your changes.
-
Close to discard your changes.
-
Notes:
-
Only 1 email address per provider can be entered. If more than one is added, none of the email addresses will receive any notifications. However, there is a workaround to get over this if the provider needs more than one email address for requests.
-
The provider’s email address is optional.
-
You and your provider need to agree on the time they need to be notified by. The provider will be emailed with the request at the time you set.
-
If you select:
-
on day of booking, they will receive an email for the day of the booking only (not the day the booking was made).
-
on booking changes, they will receive an email each time a change is made to the booking.
-
N days before, they will receive an email N days before only and not another on the day of the booking.
-
Set up booking options
If you book a resource, you may want to add options (for example, equipment like a flip chart for a room). You can set up these options and attach a supplier that provides them (either internal or external to your organisation). You can specify how those suppliers are notified. The options should be set up for you with your initial installation as part of your implementation process is done. However, you can add, edit, and delete these at any time.
To create an option, the process is as follows:
-
If you haven’t already, add your service provider as a new user.
-
You can add 1 of the 3 types of options:
-
Catering.
-
Equipment.
-
Services.
-
-
Return to the locations and resources hierarchy to assign booking options to the buildings, floors, or resources you want so that they can be requested.
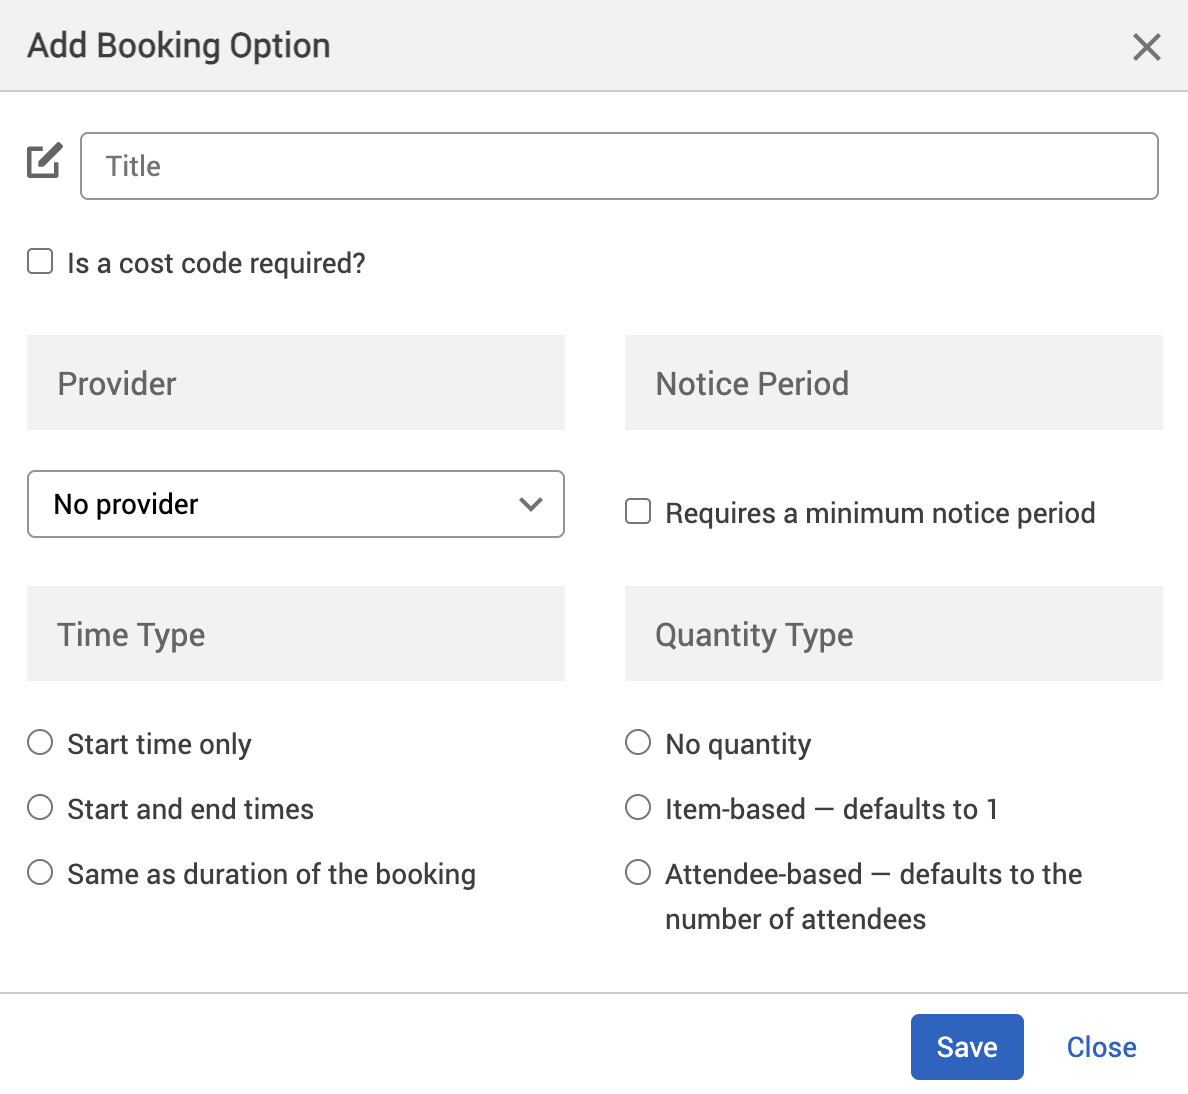
Add a booking option
To add an option:
-
Select either the:
-
New Catering Option button.
-
New Equipment Option button.
-
New Services Option button.
-
-
The Add Booking Option dialog box will appear.
-
Enter the title of the option in the Title text box. For example, “Fish and chips.”
-
Select the checkbox if a cost code is required.
-
Select the Provider of your option from the Provider dropdown under the Provider section.
-
Select the checkbox under the Notice Period section if a minimum notice period is required by your option provider.
-
If selected, a text box and dropdown will appear.
-
Enter the number of minutes, hours, or days are needed for your provider to prepare the option for you.
-
Under the Time Type section, select when you want your option available by either selecting:
-
Start time only.
-
Start and end times.
-
Same as duration of the booking.
-
-
Under the Quantity Type section, select the amount of your option you want available by either selecting:
-
No quantity (for example, audio/visual (A/V) assistance).
-
Item-based – defaults to 1 (for example, 1 flip chart).
-
Attendee-based – defaults to the number of attendees (for example, 20 attendees means 20 hot meals).
-
-
Select either of the following and the dialog will close:
-
Save to keep your changes.
-
Close to discard your changes.
-
These choices for the Time Type and Quantity Type depend on the type of option that is being defined. Any bookings made in less than the specified time period will not be able to add that option (for example, catering requires 24 hours notice and the booking was made 12 hours before the meeting, that booking couldn’t add the catering option).
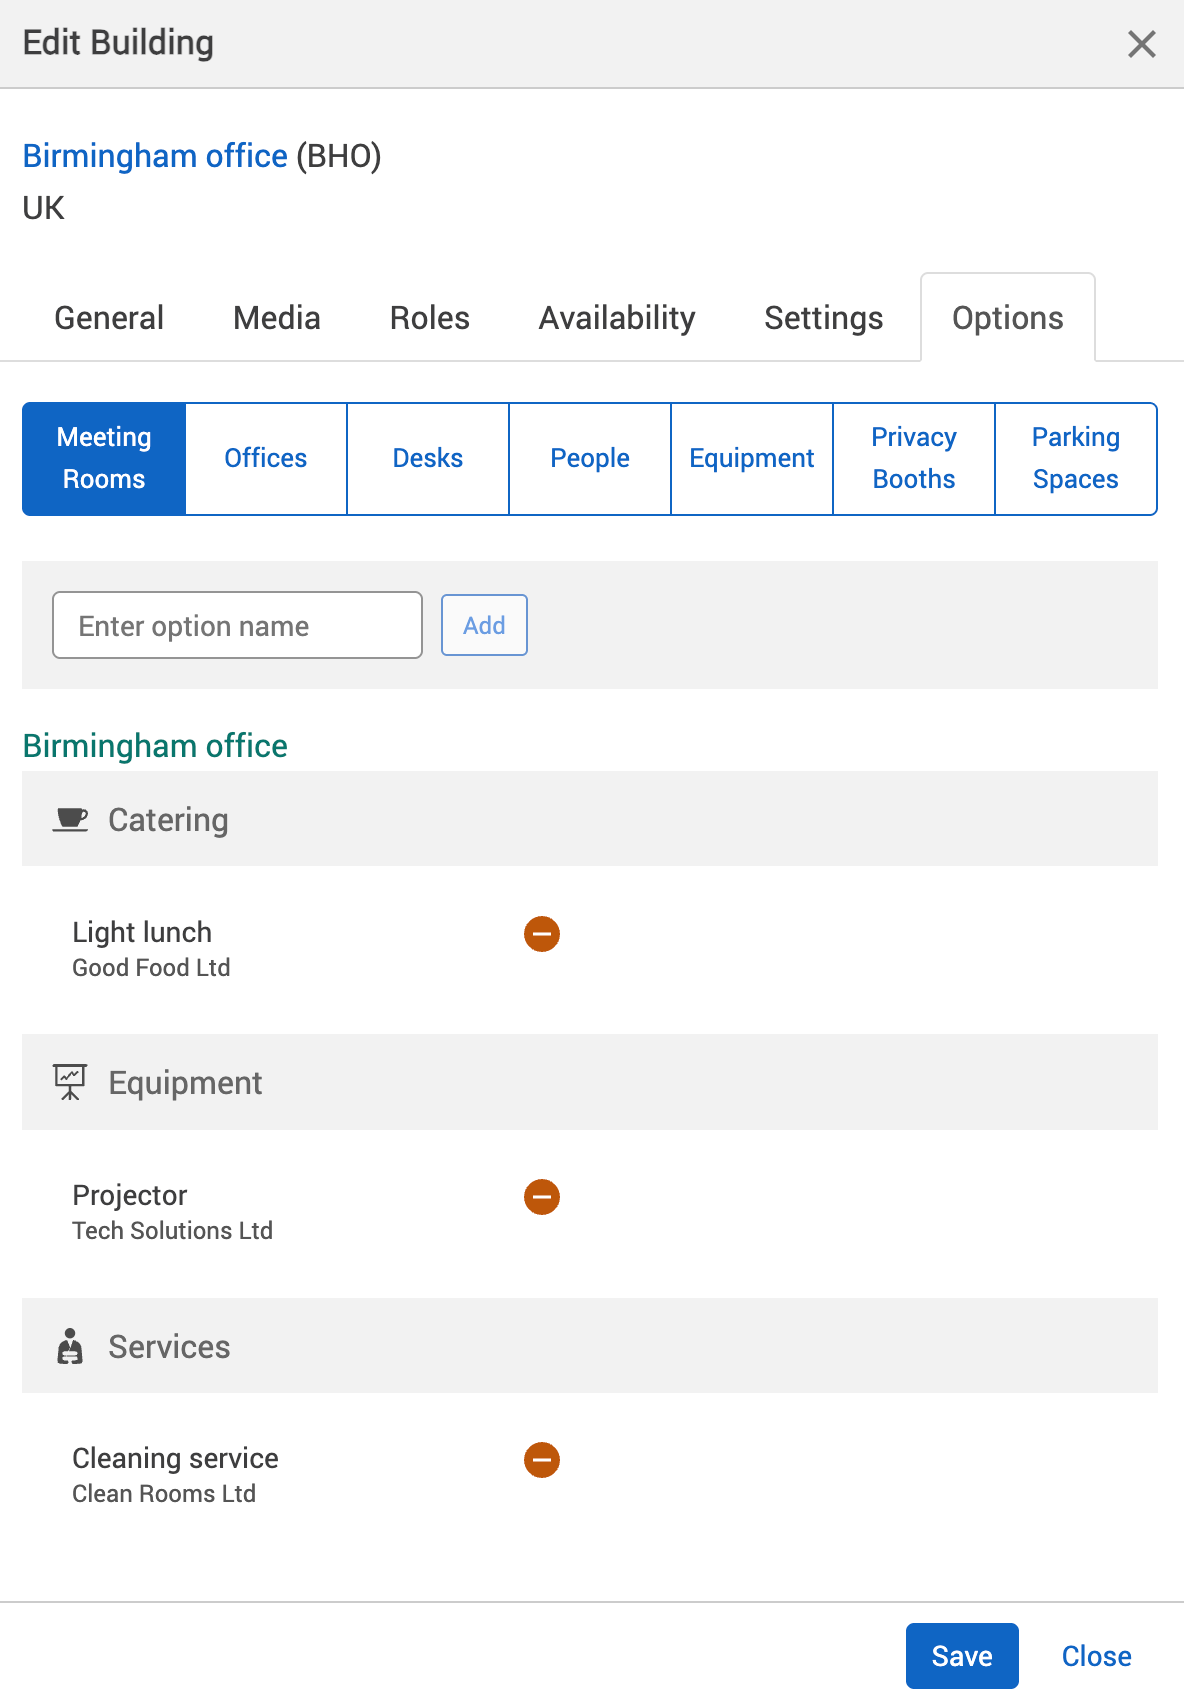
Assign booking options to locations or resources
To select a booking option when you’re making a booking, you need to first assign the booking option to your resource or the location above it. To add a booking option to a resource or location:
-
Select Admin in the navigation bar.
-
Select Locations and resources under the Location Settings section in the side menu.
-
Select Edit hierarchy. The Locations and resources hierarchy will appear.
-
Select Edit next to the location or resource you want to change. The Edit [Location or Resource] dialog will appear with the General tab selected by default.
-
Select the Options tab.
-
Select the correct resource type using the .
-
Begin to enter the option name into the Enter option name text box. A dropdown will appear.
-
Select the option you want from the dropdown. This will auto-populate the text box with your booking option.
-
Select Add.
-
To add more booking options,
-
To remove a booking option, select the – Remove button next to that booking option.
-
Select either of the following and the dialog will close to return you to the Locations and resources hierarchy:
-
Save to keep your changes.
-
Close to discard your changes.
-
-
Select Save changes.
Notes:
-
You need to have created booking options in the Booking options screen before adding an option this way. To create new options (for example, a new type of catering), see Booking options.
-
We recommend that you assign a booking option to a higher level in the hierarchy (for example, at the building level) so that the lower levels in the hierarchy (for example, meeting rooms) inherit the booking option.
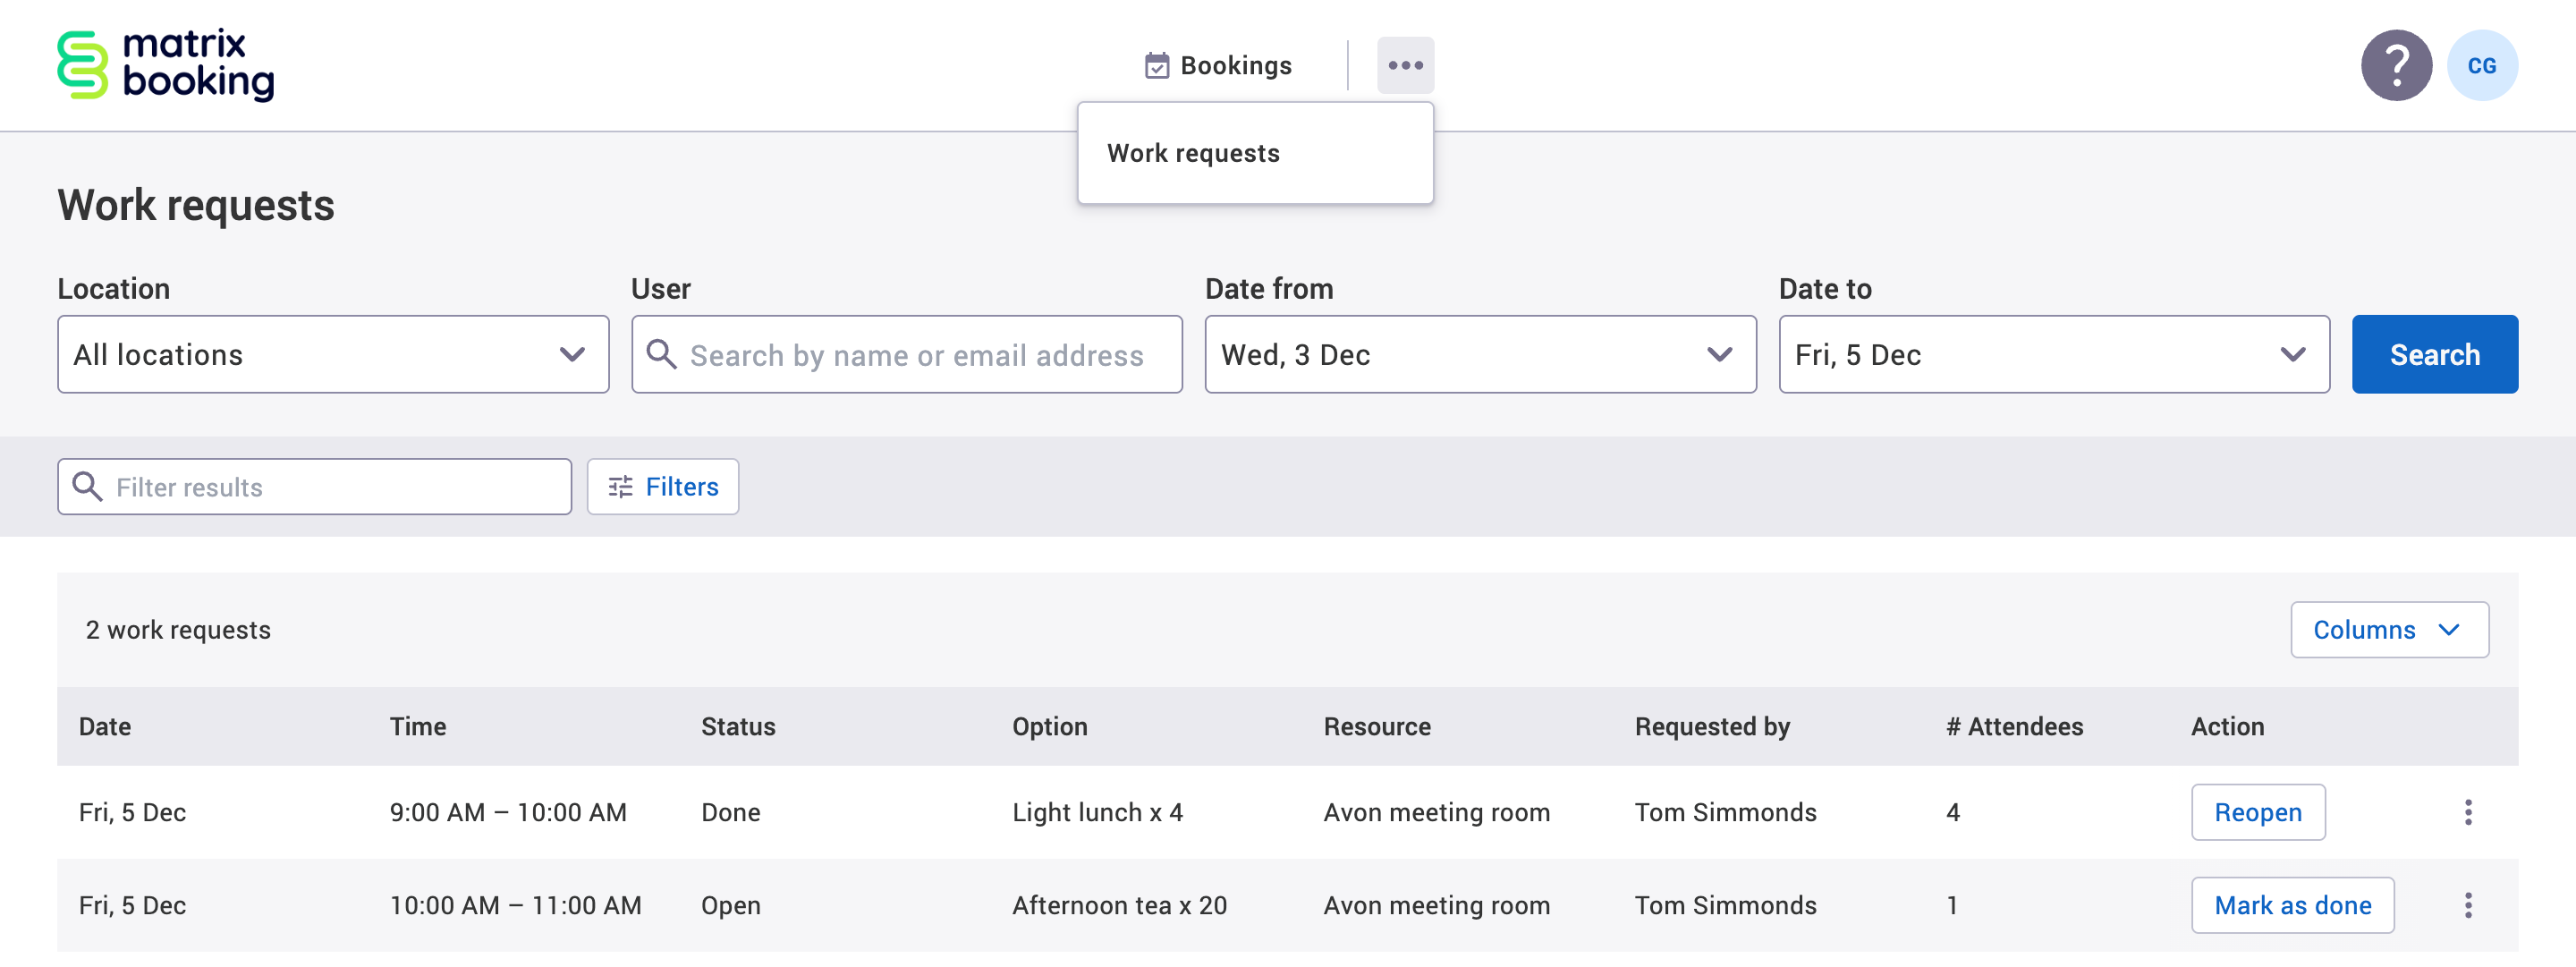
View the option requests
If you’re a provider, you will be taken to the Work requests tab in the Bookings screen, which is all you’ll be able to see.
If you’re an administrator, you’ll have access to this tab too. All requests can be marked as Done or Reopened to track if the delivery or request has been made.
Remove assigned booking options from locations or resources
Once a booking option has been used in a previous booking, it becomes a part of the booking’s history. When that happens, you won’t be able to delete it from the Booking options screen.
We don’t recommend editing a booking option as this will affect historical booking data. Instead, we recommend that you remove the booking option from the location or resource that it’s been assigned to. That way, the booking histories are accurately maintained, it reduces the number of booking options to a manageable list, and stops users from selecting a booking option that’s no longer available in your organisation.
To remove a booking option from a location or resource, .