Event management redesign
If you haven’t already, you’ll need to switch basket bookings back on in the Preferences screen following the launch of the redesigned Matrix Booking.
This page explains how to make and manage events in Matrix Booking:
Introduction
Matrix Booking allows you to now create and manage events. An event is a collection of bookings. For example, 5 rooms and 15 car parking spaces could all be booked in one go. This would be classed as an event meaning you would be allowed to edit and manage all those bookings at once rather than individually.
Switch on basket bookings
To use basket bookings, you need to get this functionality switched on for your organisation and your users:
-
Contact your customer success manager and ask for “basket bookings” and “event management” to be switched on.
-
After receiving confirmation that these have been switched on, log in to Matrix Booking.
-
Selecting your initials in the top-right corner of the navigation bar. A dropdown will appear.
-
Select Preferences. The Preferences screen will appear.
-
Select the Allow resources to be added to a basket for booking together as a group checkbox.
-
Select Save changes.
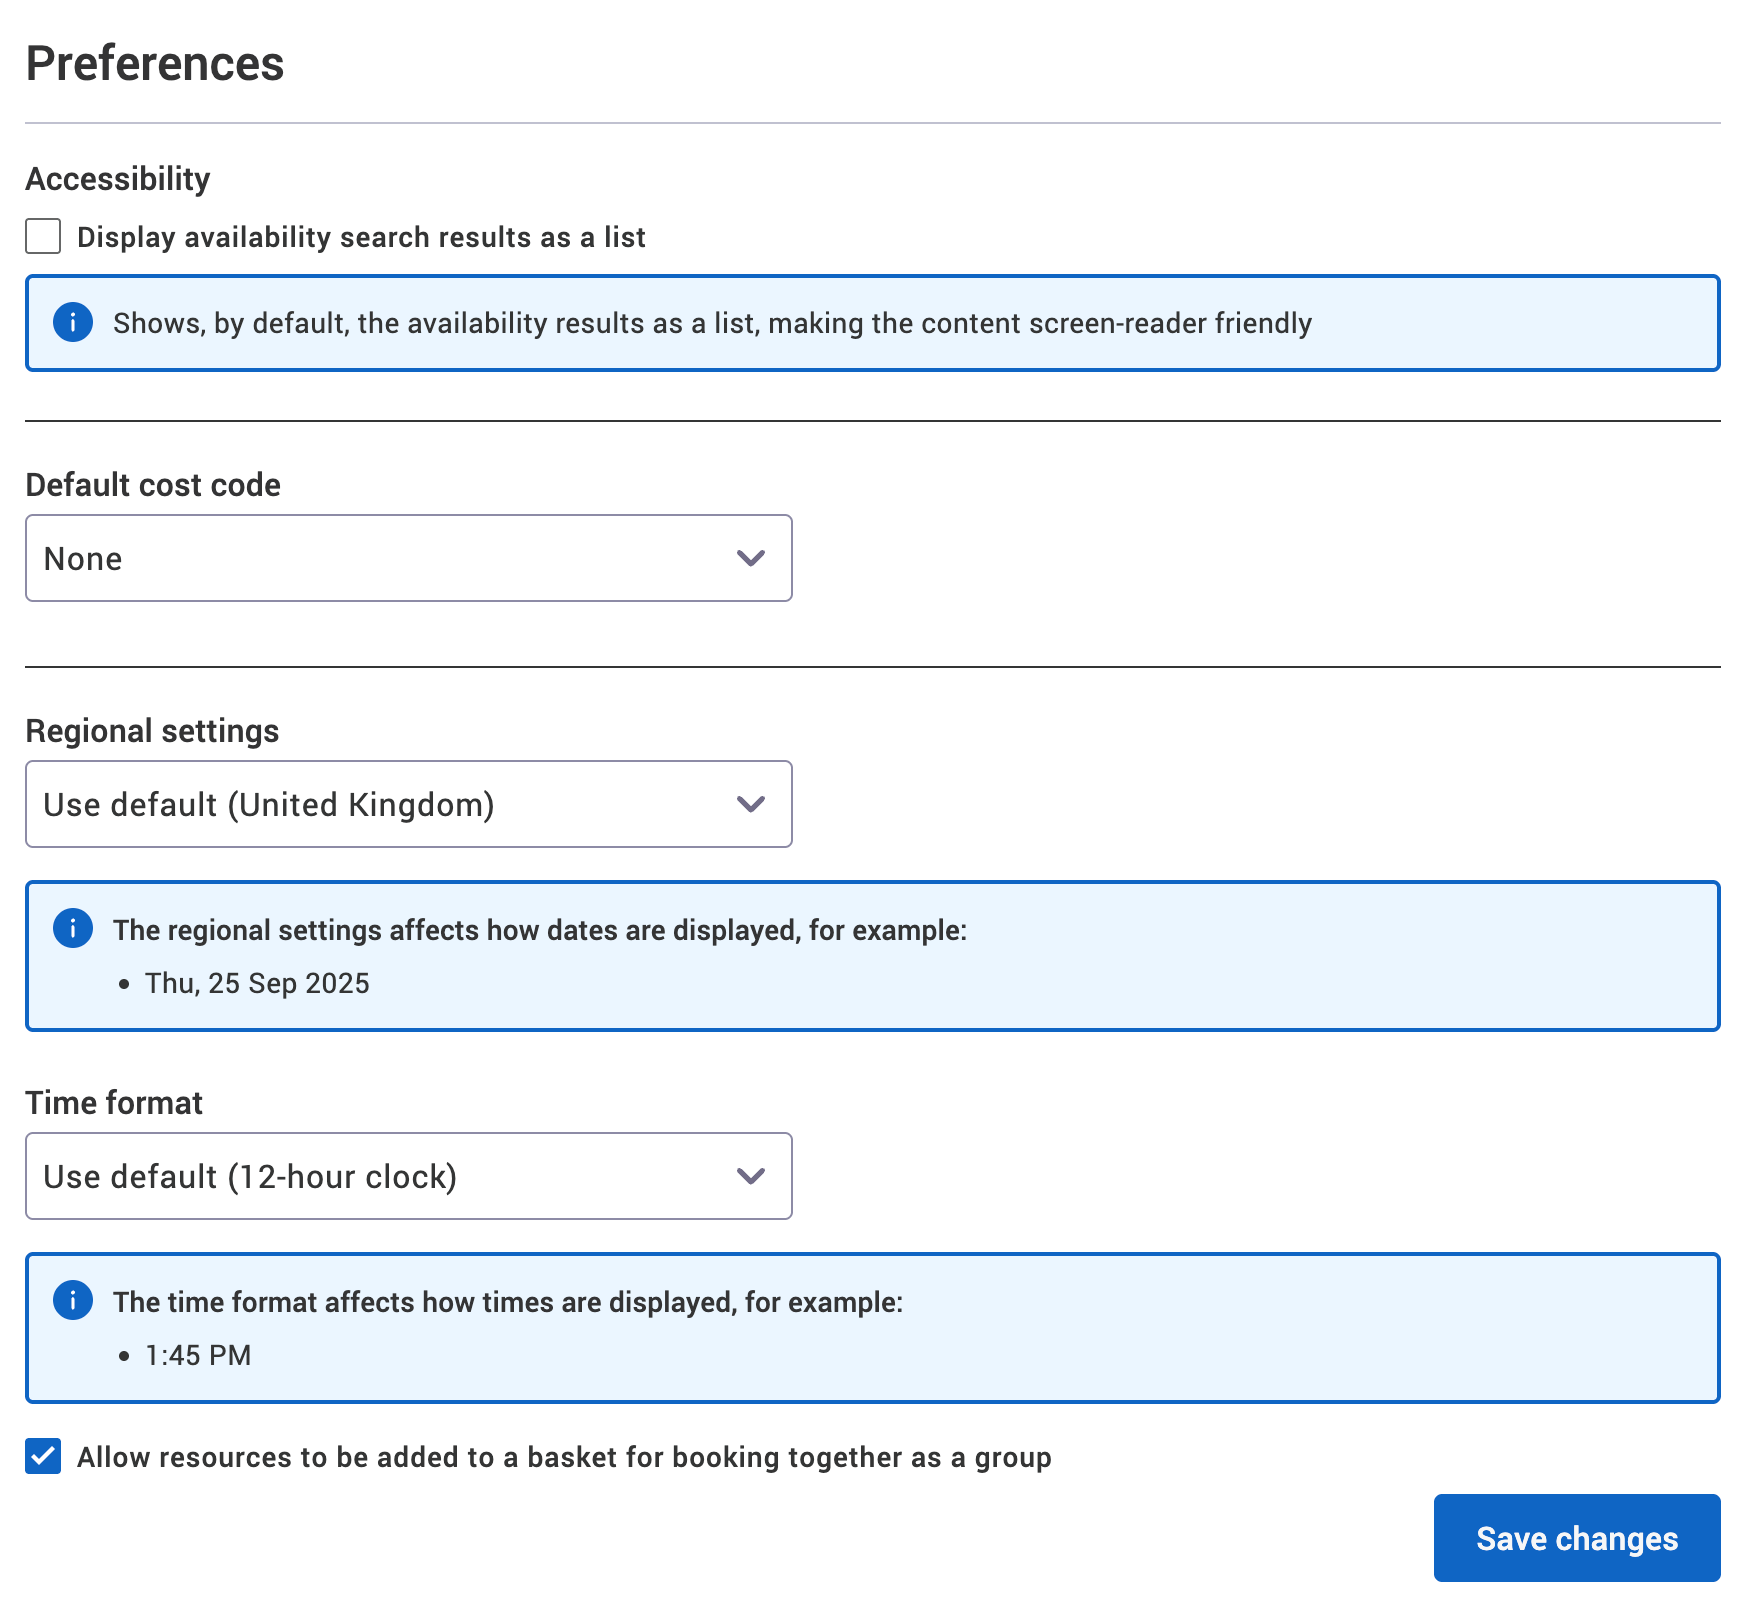
Tip: it’s useful to have the Display availability search results as a list checkbox ticked as you can only access the basket bookings or event management windows in the List as view screen.
Create a basket booking
To create a basket booking:
-
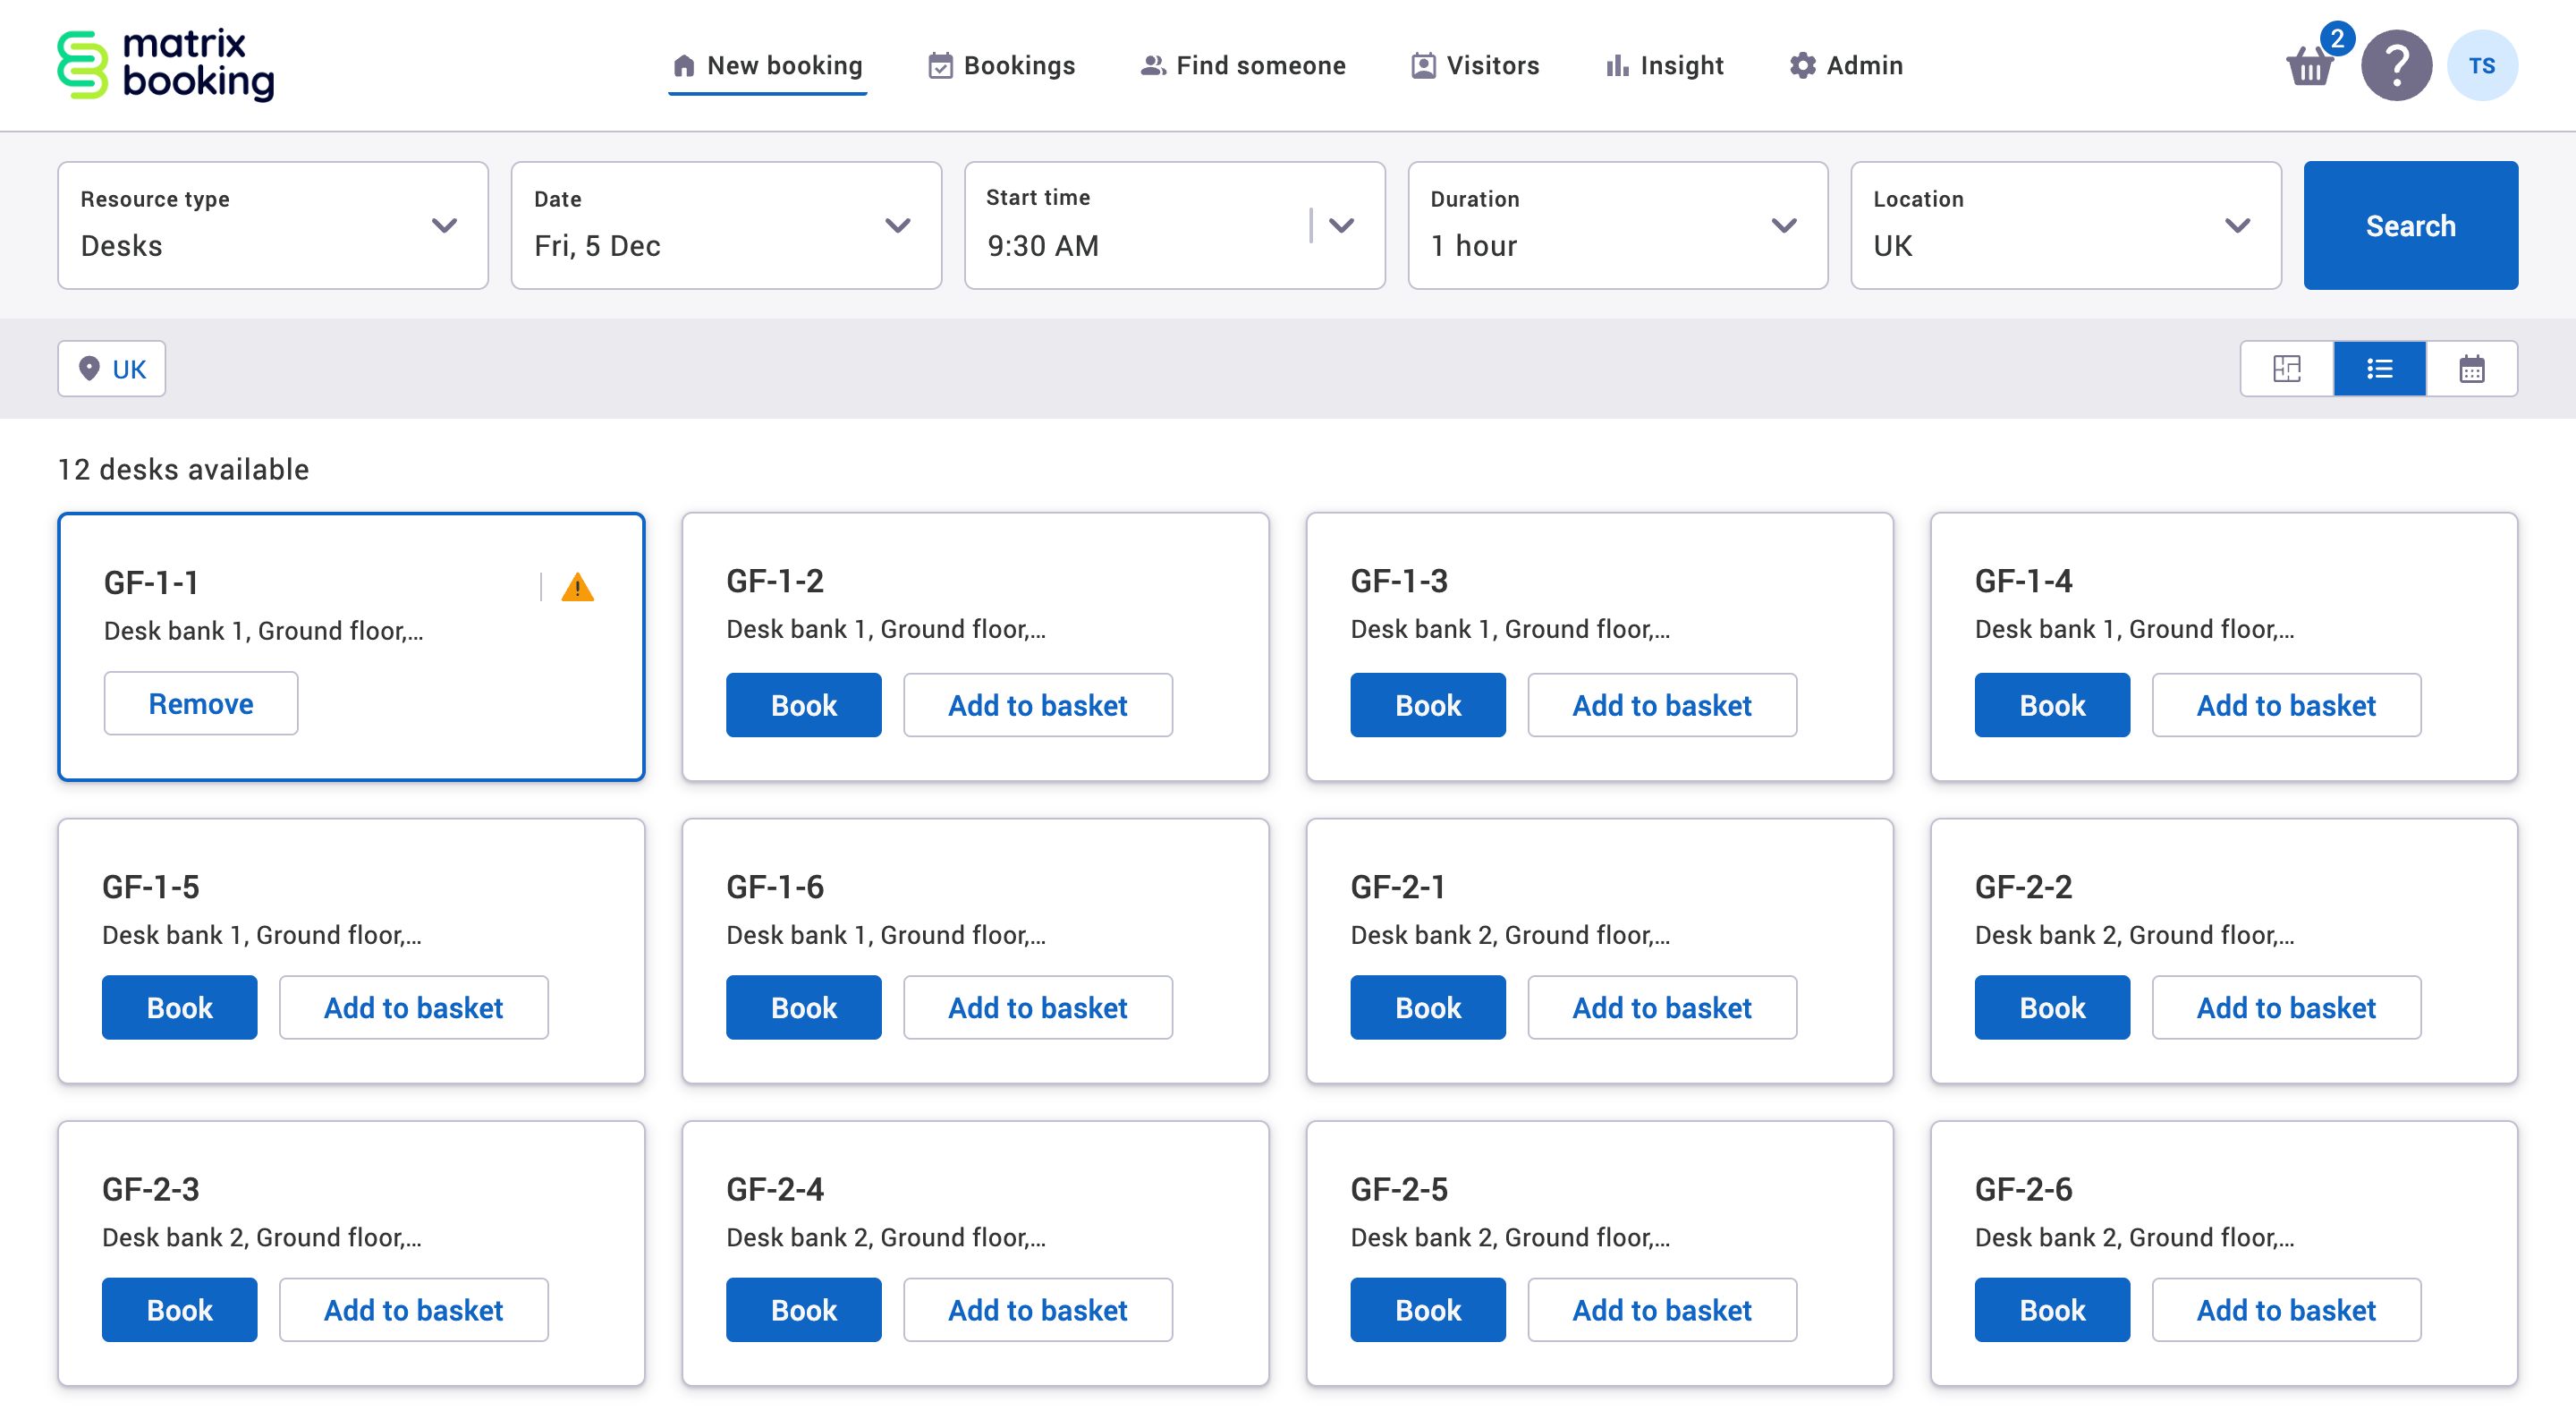
Select New booking in the navigation bar.
-
Search for the resource type you want to book with the date and start time you want to.
-
If not already selected, select List view.
-
Select Add to basket next to the resources you want to book. A basket button with the number of resources selected will appear in the navigation bar.
-
If different resource types, dates, or start times are needed:
-
Search for other resource types if you want different resources and select Add to basket again next to the resources you want to book.
-
Search for the resources again with different dates and start times.
-
Or both.
-
-
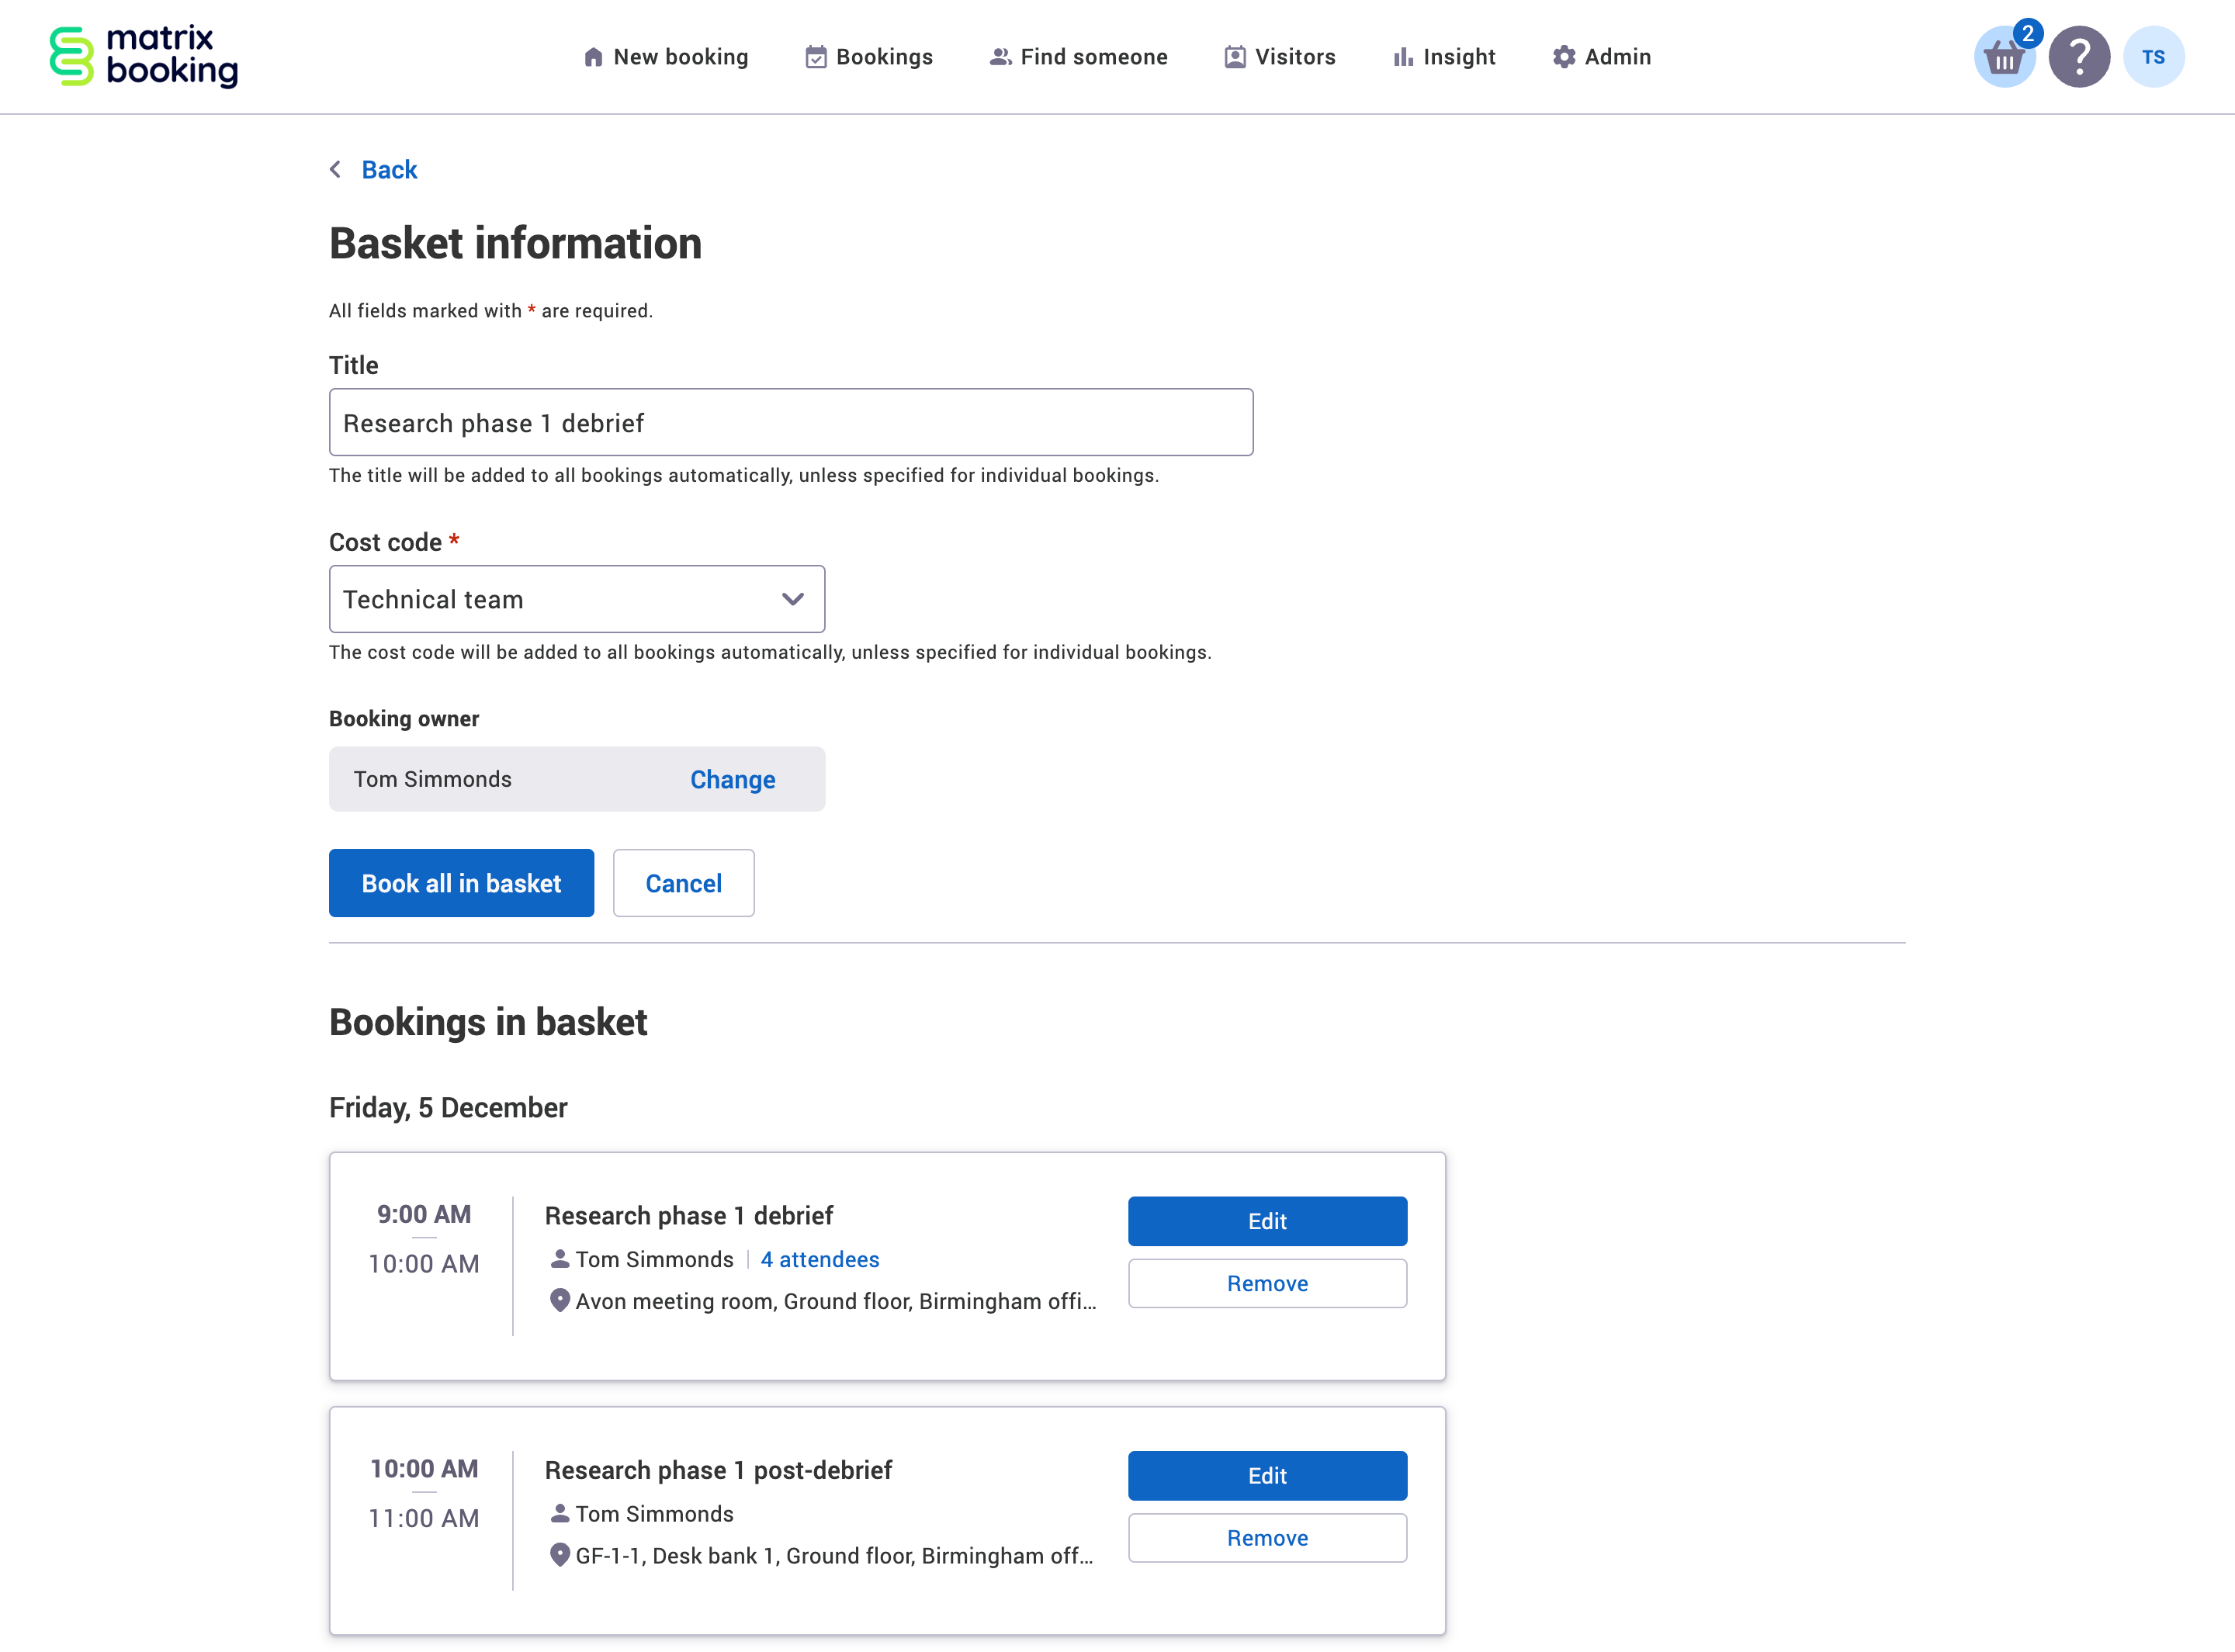
Select the basket button. The Basket information screen will appear.
-
Enter the details of the event:
-
Enter the title of the event in the Title text box.
-
Enter the cost code.
-
Change the booking owner if needed.
-
-
If you need to, edit each booking in your basket.
-
Select Book all in basket.
Notes:
-
You must have the basket and event management functionality and the basket booking switched on.
-
You must be in the List view to book events. This functionality doesn’t work in the Floor plan view, Calendar view, or Schedule view.
-
Basket bookings aren’t supported for resources with our Microsoft 365 integration.
Event bookings tab
As a location manager, location administrator, and administrator, event management can be accessed in the Event bookings tab of the Bookings screen. You can:
-
Edit the event title.
-
Edit, approve, check in to, reassign, reject, or cancel the individual bookings that make up an event.
-
Bulk reassign bookings of an event (just like the All bookings tab).
-
Bulk cancel bookings of an event (just like the All bookings tab).
-
Change views between Table and List views.
-
Cancel an event (including all its bookings) with one action.

❮ Back
Contact and directory management