As a location manager, location administrator, or administrator you can edit your own Locations and resources hierarchy, so you can add and remove your own floors, rooms, desks, and more. This page explains how to edit the Locations and resources hierarchy of your organisation in Matrix Booking:
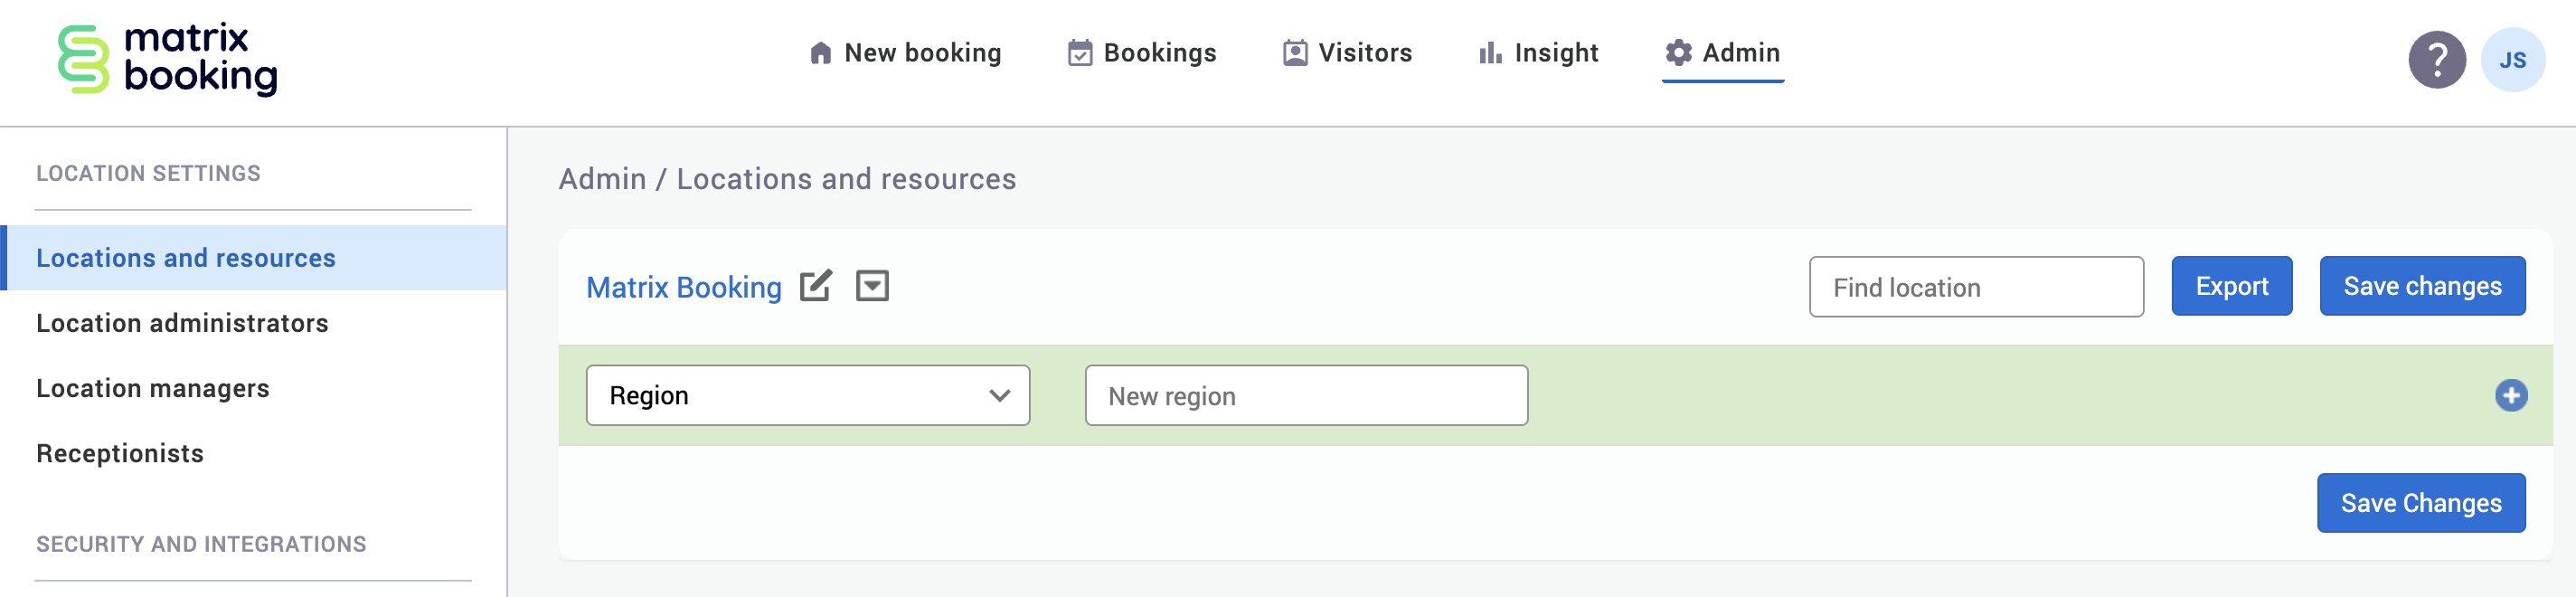
Access the Locations and resources screen
-
Select Admin in the navigation bar.
-
Select Locations and resources under the Location Settings section in the side menu.
-
Select Edit hierarchy. The Locations and resources hierarchy will appear.
View the different hierarchy levels
There are 2 options next to each line of the Locations and resources hierarchy:

|

|
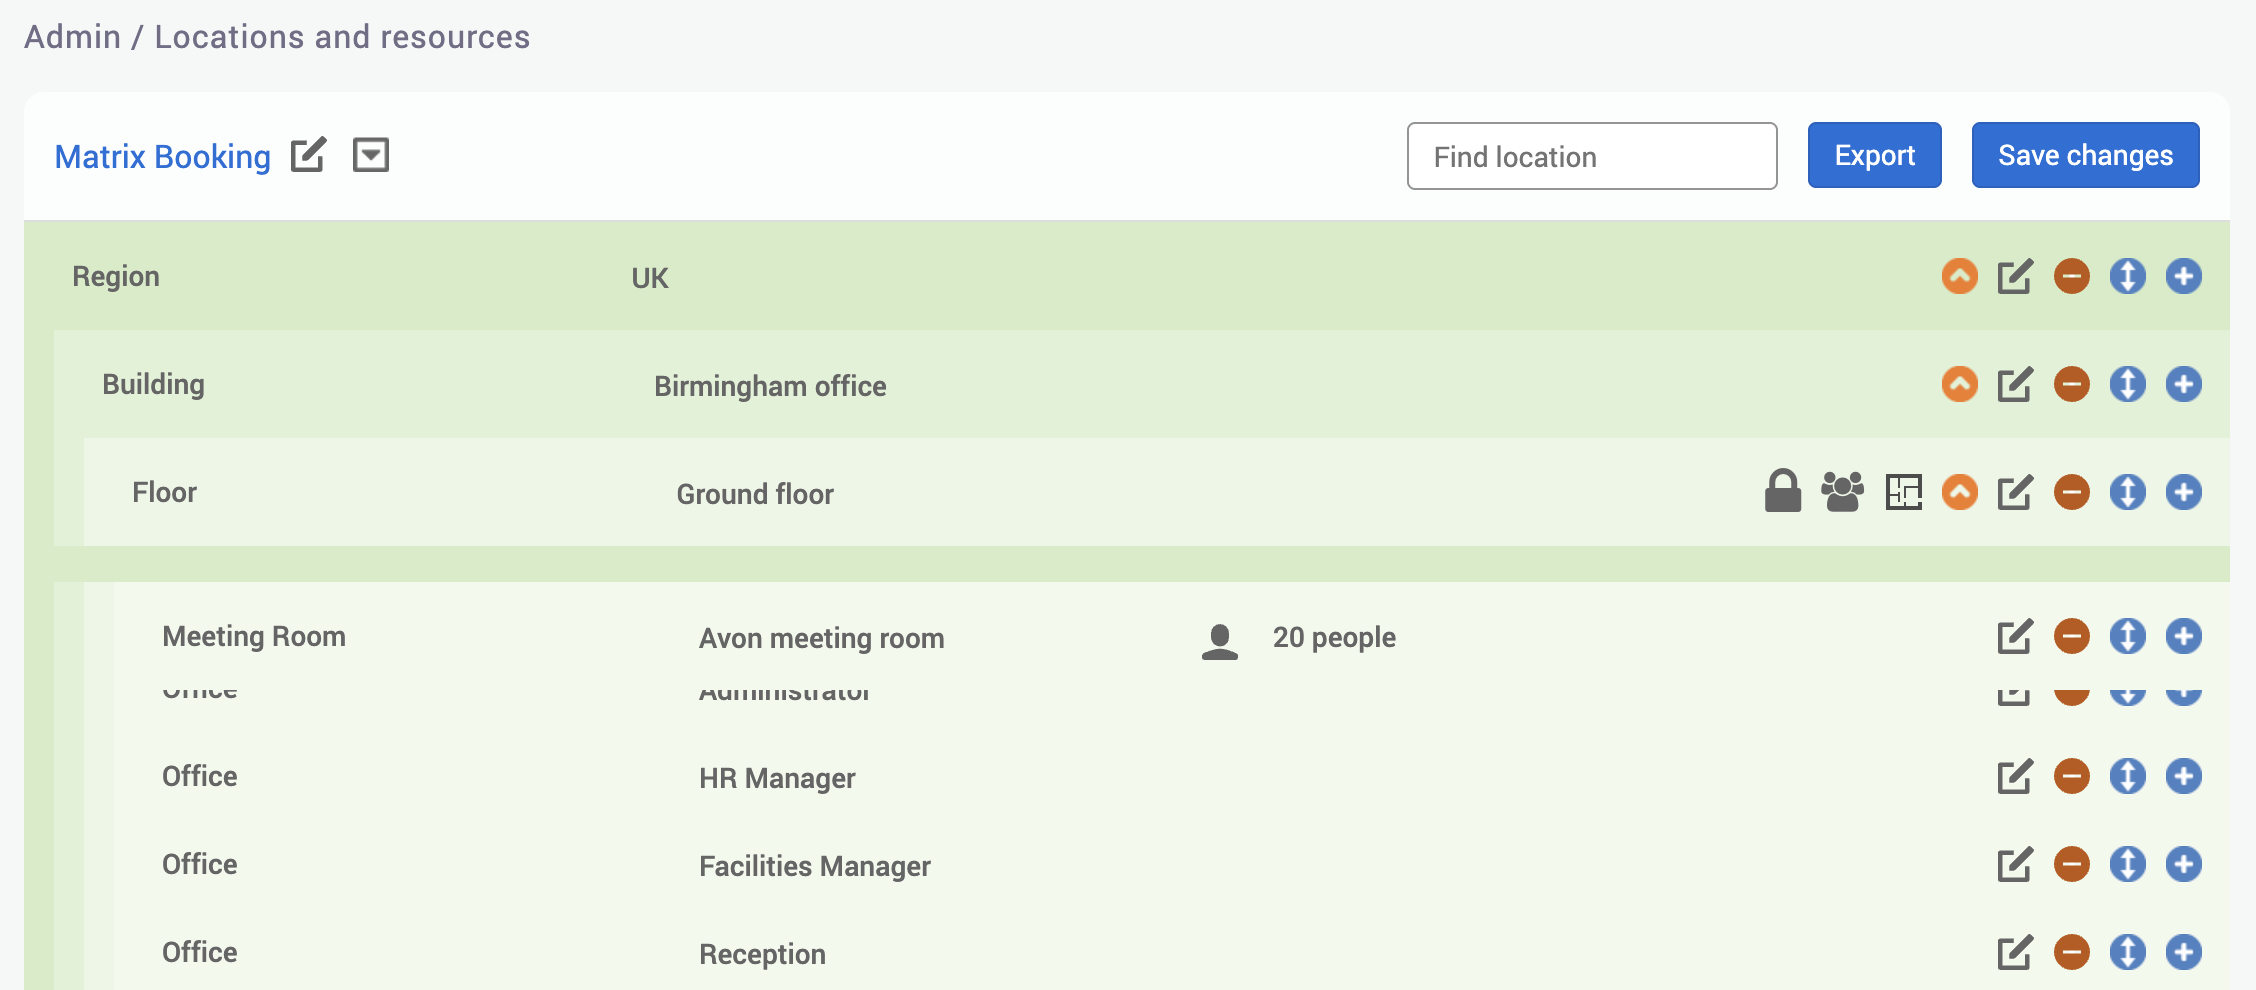
If you select the Focus button of a selected level in your hierarchy (for example, a desk bank), it will expand to reveal all the layers of your hierarchy below it (for example, the second floor was selected, so only the zones and resources of that floor will be shown in detail). Use this option to edit any of the settings for any of the lower-level items (for example, making 1 room only available Monday to Friday).
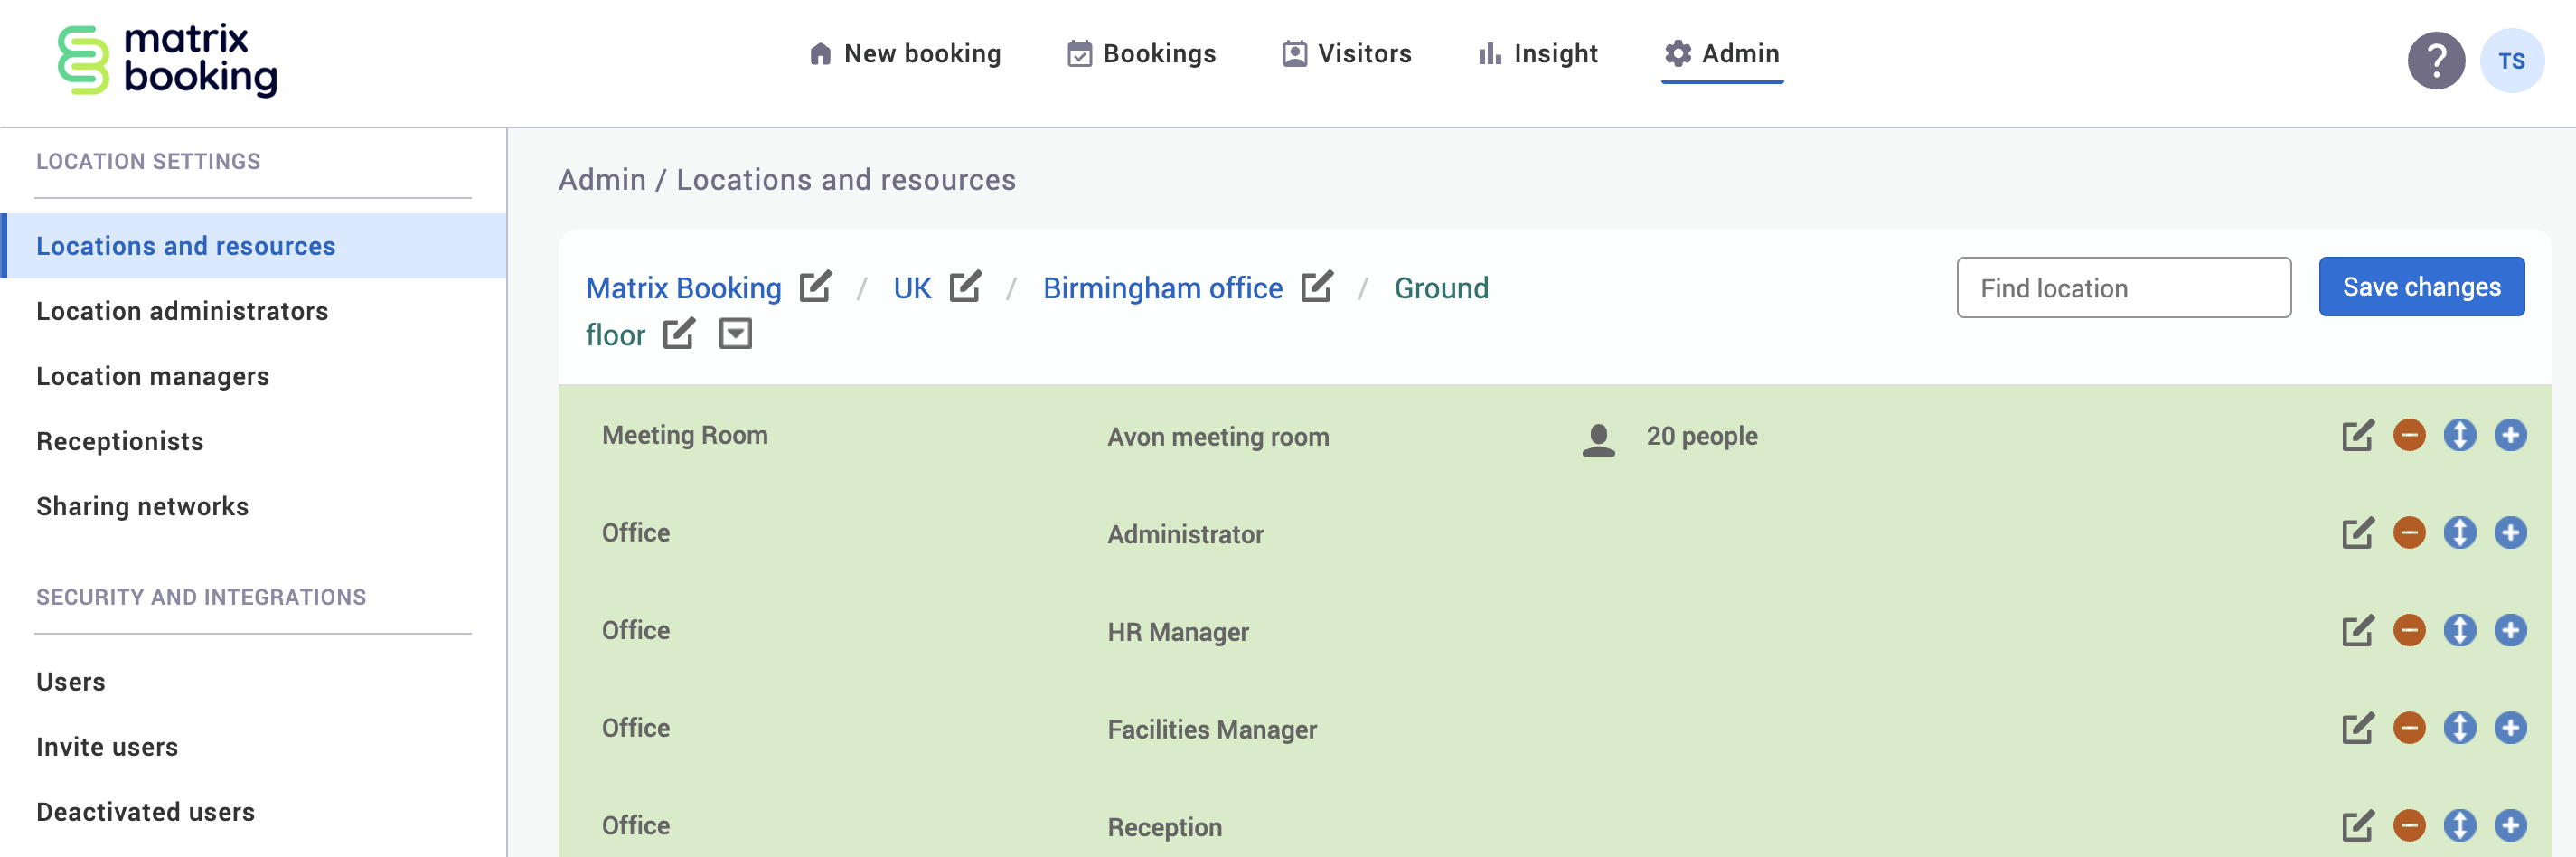
Above your hierarchy list, the flow of the levels you’ve bypassed to get to the floor you want to focus in on will be displayed:
-
Organisation.
-
Region.
-
Site.
-
Building.
-
Floor.
The expanded hierarchy lets you see all the resources within that building. It can also show you whether things have been added to any locations or resources, like floor plans with floor plan icon.
You can change the settings for every individual resource within the list by selecting Edit. If you select Edit, the Edit Location dialogue box will appear. You can edit the settings for that entire level, from its address to the time zone it operates in. Everything below the level you select in that location hierarchy (for example, floor was selected, so zones and resources of that floor) will inherit the changes you make.
Add a location or resource
To add a location or resource within your organisation:
-
Go to where you want to add the location or resource (for example, a floor in a building).
-
Select + Add.
-
Select the booking category you want from the Booking category dropdown.
-
Enter the name of location or resource in the text box.
-
If it’s a resource with a capacity (for example, a room), select the capacity of the resource from the Capacity dropdown.
-
To remove a resource, select – Delete.
-
Select Save changes.

This will bring up a new resource on the line below. By default, it will be the same resource type (for example, if selected the + Add on a room, a new room will be created.
By default, “New meeting room” in a faint grey font will be written in the middle text box. Enter in this text box with your new room name and select the capacity from the dropdown.
When you start to enter the room name, you’ll see that another resource is automatically created on the line below. This is to speed up the process of entering multiple resources. If the additional row isn’t needed, select – Delete next to it.
Change the resource type
When adding a new resource using the above process, you can change the resource type from the dropdown. You can add any of the resources in the list so long as they are supported by your setup. You can also use this process to add new floors and new zones.
Move your locations and resources using the process below. When doing this, resources are set at different levels, so if you try to change a desk to a floor, it will move out to the left to indicate it’s now at a higher level in the hierarchy.
Note: whilst it’s fine to change resources, it’s often better to add new resources and archive or delete the old ones if in any doubt about your hierarchy levels.
Move a location or resource
In addition to adding and removing resources, it’s possible to move a resource or location to another position in the Locations and resources hierarchy. To ask for this feature to be switched on, raise a support ticket.
To move a location or resource:
-
Locate the location or resource within your hierarchy you want to move.
-
Select and hold anywhere on the pale green area of that location or resource.
-
Drag-and-drop it on the part of your hierarchy where you want it.
-
Select Save changes.
Note: any changes you make won’t go live until you select Save changes. If you release it too soon or release it in the wrong area, don’t select Save changes, but refresh your screen and your unwanted change will discarded.
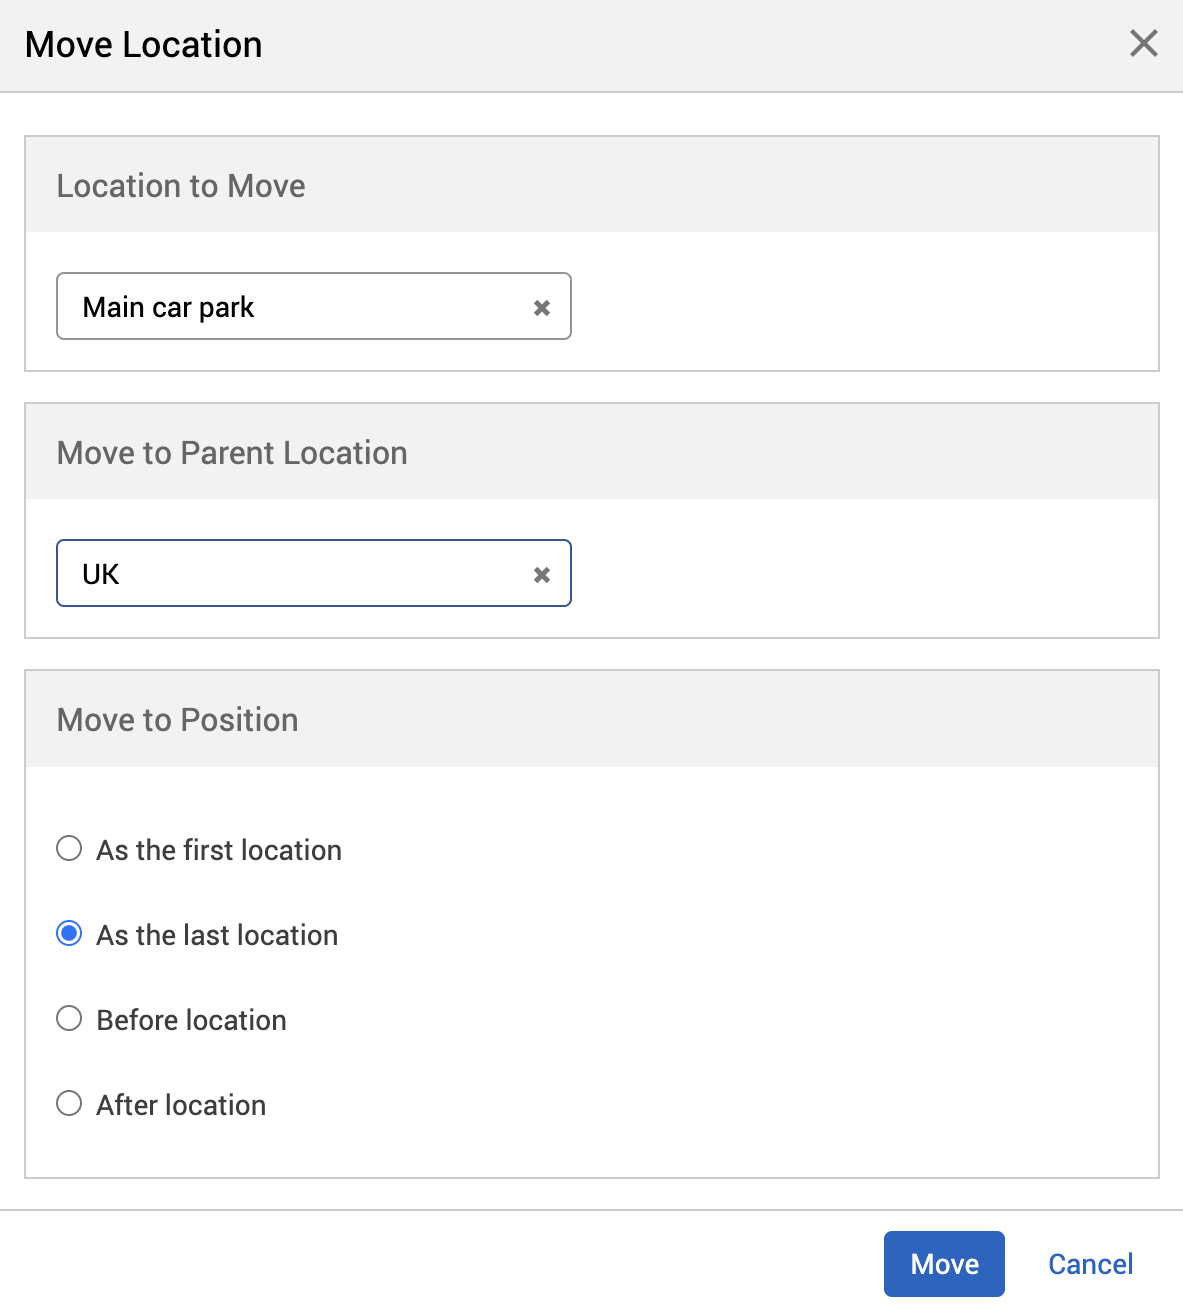
Another way to move a location or resource is to:
-
Select the Move button next to the location or resource you want to move. The Move Location or Move Resource dialog will appear.

-
Begin to enter the name of the location that your location or resource will sit under in your hierarchy into the Find parent text box. The Parent Location dropdown will appear.
-
Select the Parent Location you want from the Parent Location dropdown.
-
In the Move to Position section, you can choose where you want your location or resource to sit specifically in your hierarchy. Select either:
-
As the first location
-
As the last location
-
Before location
-
After location
-
-
Select Move. This will take you back to the focussed view of the Parent Location.
-
Select Save changes.
Notes:
-
Make sure that your hierarchy is still correct when moving locations or resources (for example, you can move a floor into a building, but a building can’t be moved into a floor).
-
You can move any resource or location that sits outside a building into that building or move them from 1 building to another.
Delete a location or resource
There are 2 different ways to delete a location or resource depending on whether the location or resource has any previous or future bookings.
To delete a location or a resource that doesn’t have a booking history or future bookings:
-
Select Admin in the navigation bar.
-
Select Locations and resources under the Location Settings section in the side menu.
-
Select Edit hierarchy. The Locations and resources hierarchy will appear.
-
Select – Delete next to the location or resource you want to delete.
-
Select Save changes.
However, if you delete a resource that has a booking history, it will also be deleted. Therefore, rather than deleting the resource, we recommend that you move the resource to a hidden building or location that acts as an archive area. This is useful if you wish to hide the resource, but keep the historical booking data for your reports.
If there are bookings (either historic or future), Matrix Booking will allow you to delete up to 10 resources at a time. This is so that you can delete resources at pace without accidentally deleting a resource you shouldn’t.
To delete a resource that has a booking history:
-
Select – Delete next to the location or resource you want to delete.
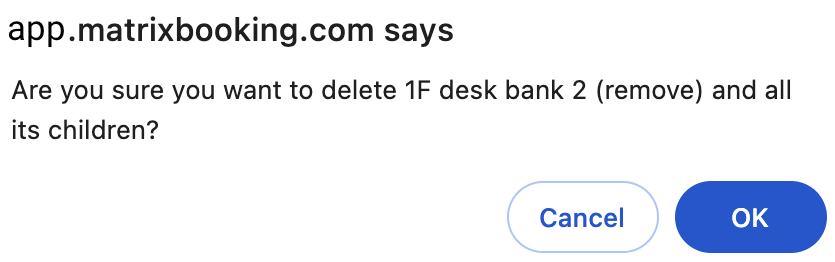
-
Depending on which level in your hierarchy you selected – Delete, the Delete location or Delete resource dialog will appear. In this example, we selected the location above the resource with the booking history.
-
If you want to delete the location, it’s resources, and their associated booking histories, select OK.
-
If you don’t, select Cancel.
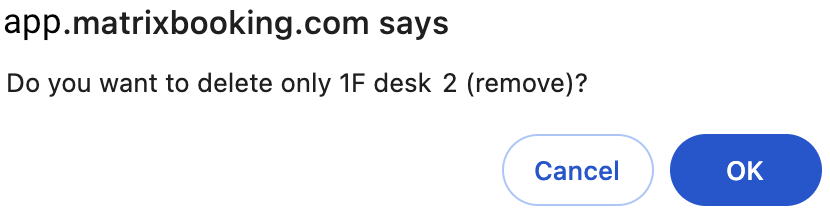
-
If you selected to delete a location, but then selected Cancel on the dialog, the Delete resource dialog will appear. The resource stated in the dialog will be the resource with the booking history.
-
If you want to delete the resource and its associated booking histories, select OK.
-
If you don’t, select Cancel.
-
Select Save changes.
Warning: if you exit without saving, any changes made in that session will be lost.
Next ❯
Location and resource settings