Reception sharing is where an organisation can share their reception with another organisation. Two terms used throughout the page are:
-
Sharer organisation – the organisation sharing the reception.
-
Sharee organisation – the organisation that can access the shared reception of another organisation.
This feature is especially useful where 2 or more organisations are sharing the same location or building and wish to use the same space to accept staff and visitors:
Create a reception
We recommend that you set your reception up at the building level and have 1 reception per building. You should see the building name appear below that as a dedicated reception. This will allow you to specify this building as a location for your visitors to arrive at.
To create a reception:
-
Select Admin in the navigation bar.
-
Select Locations and resources under the Location Settings section in the side menu.
-
Select Edit hierarchy. The Locations and resources hierarchy will appear.
-
Select Edit next to the location or resource you want to change. The Edit [Location or Resource] dialog will appear with the General tab selected by default.
-
Select the Settings tab.
-
Select the correct resource using the booking category selector.
-
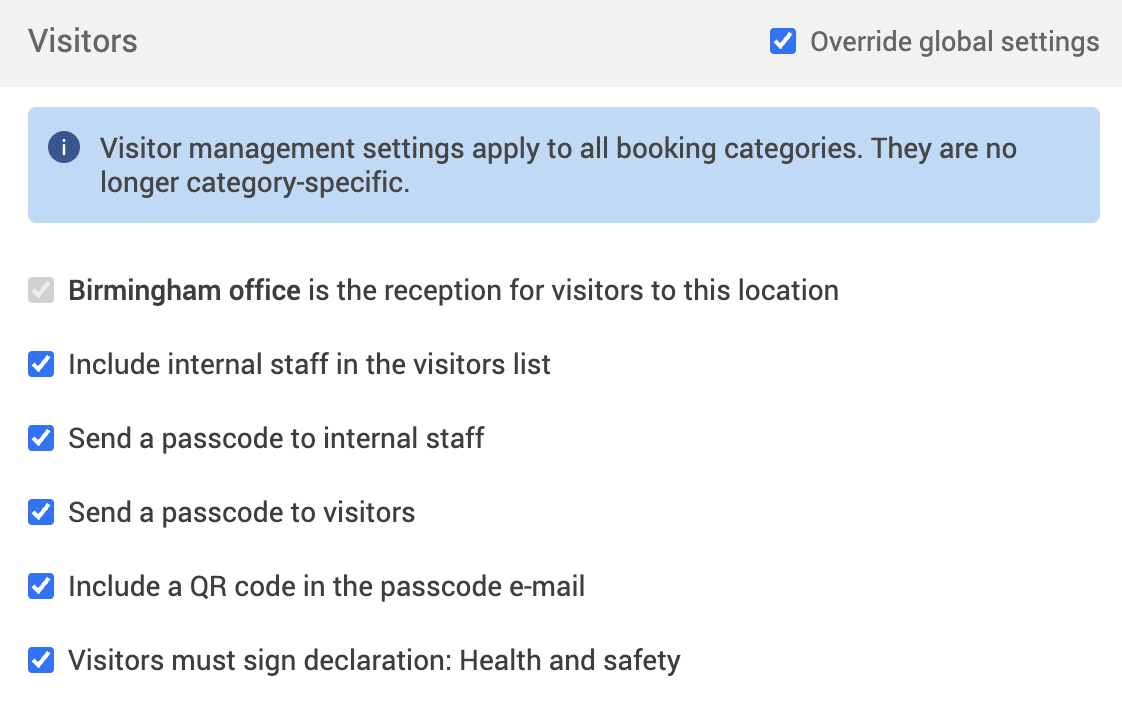
Select the Override global settings or Override [location or resource] checkbox under the Visitors section.
-
Check if any of the checkboxes are greyed out. If they are, this means that these settings are inherited from a higher level in your resource hierarchy. You may have them switched on at that level for a reason.
-
The [Building] is the reception for visitors to this location checkbox will be automatically selected for you.
-
Optional – select any of the following that you want to set up:
-
The Include internal staff in the visitors list checkbox.
-
The Send a passcode to internal staff checkbox.
-
The Send a passcode to visitors checkbox.
-
The Include a QR code in the passcode email checkbox.
-
-
Select either of the following and the dialog will close to return you to the Locations and resources hierarchy:
-
Save to keep your changes.
-
Close to discard your changes.
-
-
Select Save changes.
Share a reception
Shared receptions are for organisations that share the same building or an organisation owns the building and allows other organisations to use their building. To share a reception, both organisations need to contact their customer success managers. They will get this feature switched on for you.
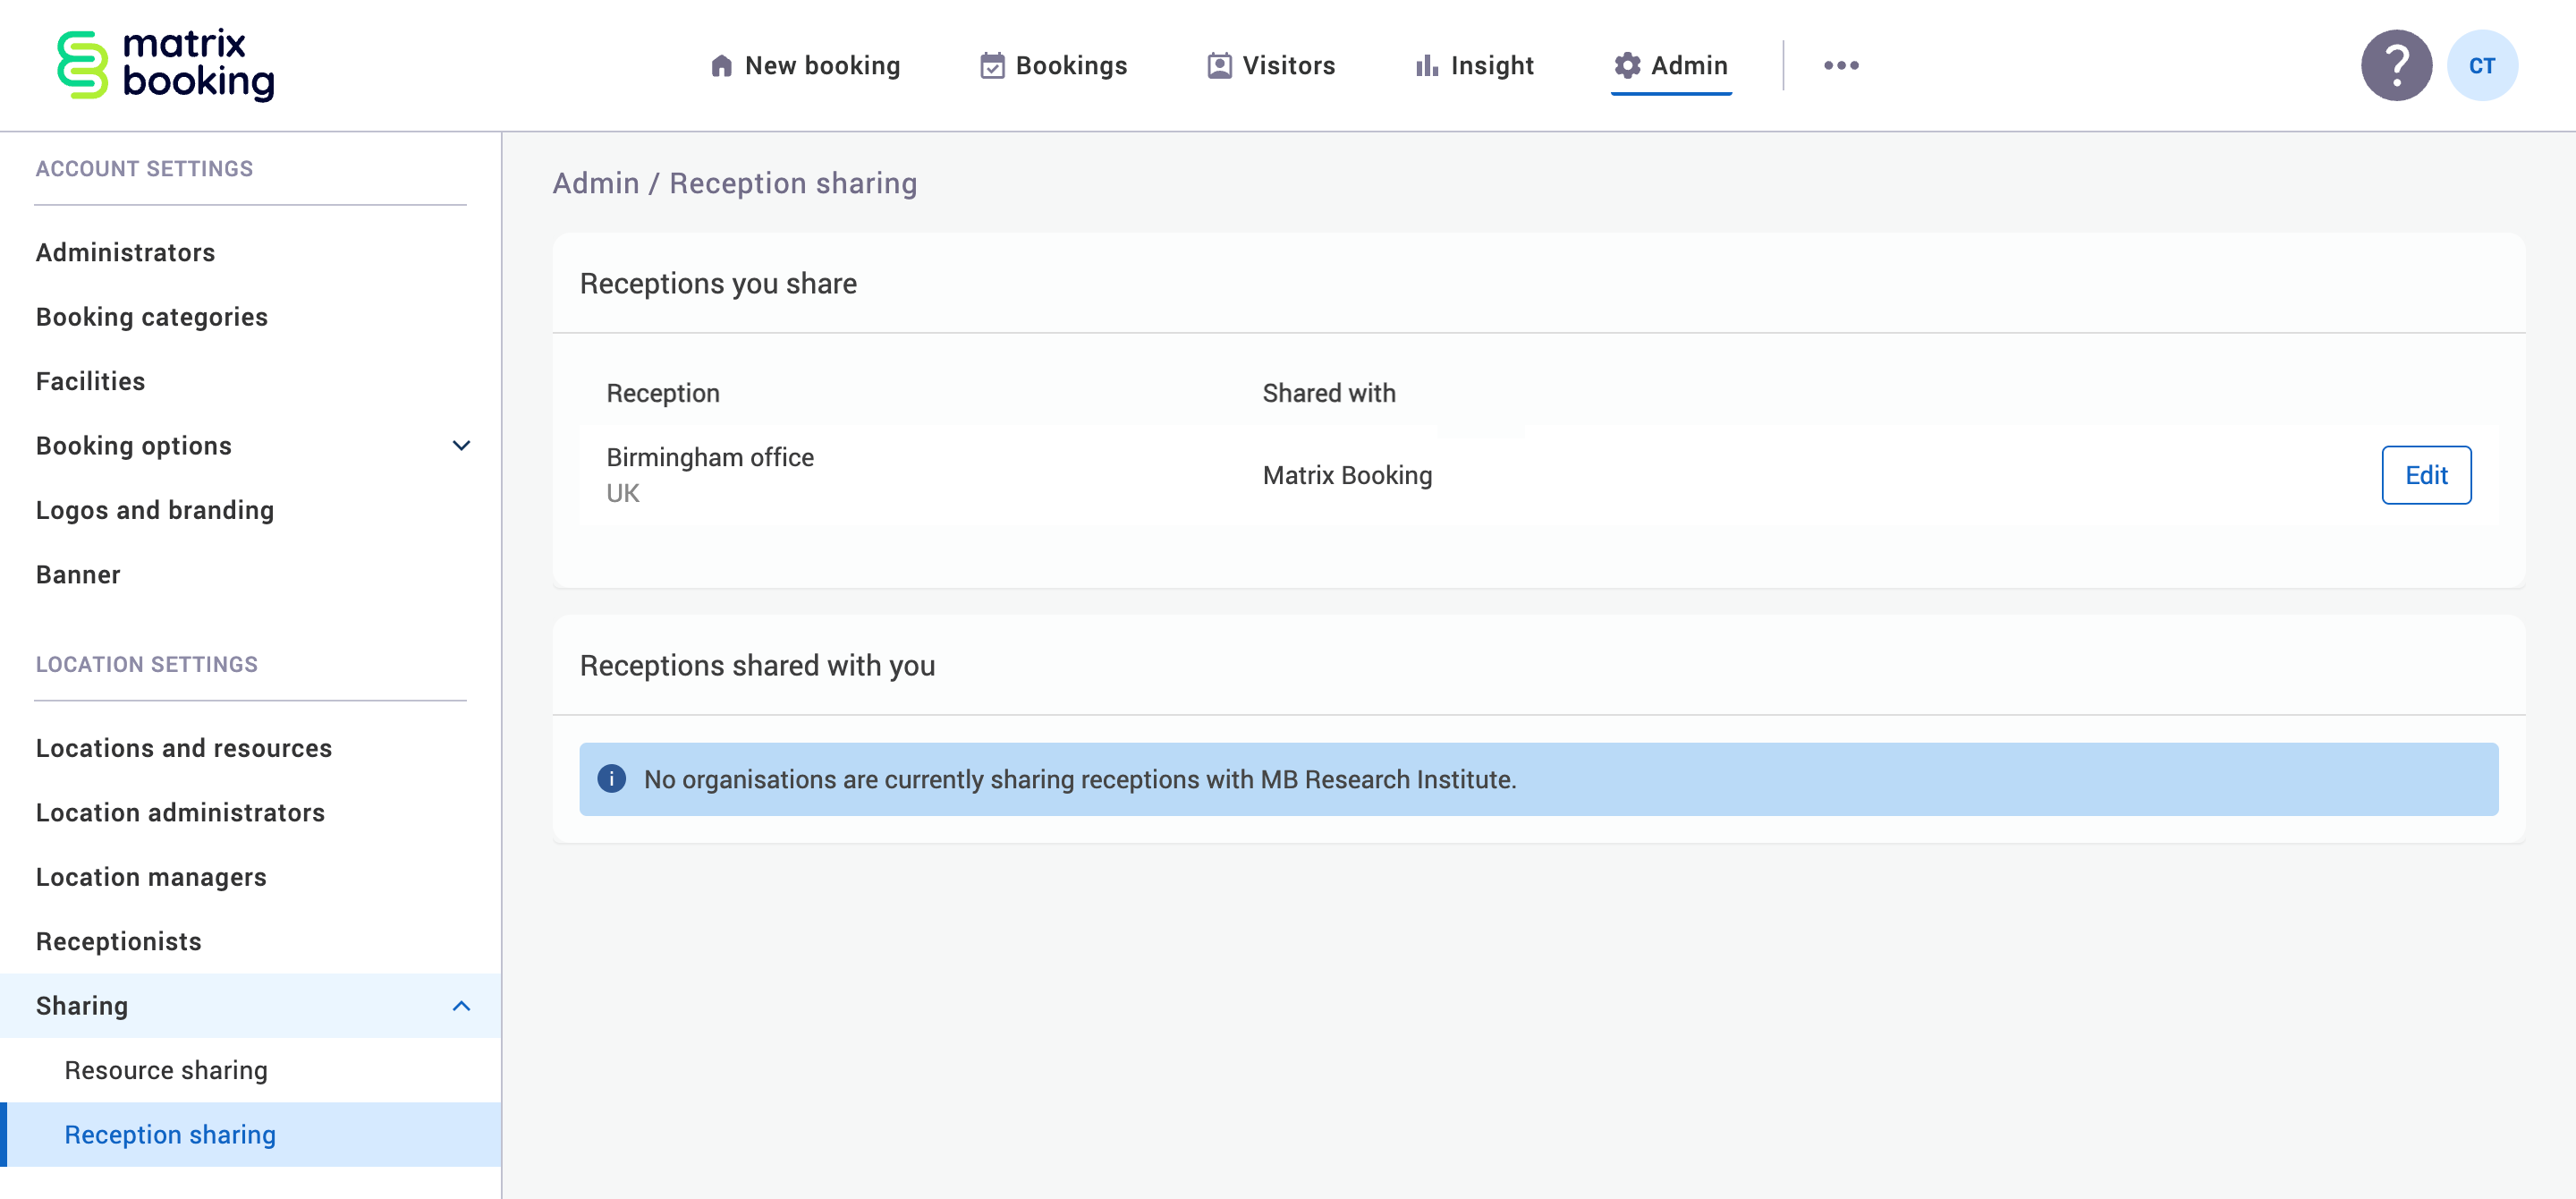
Access the Reception sharing screen
To access the Reception sharing screen:
-
Select Admin in the navigation bar.
-
Select the Sharing dropdown under the Location Settings section in the side menu.
-
Select Reception sharing. The Reception sharing screen will appear.
Map a shared reception
When a sharer organisation shares a reception that’s been set up in their Locations and resources hierarchy, the sharee organisation needs to add their own visitors to a dummy or duplicate reception that’s shared with the sharer organisation. This means that on the Visitors list screen for the sharer organisation, the visits will be separated by the Host organisation filter. For more information, see Shared receptions in the Visitors lists.
Now that your shared reception has been set up, the receptions need to be mapped to represent the same reception within Matrix Booking. As a sharer organisation, to map a shared reception:
-
Select Show unmapped shared receptions to see the receptions that aren’t mapped under the Reception Mapping section.

-
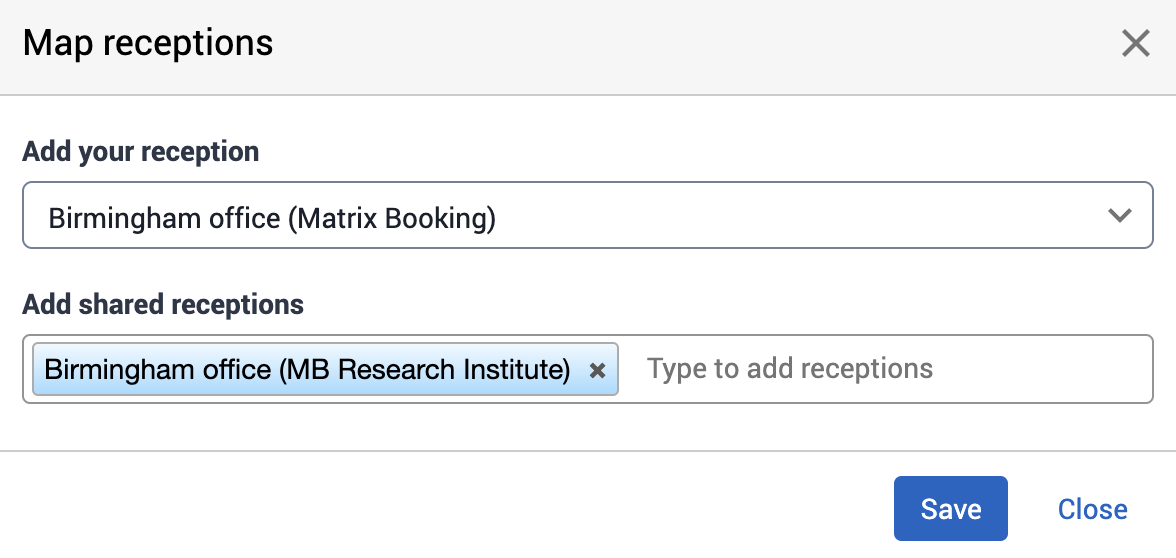
Select Map receptions. The Map receptions dialog will appear.
-
Select the reception in your organisation from the dropdown.
-
Enter the receptions that are being shared by the tenant organisations.
-
Select either of the following and the dialog will close to return you to the Reception sharing screen:
-
Save to keep your changes.
-
Close to discard your changes.
-
Edit a shared reception
To edit a shared reception:
-
Select Edit next to the shared reception you want to change in the Reception Mapping section. The Edit mapping dialog will appear.
-
Make the changes you need to in the Edit mapping dialog.
-
Select either of the following and the dialog will close to return you to the Reception sharing screen:
-
Save to keep your changes.
-
Close to discard your changes.

-
Note: if you make any changes to a shared reception, make sure to let the other organisation know.
Remove a shared reception mapping
To remove a mapped shared reception:
-
Select Remove next to the shared reception you want to remove in the Reception Mapping section. The Remove reception mapping warning dialog will appear.
-
Select Remove.

Notes: if you make any changes to a shared reception, make sure to let the other organisation know.
Remove a shared reception
If either the sharer or sharee organisation removes the mapping for a shared reception, the shared reception will still appear on the Recption sharing screen – it just won’t be sharing the reception anymore.
Both organisations need to contact each other first to agree to removing the shared reception. Afterwards, they need to contact their customer success managers to let them know that the reception is no longer being shared.
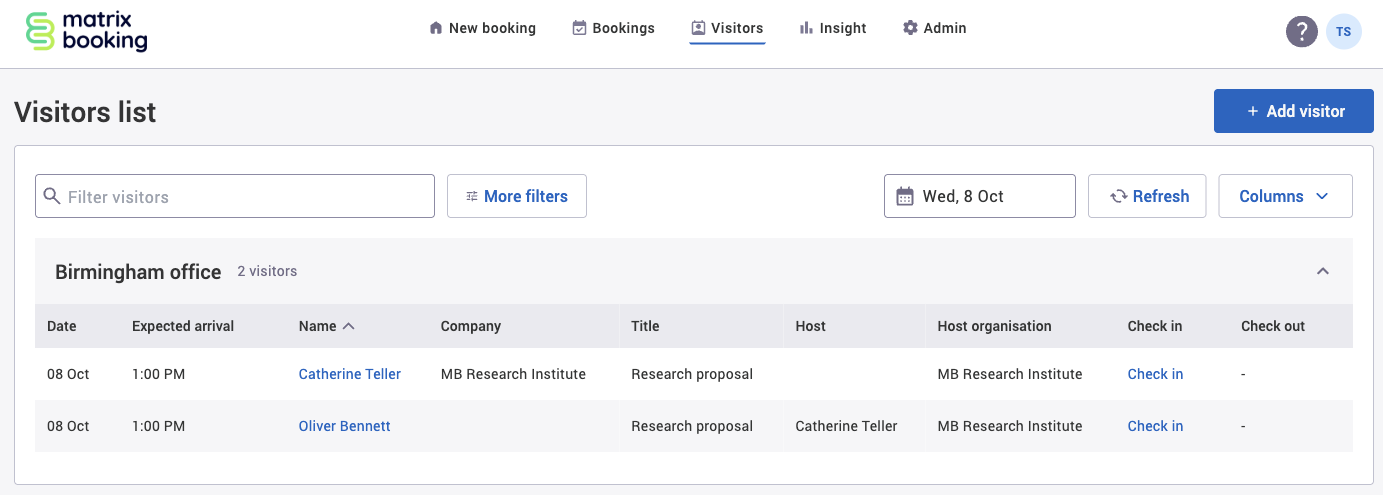
Shared receptions in the Visitors List
Once your shared reception has been setup, you’ll see a consolidated Visitors list. To see the Visitors list:
-
Select Visitors in the navigation bar. The Visitors list screen will appear.
-
Select Host Organisation using the Choose Columns dropdown.