Resource sharing is where an organisation can share a resource (for example, desks or rooms) with another organisation. Two terms used throughout the page are:
-
Sharer organisation – the organisation sharing the resources.
-
Sharee organisation – the organisation that can access the shared resources of another organisation.
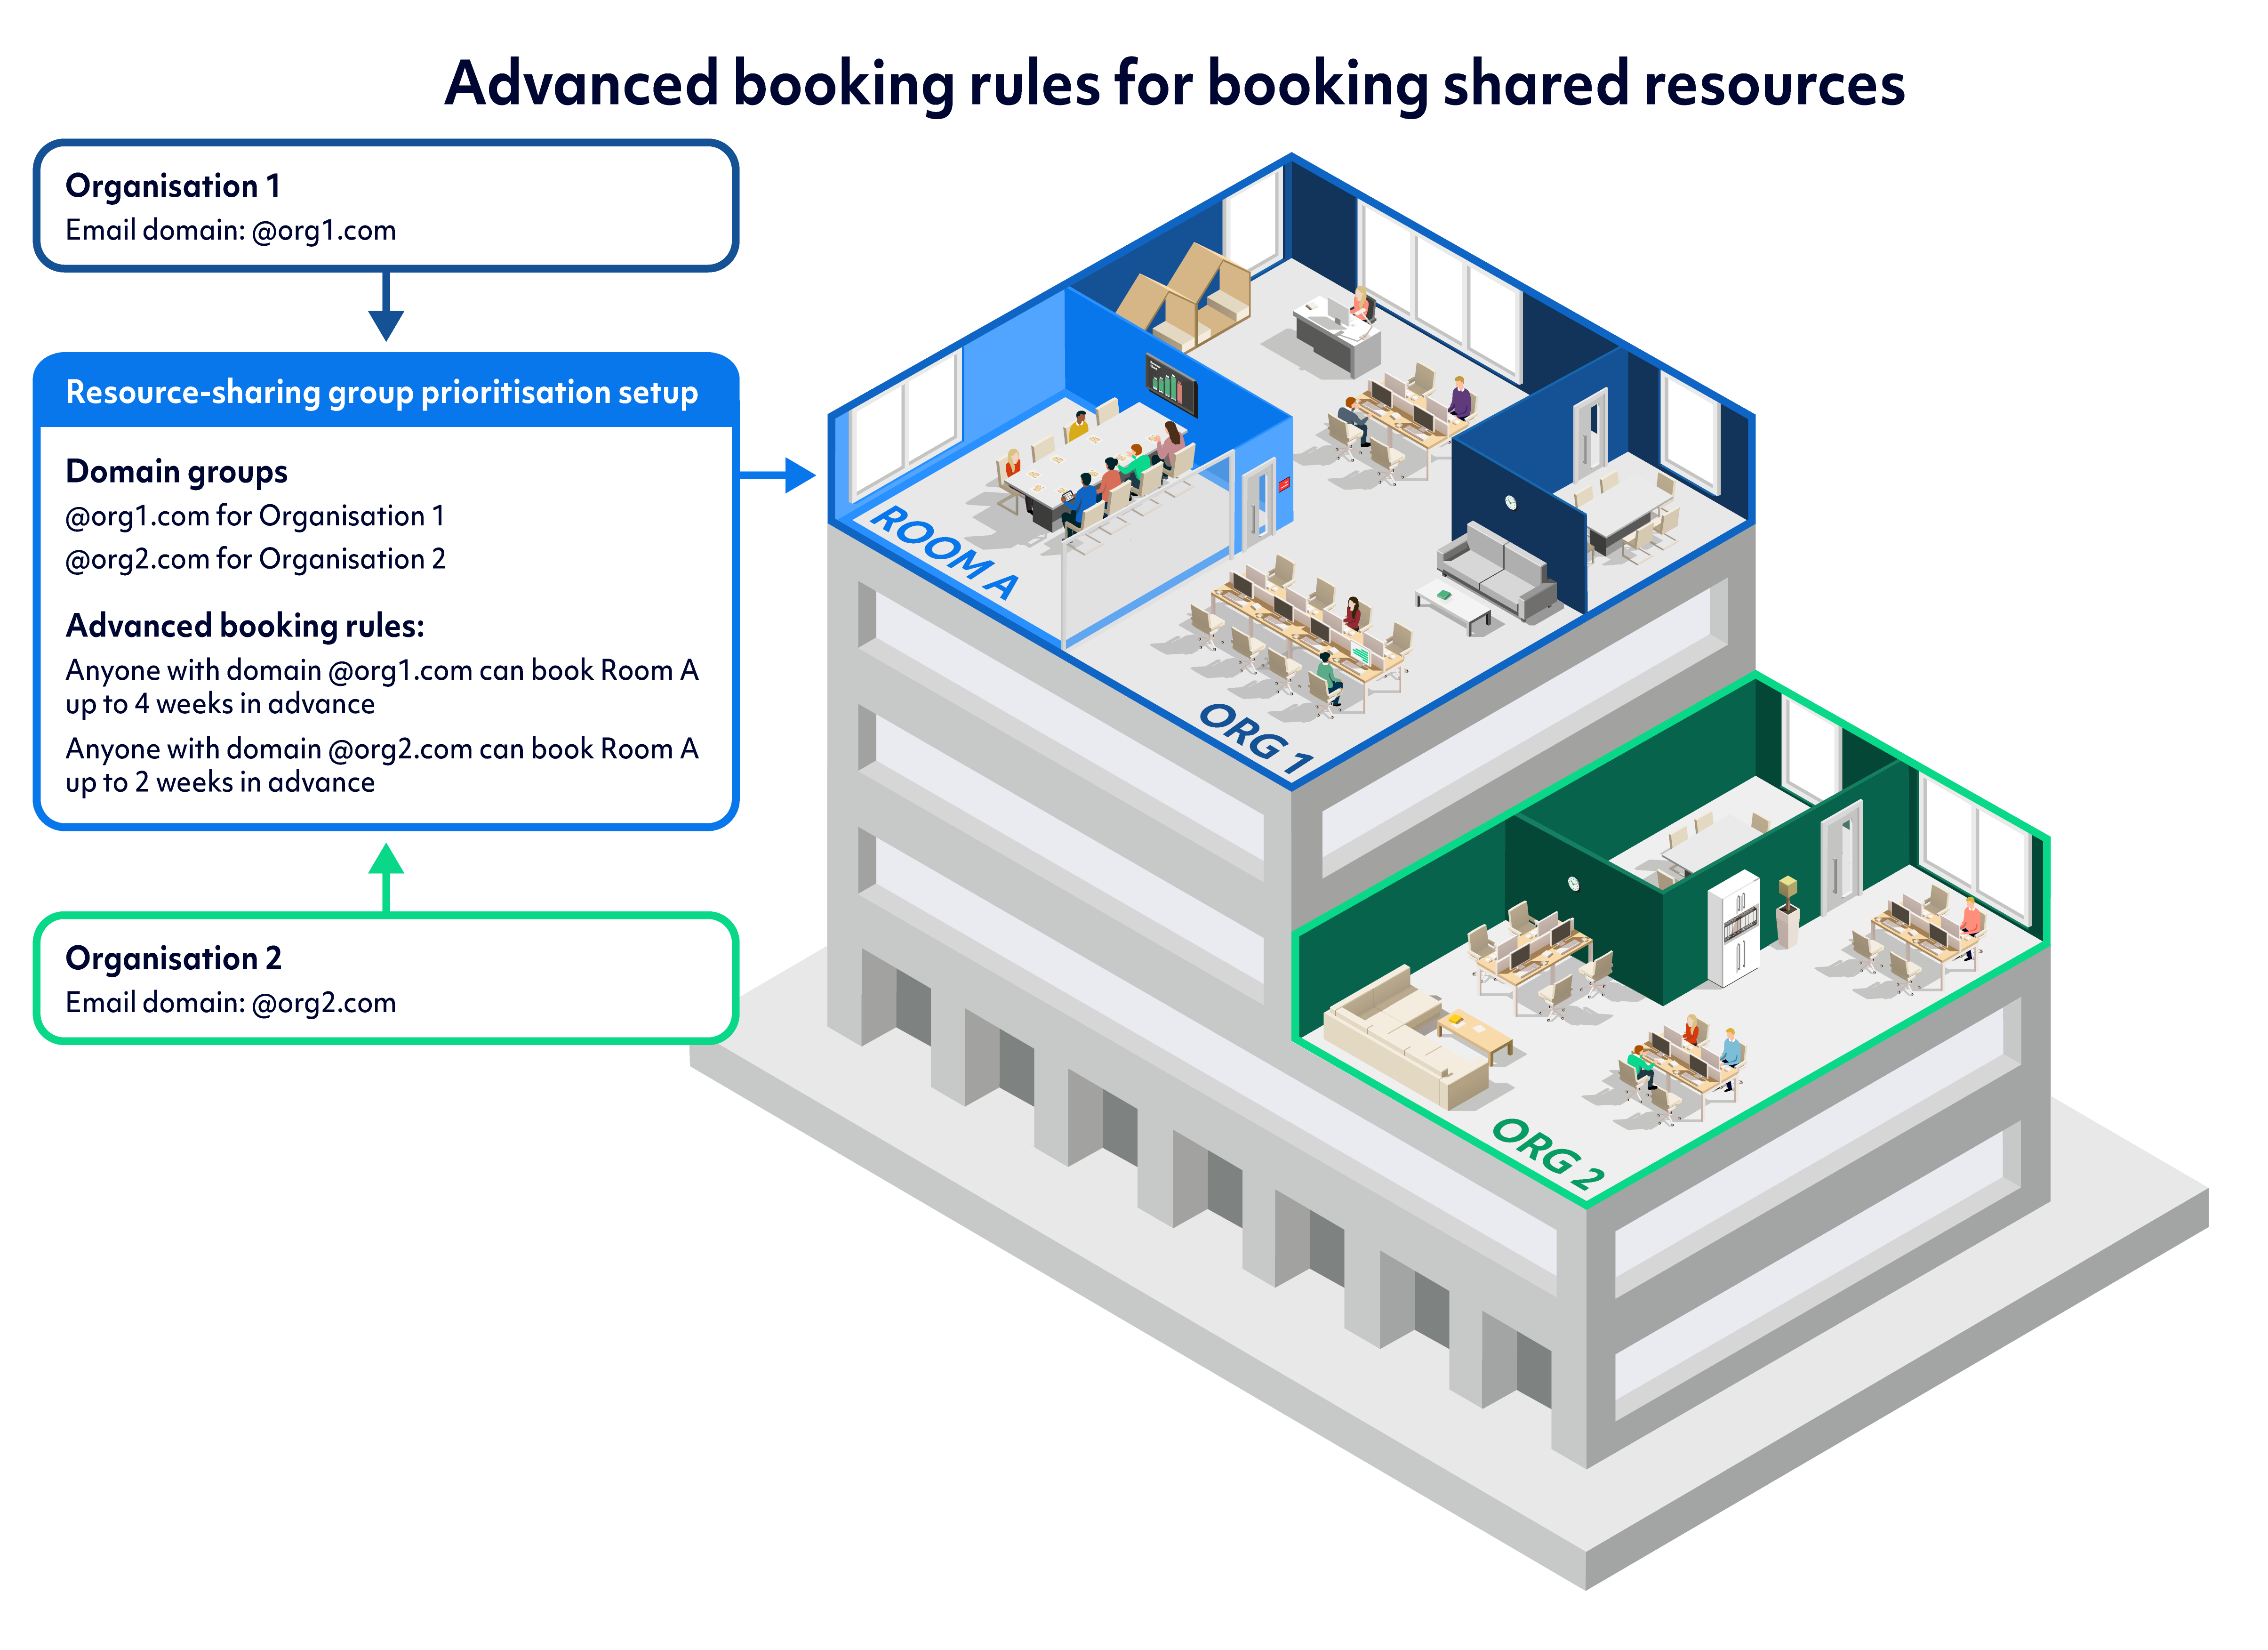
This feature is especially useful where 2 or more organisations are sharing the same location or building and wish for all staff of the building to book all available resources:
Share a resource
To share a resource with another organisation, you must first add your resource.
To share a reception, both organisations need to contact their customer success managers. Let them know which resources you want to share and the organisations you want to share them with. Our team will set up your sharing network.
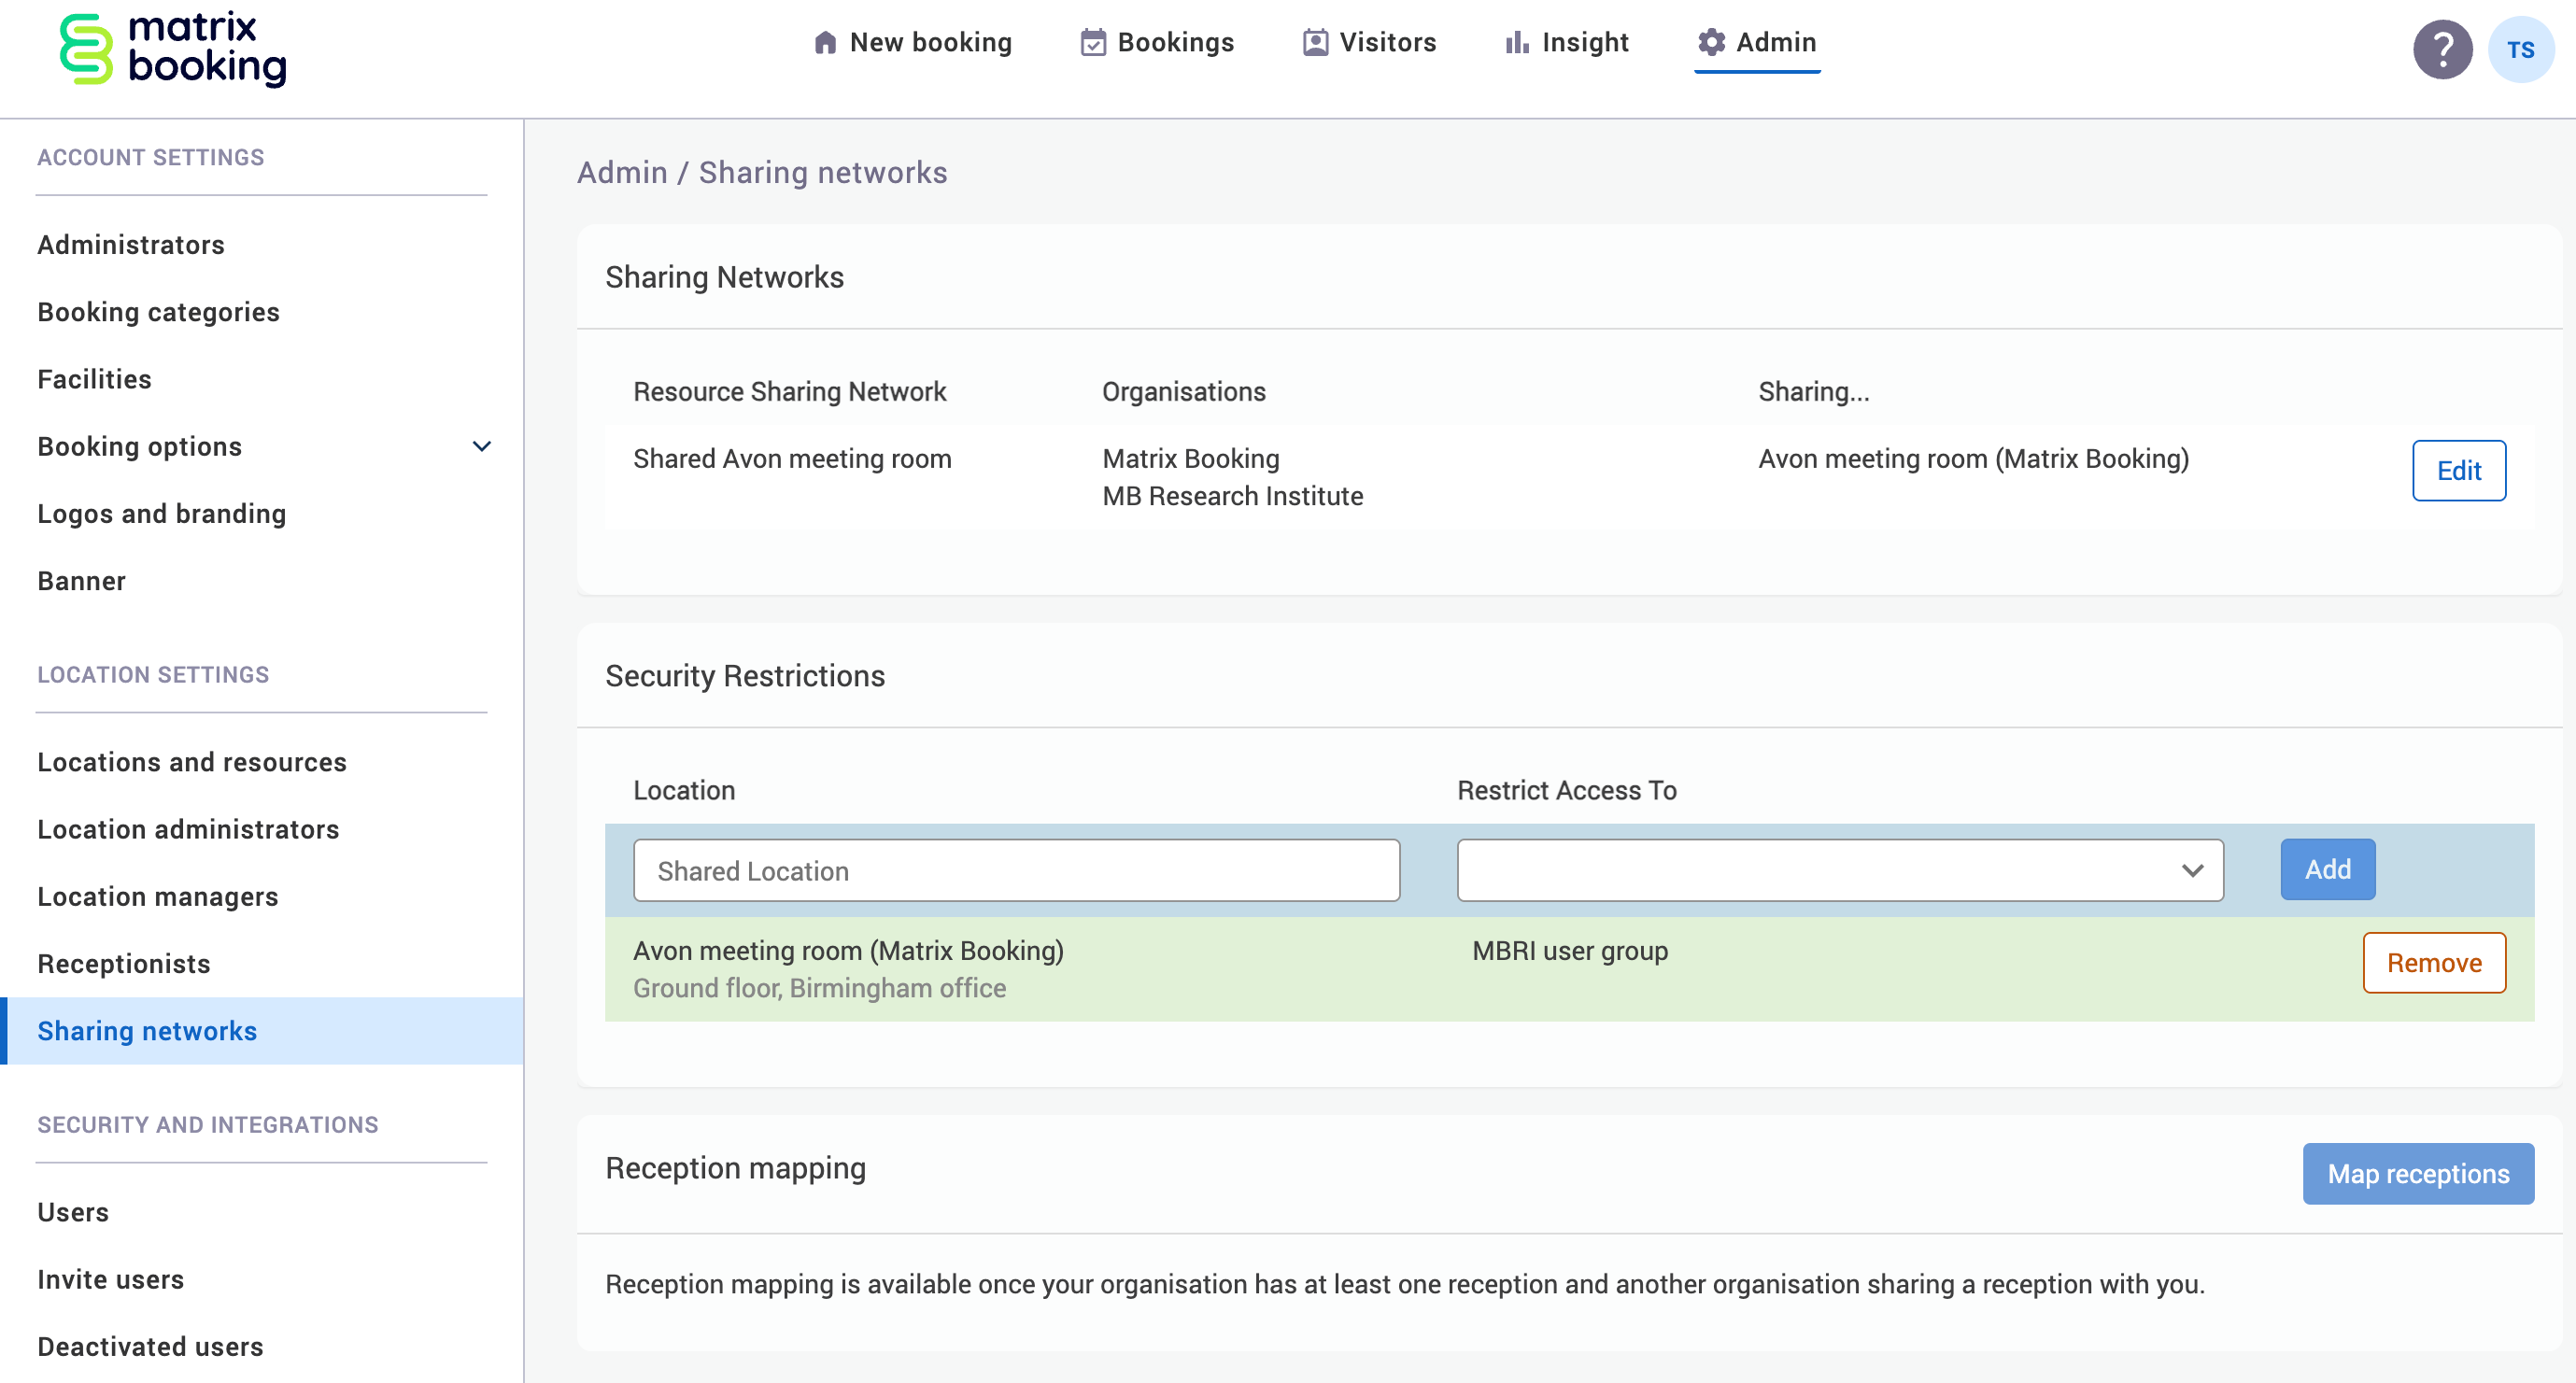
Once your organisation has shared resources with another organisation, they will be visible to the sharee organisation’s staff. Matrix Booking doesn’t allow the sharer organisation to view the sharee organisation’s security restriction settings.
It’s the sharee’s responsibility to add any additional security they need (for example, limiting it to a particular group that’s in the sharee’s organisation).
Note: administrators can only edit sharing networks.
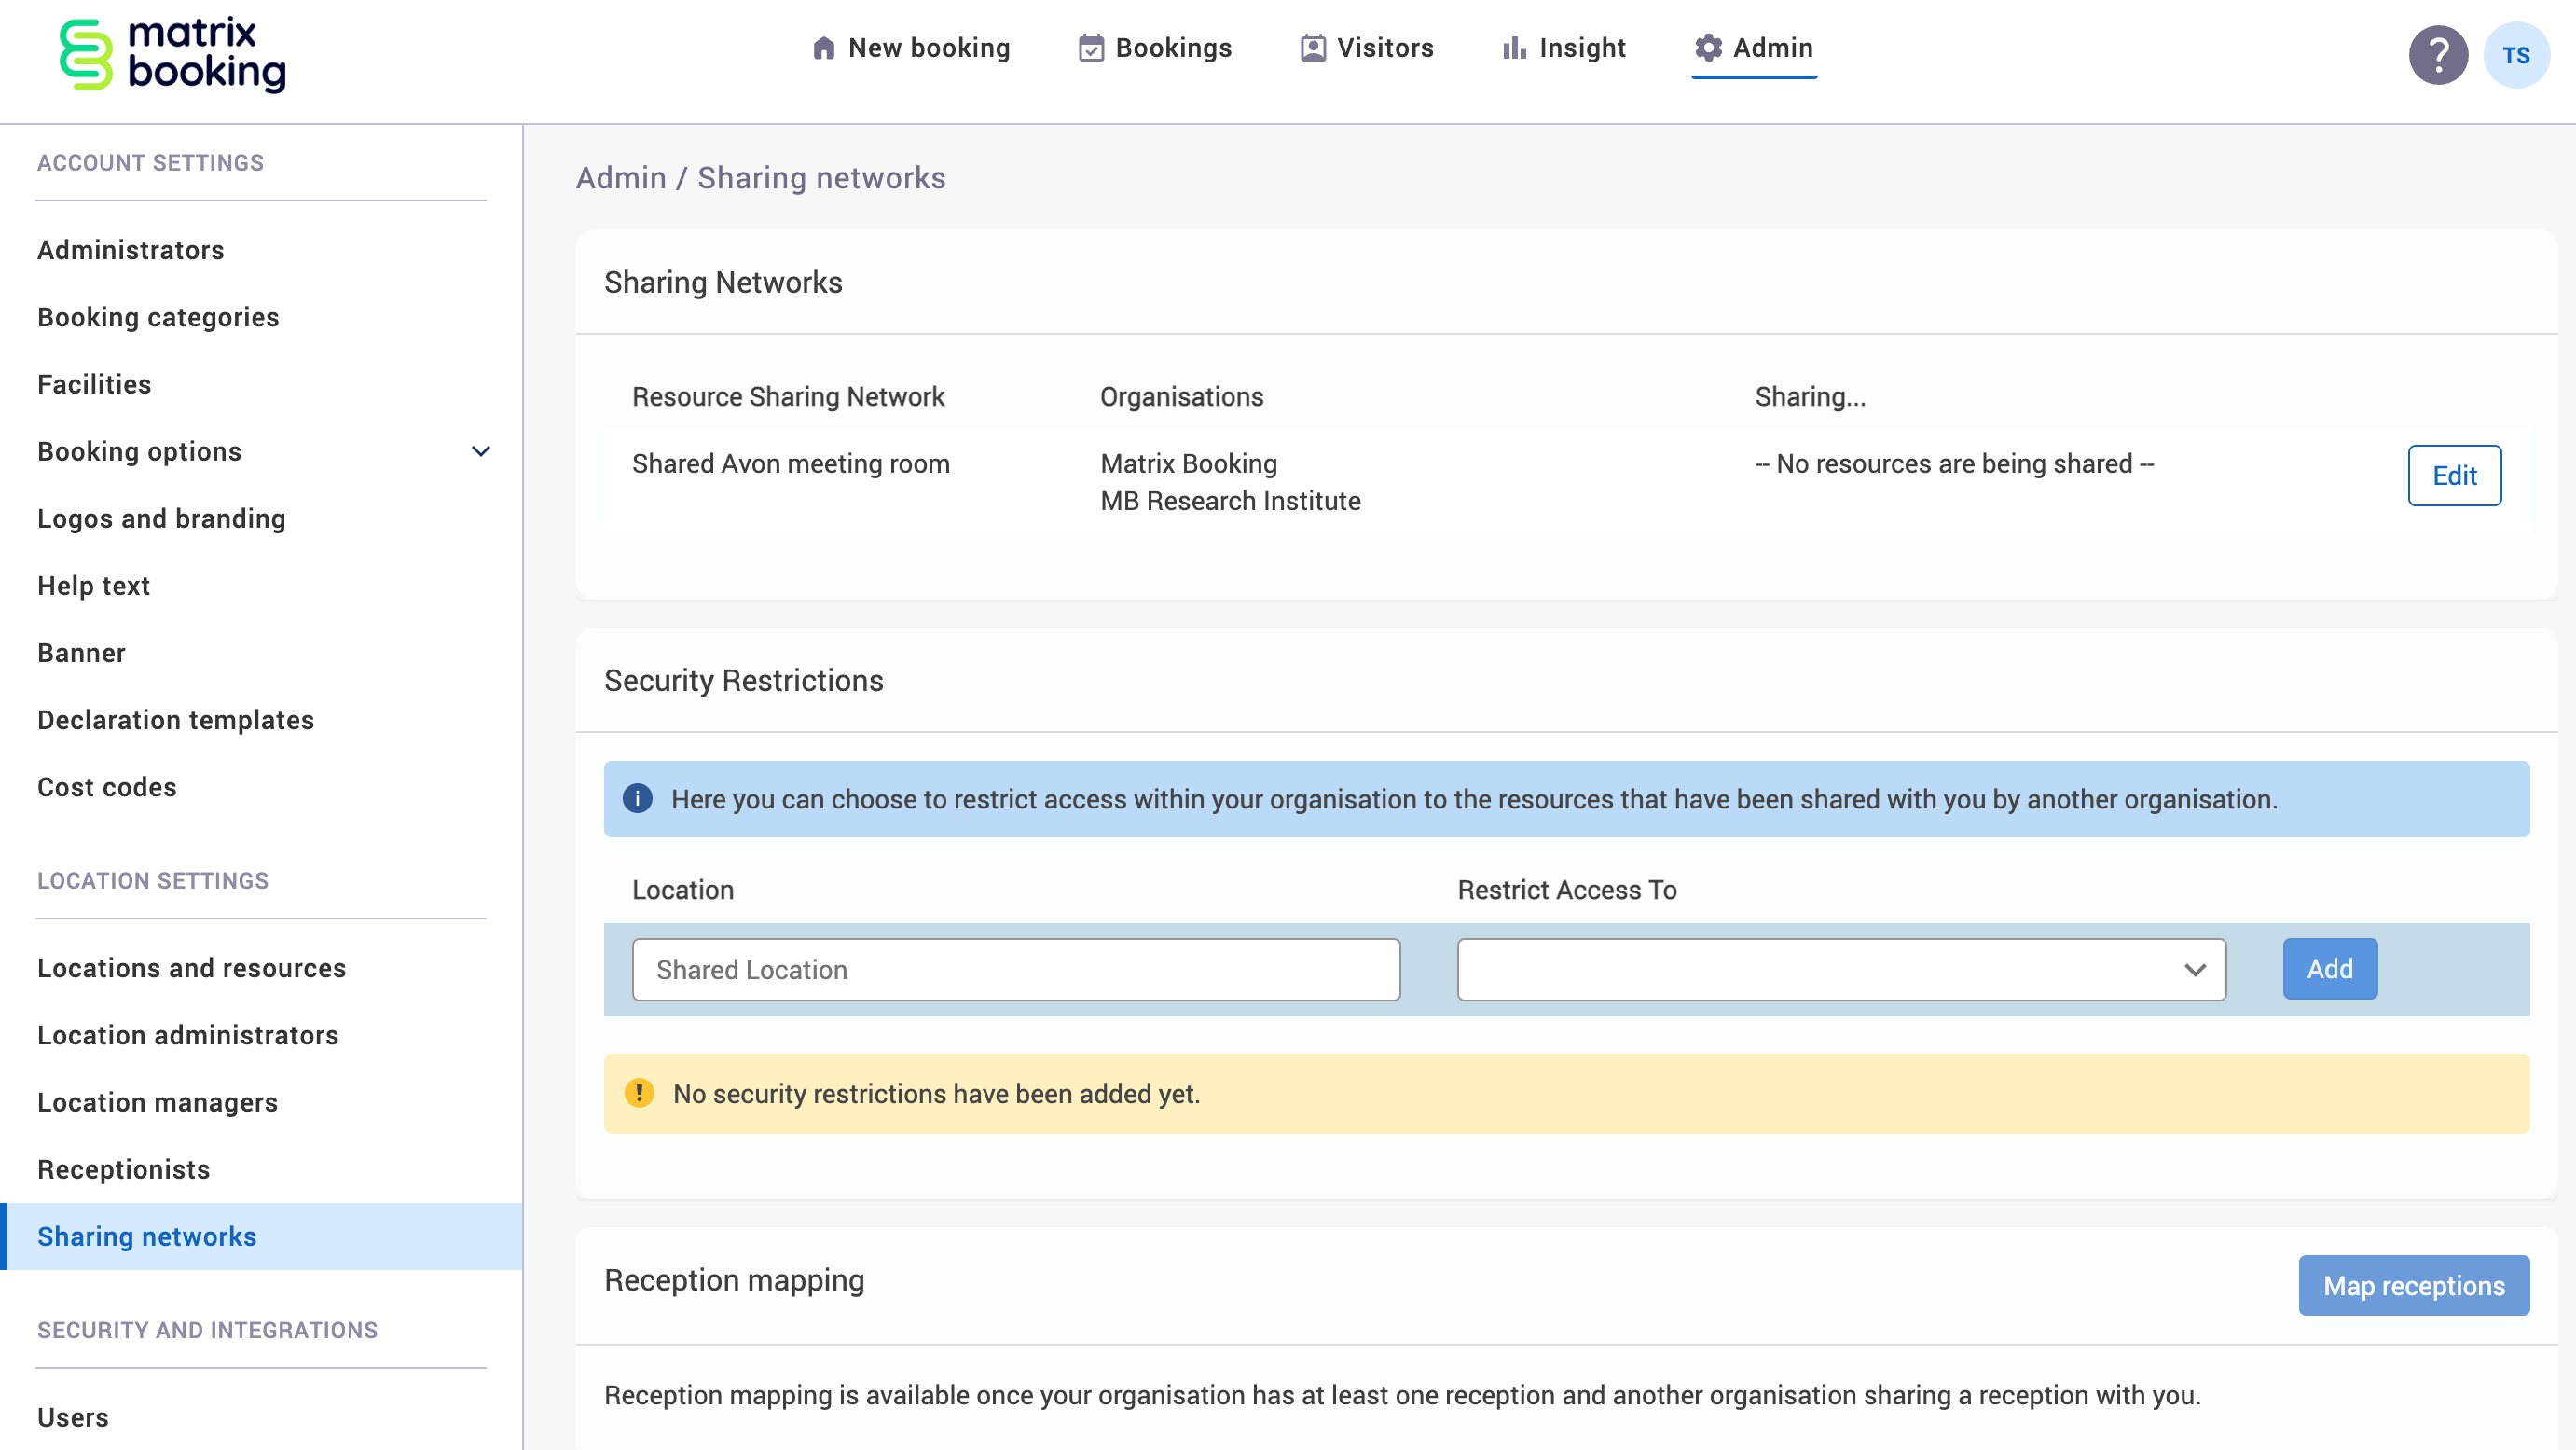
Access the Sharing networks screen
To access the Sharing networks screen:
-
Select Admin in the navigation bar.
-
Select Sharing Networks under the Location Settings section in the side menu.
Edit a shared resource
To edit a shared resource:
-
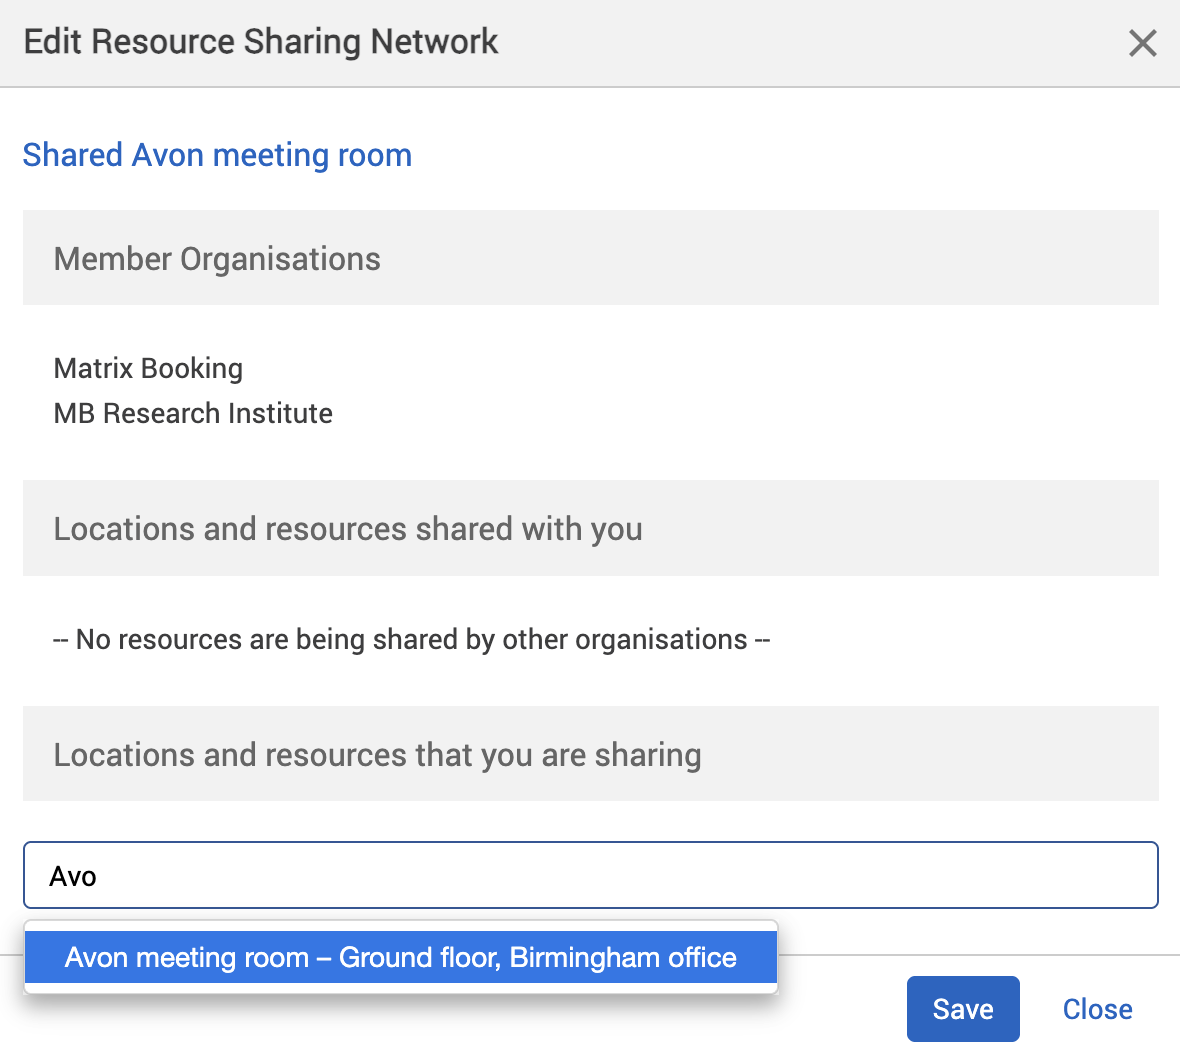
Select the Edit button next to a sharing network. The Edit Sharing Network pop-up will appear.
-
To change the name of the sharing network, select the sharing network name. The name will appear in an editable text box.
-
Enter the new sharing network name in the Sharing Network Name text box.
-
Begin to enter the name of the location or resource. A dropdown will appear.
-
Select the location or resource you want to share from the dropdown.
-
To remove the locations or resources you don’t want the other organisation to have access to, select the X next to the location or resource.
-
Select either of the following and the pop-up will close to return you to the Sharing networks screen:
-
Save to keep you changes.
-
Close to discard your changes.
-
Remove a shared resource
If the sharer organisation edits their shared resource, they can remove the resource from the sharing network. However, the sharing network will still appear on the Sharing networks screen – it just won’t be sharing your resource anymore.
Both organisations need to contact each other first to agree to removing the shared resources. Afterwards, they need to contact their customer success manager to let them know that those resources are no longer being shared.
Restrict shared resources to groups
By default, any users or domains in the sharee organisation will have access to the shared resources in a sharing network. The Security Restrictions section can only be set by sharee organisations.
Warning: if the sharer organisation switches on the Restrict access to setting in the Availability tab of the shared resource they own, this will prevent the sharee organisation from booking the shared resource.
Make sure that the resources you want to share don’t require any group or organisation restrictions.
As a sharee organisation, to set restrictions on who can access your shared resources:
-
Begin to enter the shared resource’s name in the Location text box under the Security Restrictions section. The Location dropdown will appear with a list of matching results.
-
Select the resource you want to have restrictions for from the Location dropdown under the Security Restrictions section.
-
Select the groups you wish to have restrictions against from the Restrict Access To dropdown.
-
Select Add and the restrictions will be applied.
-
To remove an unwanted restriction, select Remove next to that restriction.

Notes:
-
You can only add 1 restriction per shared resource. Make sure the users or domains you use in your group are correct.
-
Restrictions for your own locations and resources can managed in the normal way through the Locations and resources hierarchy.
Advanced booking rules and lead time restrictions
If a user in the sharee organisation wants to book a shared resource that belongs to the sharer organisation, but advanced booking rules and lead times have been set up for that resource, the user will be limited by how far in advance they can that resource. For example, the resource needs to be booked 6 months in advance when the lead time for that room is only 3 months.
The user needs to contact the sharer organisation’s location administrators or location managers – they can override these settings and book the resource on behalf of the external user.
To book a shared resource for an external user:
-
The user of the sharee organisation must supply their email address to the sharer organisation’s location administrator or location manager.
-
The location administrator or location manager creates the booking in the normal way.
-
Add the user’s email address to Name text box.
-
Complete the booking process.
-
The user in the sharee organisation will see the new booking in the My Bookings screen.
Advanced booking rules for booking shared resources
In the following example, we show how 3 features of Matrix Booking can be used together so that you can share your resources with other organisations while still giving priority to your staff.
Resource sharing
Organisation 1 shares a resource (Room A) with Organisation 2. Both organisations are in the same building, but occupy different floors. Organisation 1 wants to give its own staff higher prioritisation for booking Room A than Organisation 2.
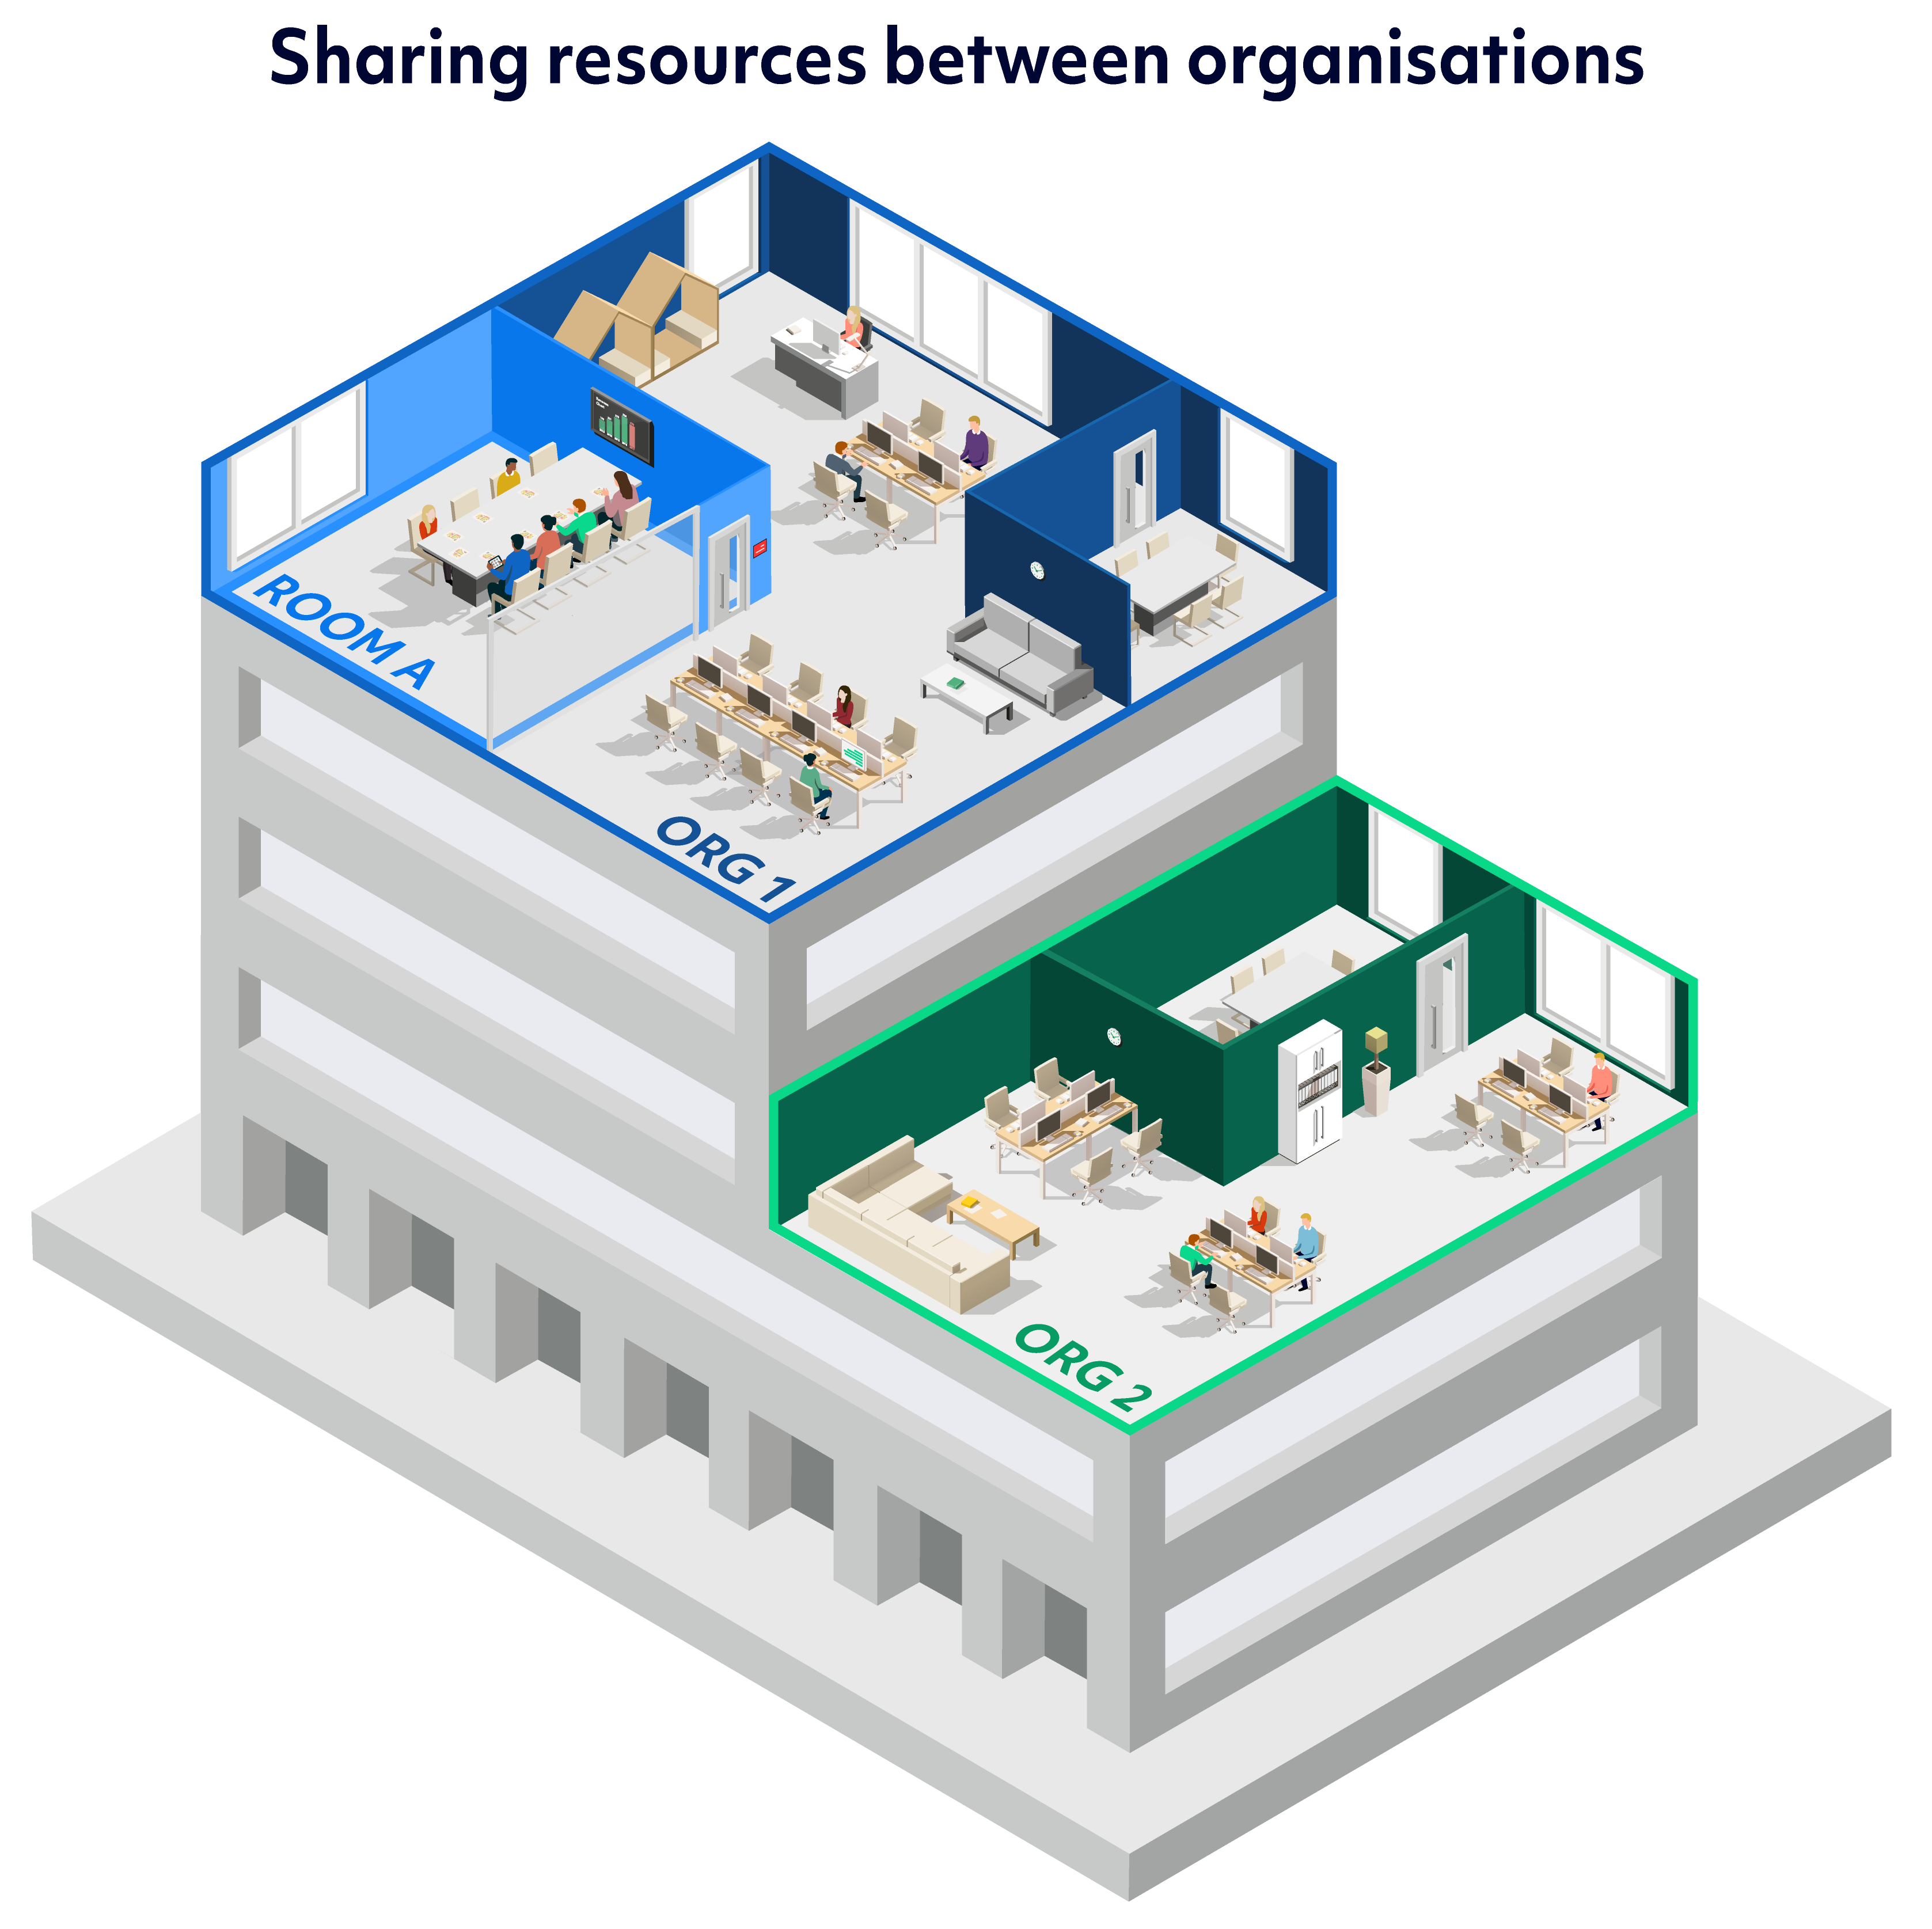
Although the example below shows 1 shared resource in 1 shared building, this setup could be applied to multiple shared resources and across multiple buildings.

Domain groups
Before setting up the different prioritisations for the organisations that can book Room A, Organisation 1 needs to set up domain groups. Domain groups rely on each organisations’ email domain. Organisation 1 has set up the following domain groups:
-
Organisation 1 has the domain @org1.com
-
Organisation 2 has the domain @org2.com

Advance booking rules (prioritisation)
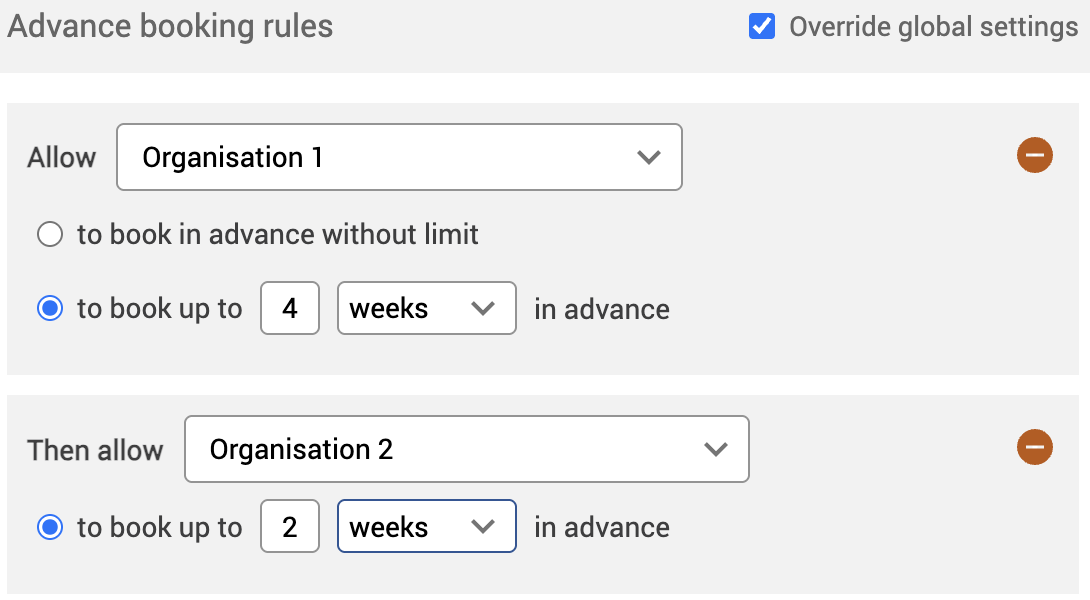
Now that the domain groups have been set up, Organisation 1 can set up the Advance booking rules for each organisation based on the domain groups. Organisation 1 has set up the following Advance booking rules:
-
Domain group Organisation (@org1.com)1 can book Room A up to 4 weeks in advance.
-
Domain group Organisation (@org1.com)2 can book Room A up to 2 weeks in advance.
