A resource schedule is a list of a type of resource your organisation has with different availability parameters set against each one. It helps users select the correct resource they need when they visit their place of work. For example, 1 person has travelled far to their office and needs to use a full day charger for their EV, whereas someone in the next town needs an afternoon charger for their small commute.
This page describes how to set up resource scheduling:
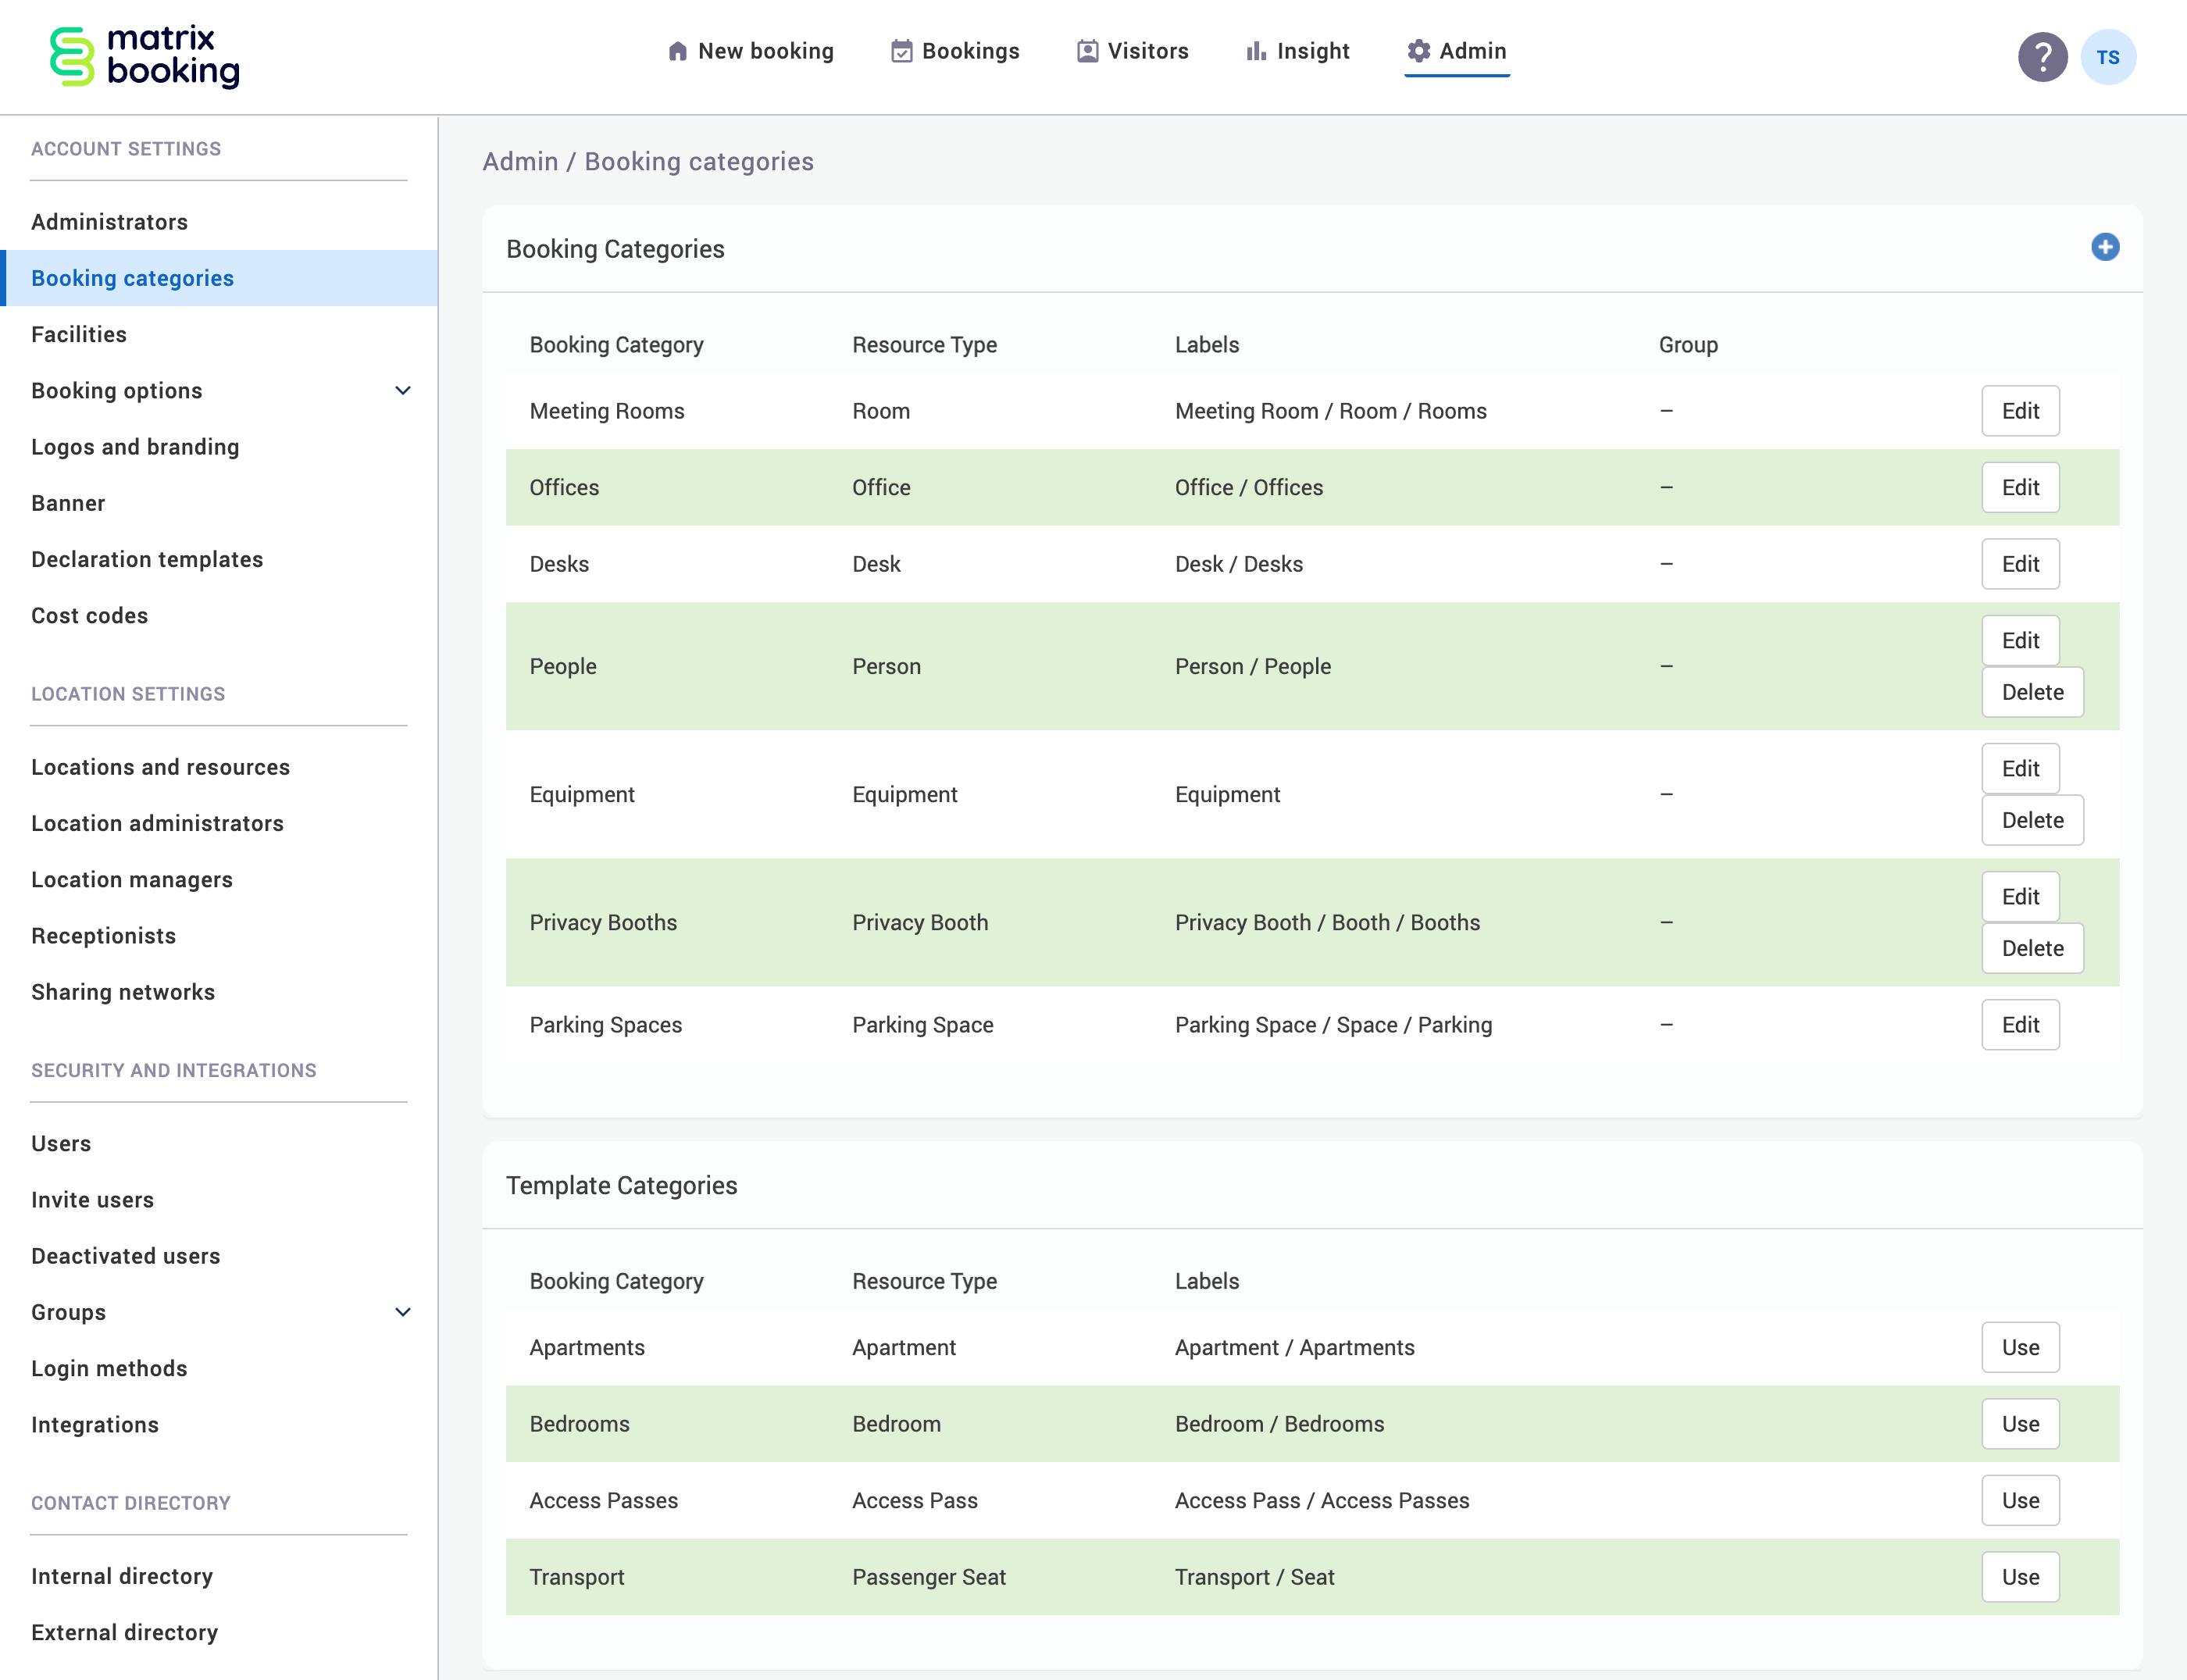
Add booking categories
If you’ve already set up the booking categories you need, skip to Set up user groups.
To use a template category:
-
Select Admin in the navigation bar.
-
Select Booking categories under the Account Settings section in the side menu.
-
Go to the Template Categories section under the Booking Categories section.
-
Find the template category you want.
-
Select Use.
Set up user groups
It wouldn’t be fair if someone who had a longer commute had a shorter charge time. You can restrict users’s access to the resources that better suits their needs (for example, someone living closer to the office can have a shorter charge time). You can do this by .
If you don’t want to restrict users to particular resources, .
To add a user group:
-
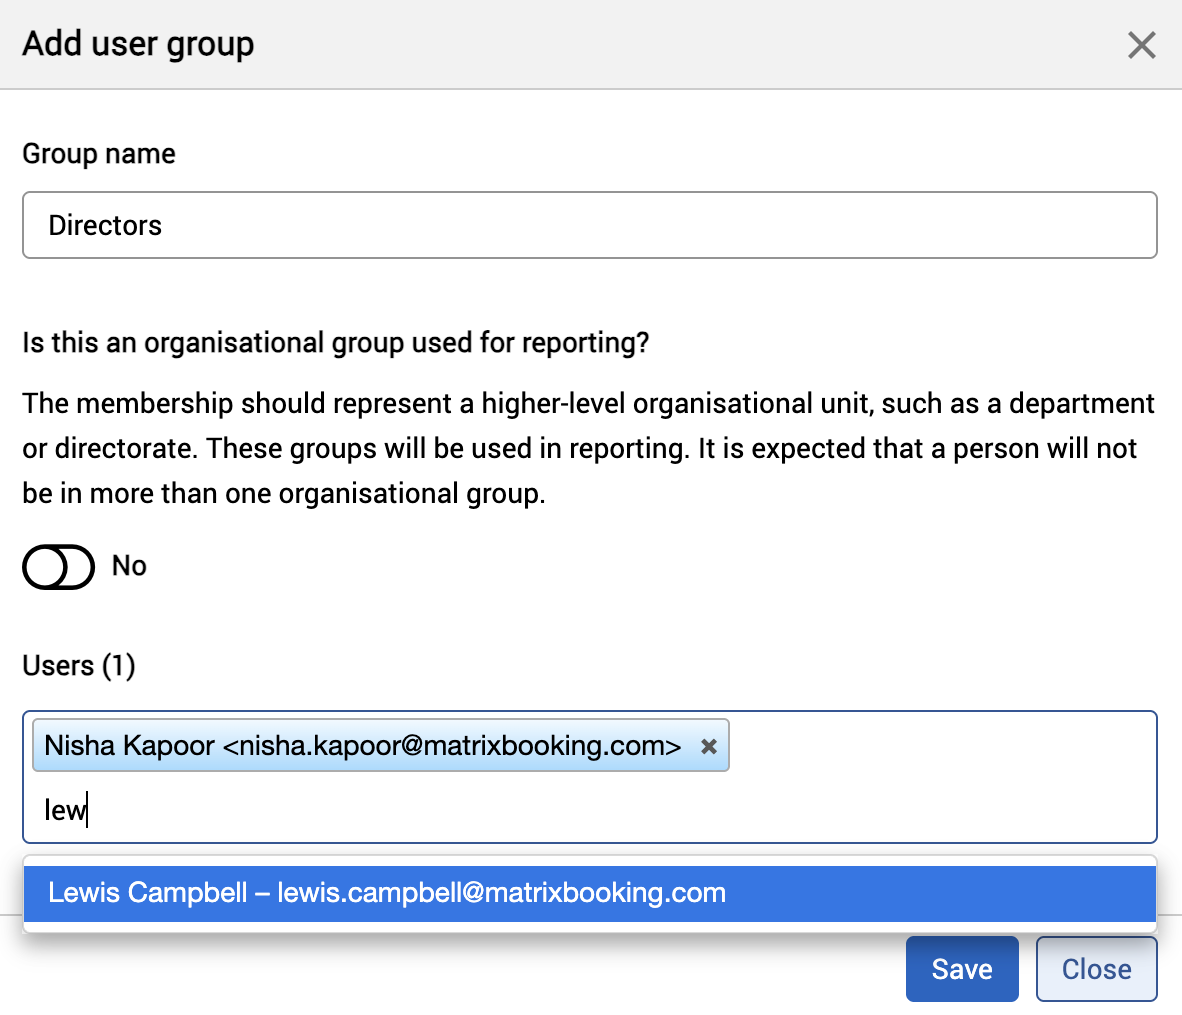
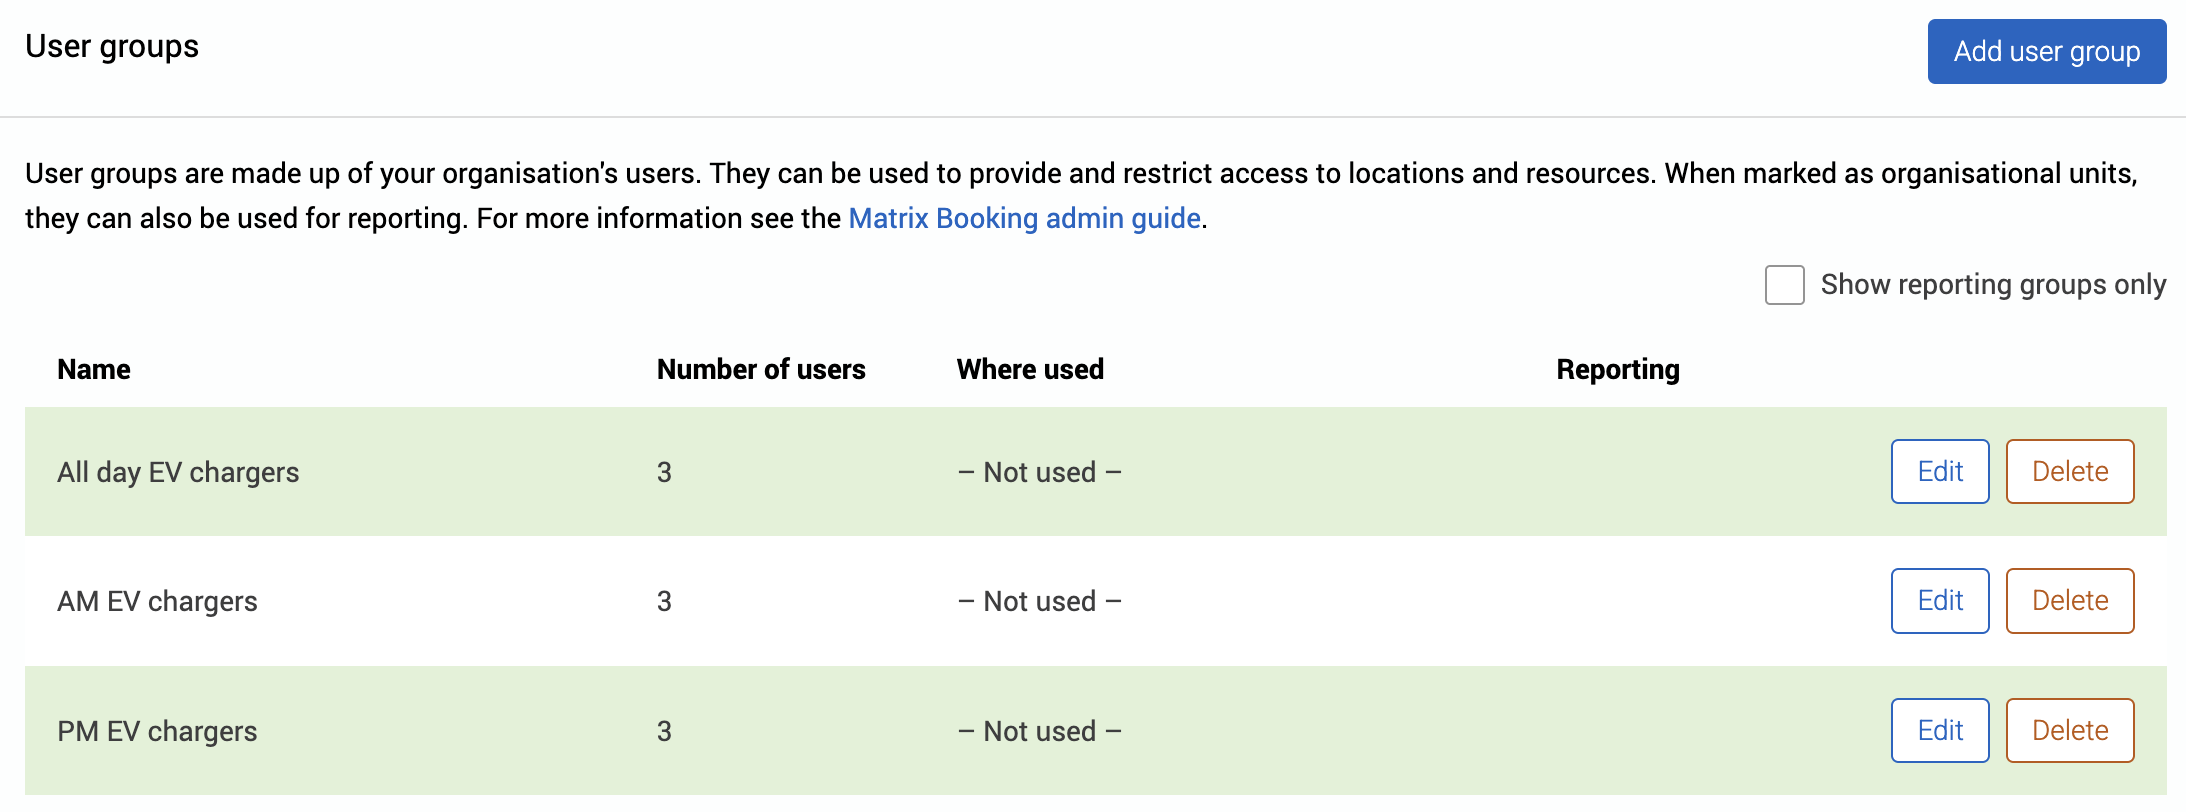
Select Add user group. The Add user group dialog will appear.
-
Enter the name of the user group you’re creating in the Group name text box.
-
Select whether this is an organisational group for reporting purposes. The default is No.
-
Begin to enter the user’s name in the search bar. The User dropdown will appear.
-
Select the correct user from the dropdown.
-
To add more users to the user group, repeat steps 6 and 7.
-
Select either of the following and the dialog will close to return you to the User groups screen:
-
Save to keep your changes.
-
Close to discard your changes.
-
To add more user groups that would like to book the resources for different times of the day, repeat the set up user group steps.
The example below describes resource scheduling for EV chargers, but any resource type could have the same or similar scheduling set up for them:
-
All day chargers (people who live more than 75 miles away)
-
Morning (AM) chargers
-
Afternoon (PM) chargers
Set up resource scheduling
To set resource scheduling, you need to:
Add your resources to your resource hierarchy
To add resources to your organisation:
To add a location or resource within your organisation:
-
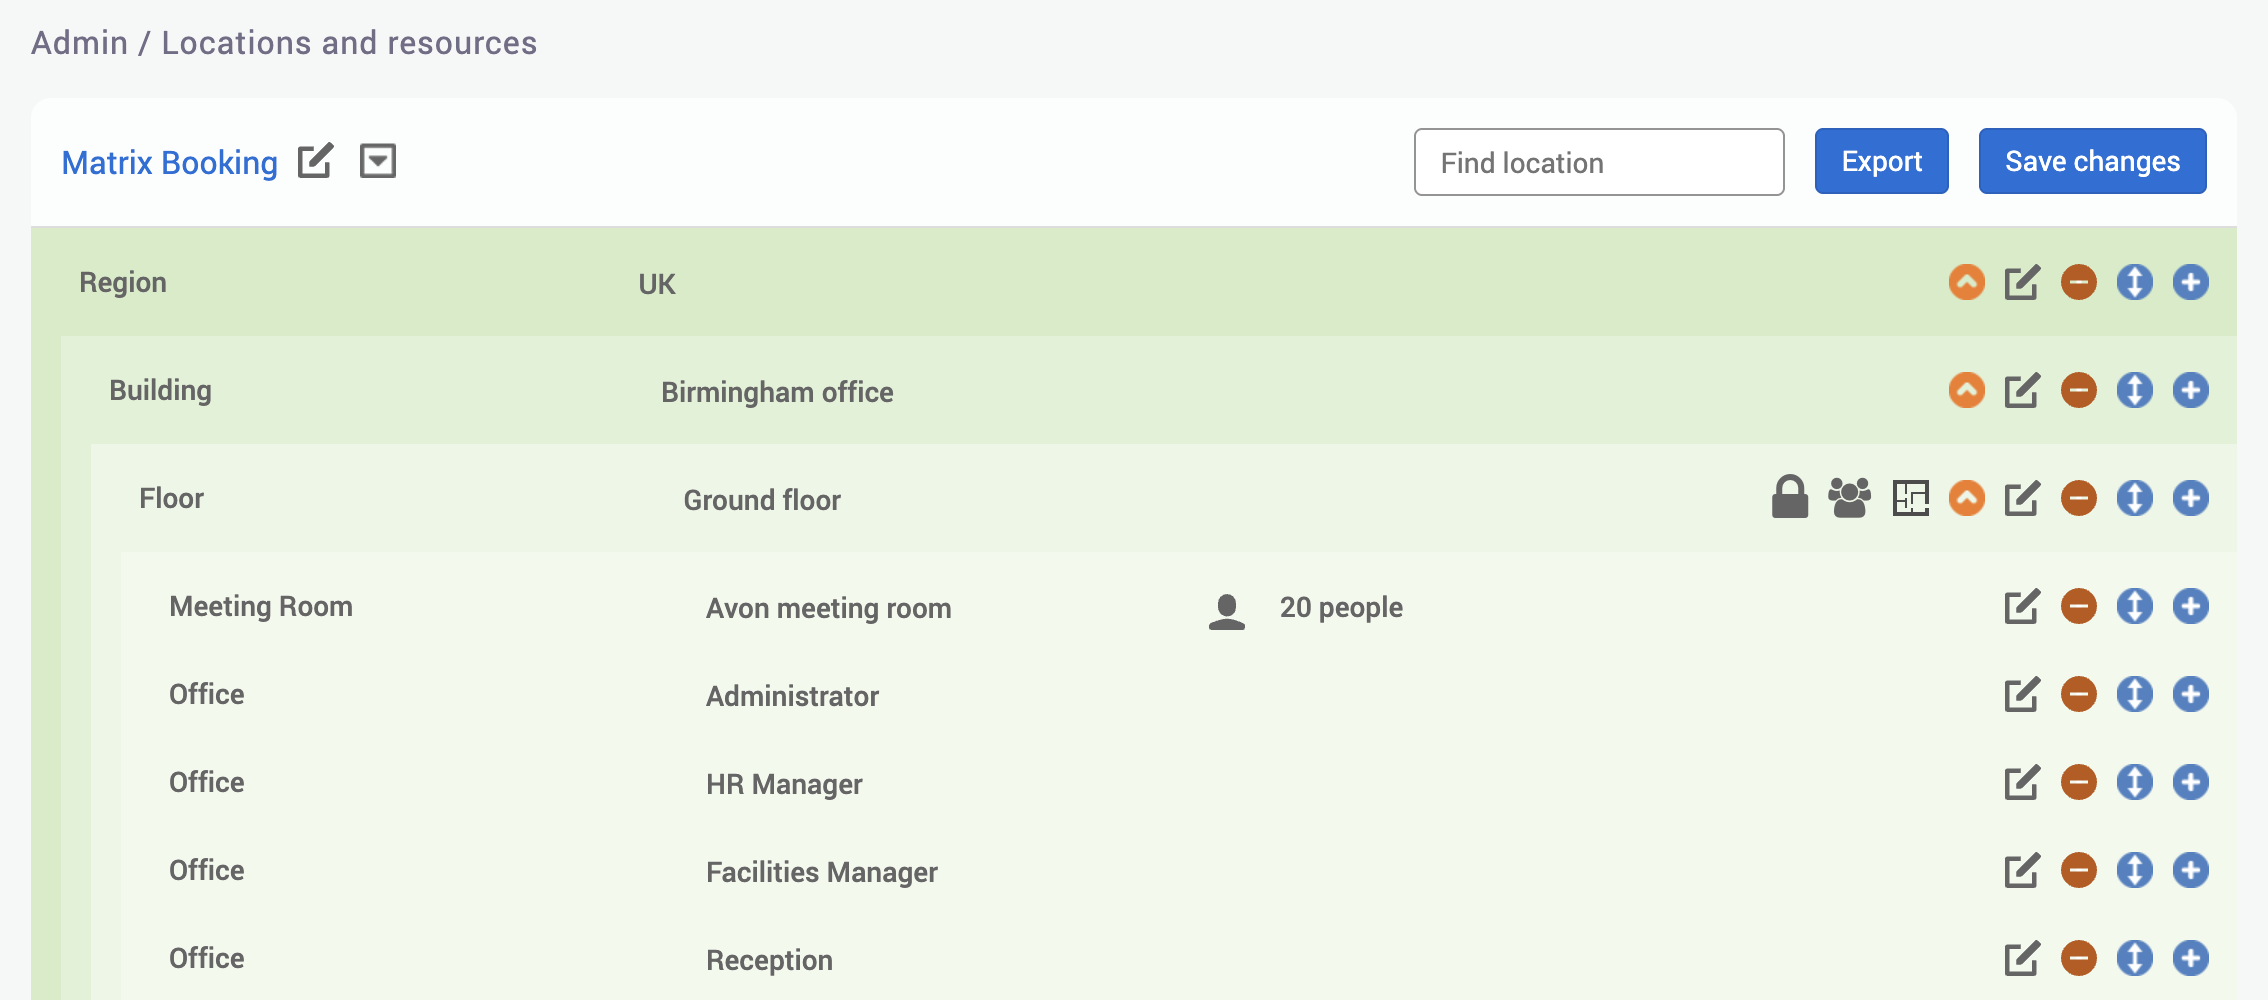
Go to where you want to add the location or resource (for example, a floor in a building).
-
Select + Add.
-
Select the booking category you want from the Booking category dropdown.
-
Enter the name of location or resource in the text box.
-
If it’s a resource with a capacity (for example, a room), select the capacity of the resource from the Capacity dropdown.
-
To remove a resource, select – Delete.
-
Select Save changes.
Your resources are available to book by anyone for any time.
Resource time and user group availability
To change a resource’s availability in your resource hierarchy:
-
.
-
Select Edit next to the resource you want to change. The Edit [Resource] dialog will appear.
-
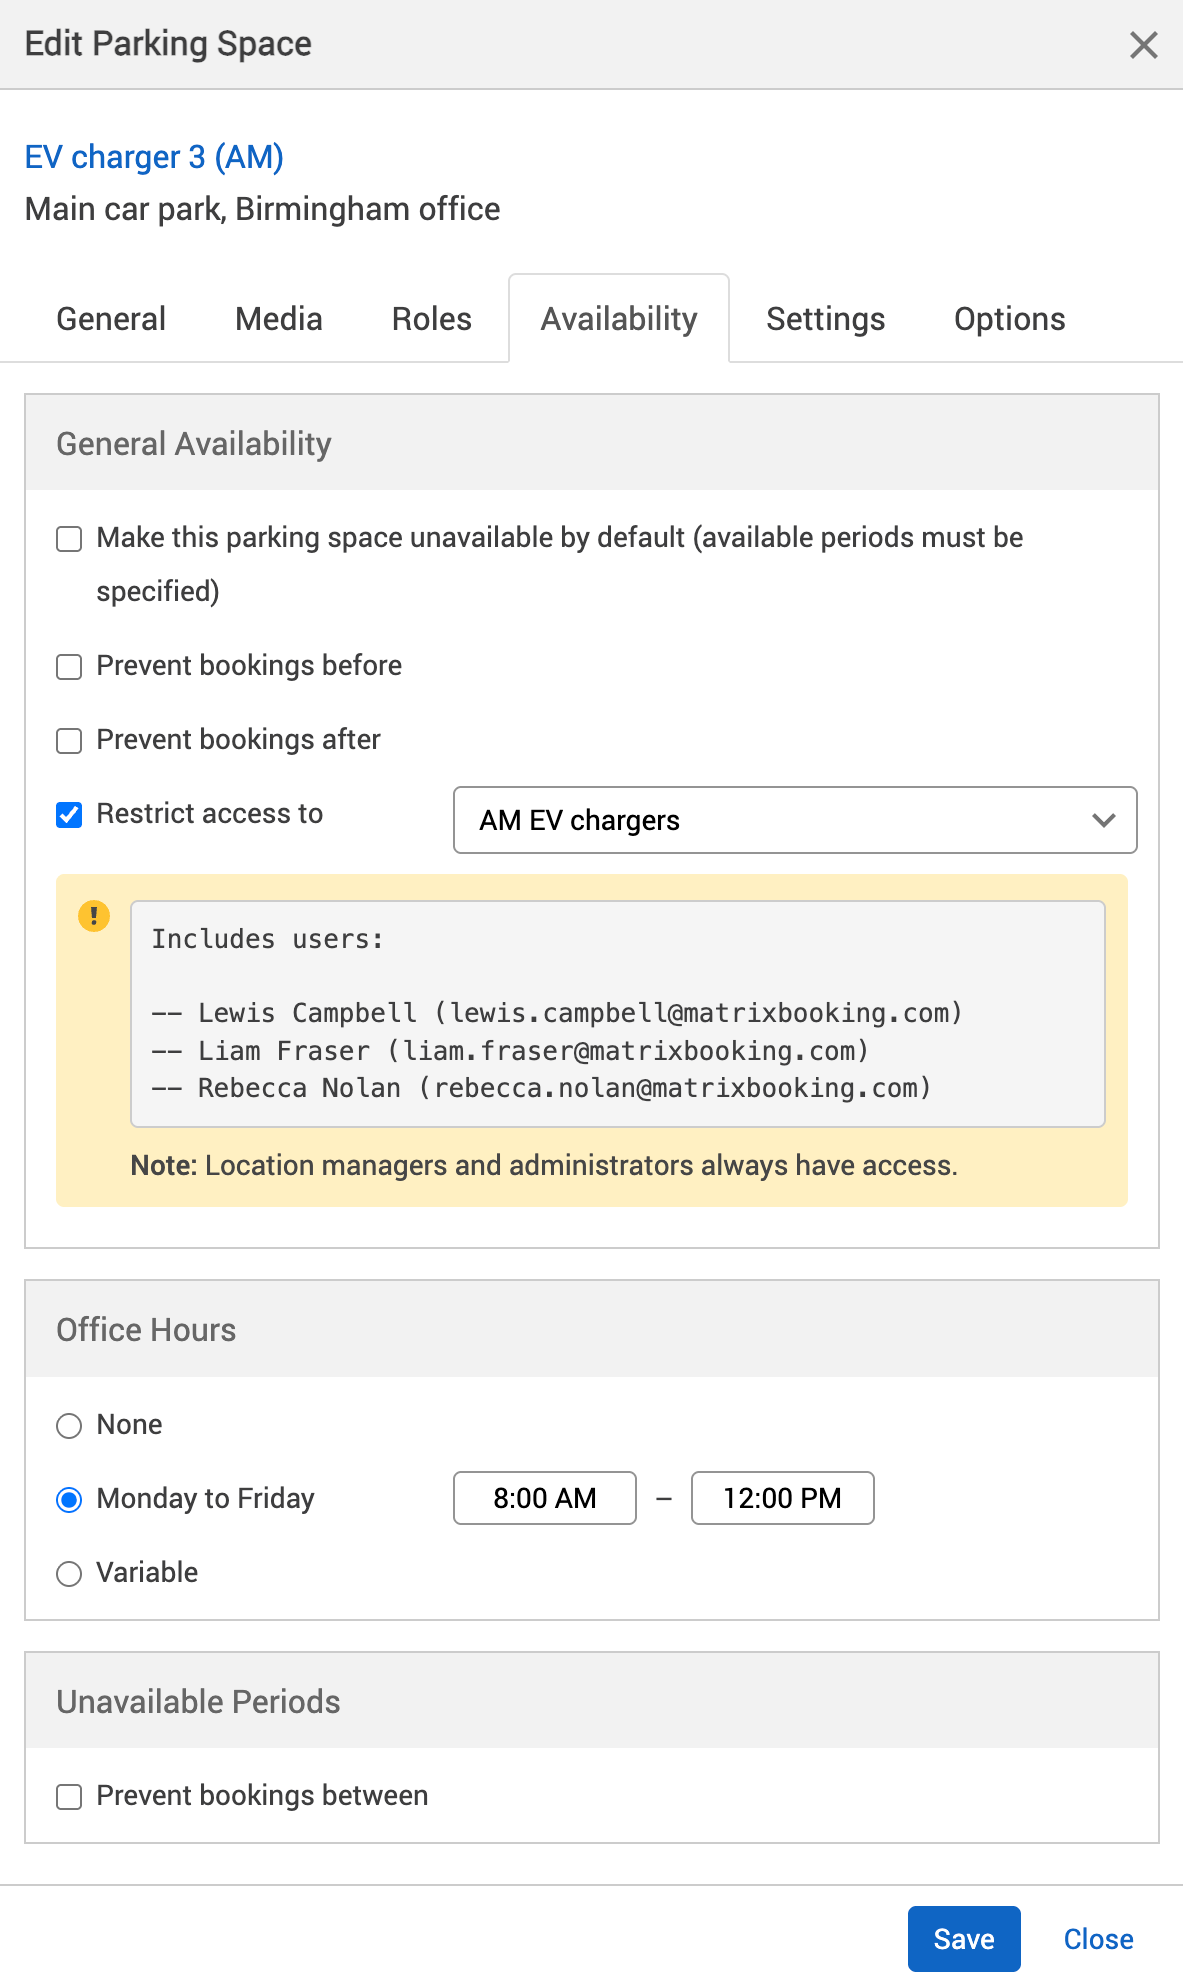
Select the Availability tab.
-
Optional: select the Restrict access to checkbox in the General Availability section.
-
Optional: select the right user group from the dropdown (for example, a morning EV charger should be restricted to the morning EV charger user group). The users in that user group will be listed at the bottom of the General Availability section.
-
Recommended: select Monday to Friday in the Office Hours section.
-
Recommended: Enter the time you want the resource to be available for (for example, mornings could be 8:00 AM to 12:00 PM).
-
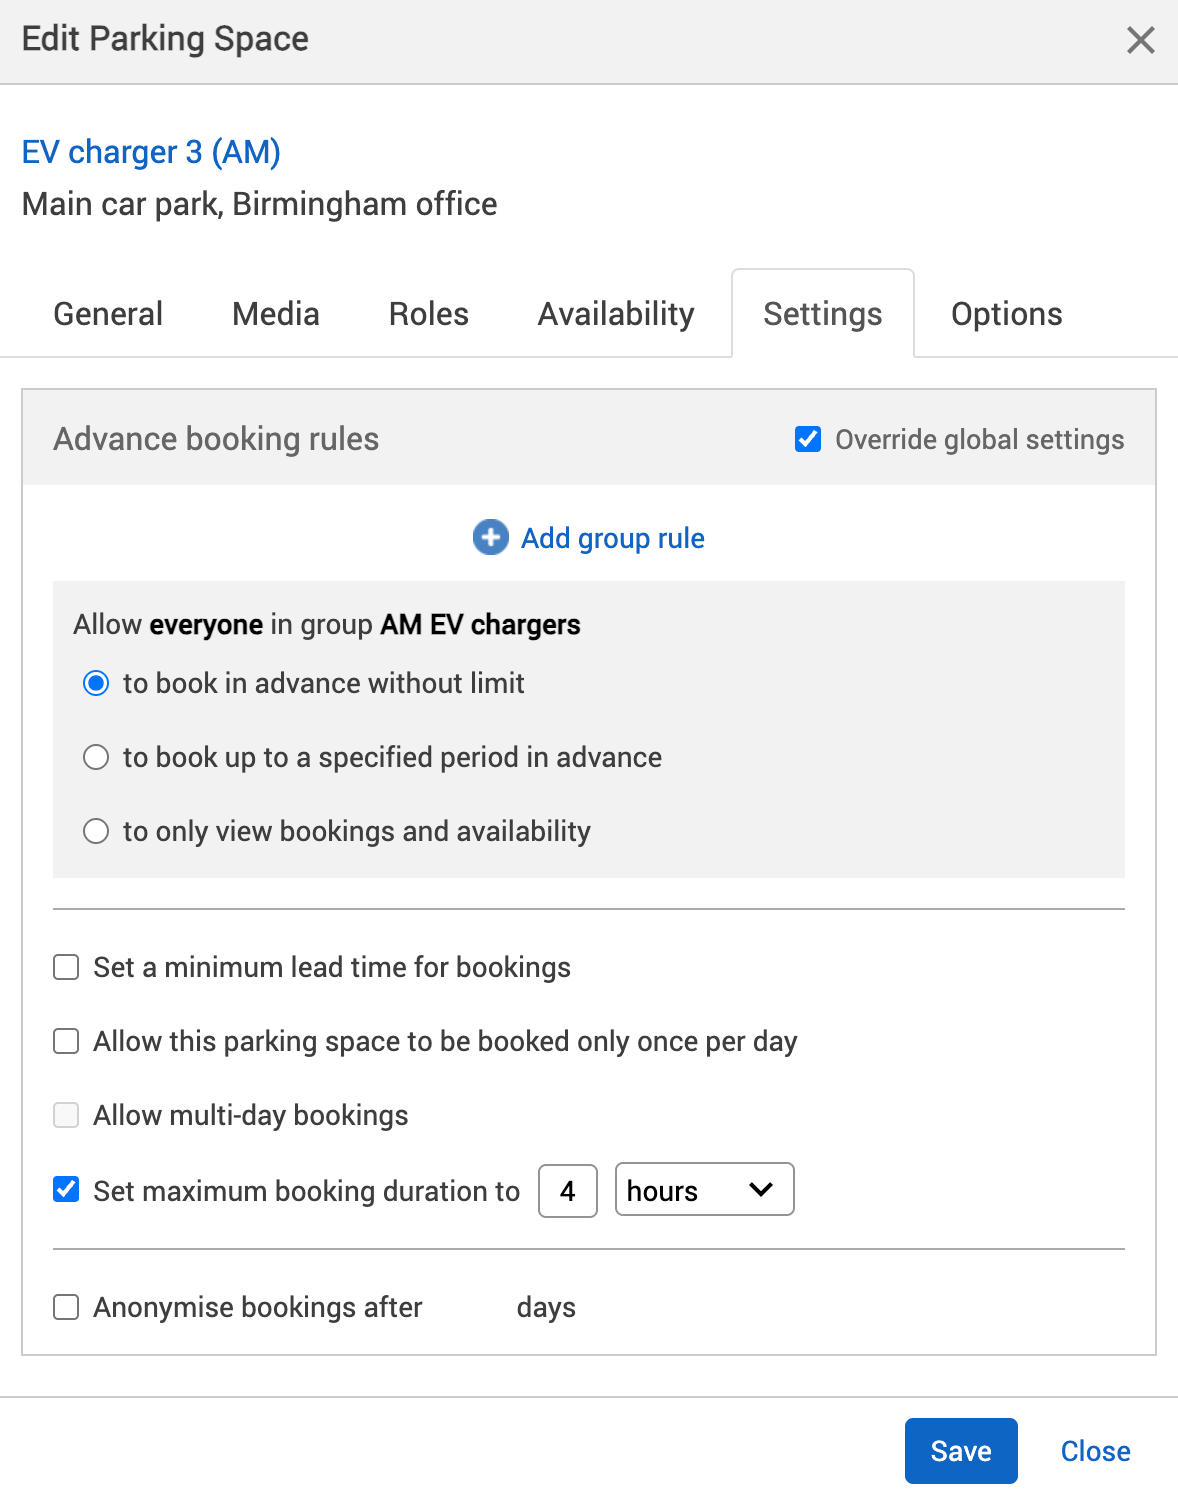
Optional: Select the Settings tab.
-
Select the correct resource using the .
-
Select the Override global settings or Override [location or resource] checkbox under the Advanced booking rules section.
-
Select the Set maximum booking duration to checkbox.
-
Check if any of the checkboxes are greyed out. If they are, this means that these settings are inherited from a higher level in your resource hierarchy. You may have them switched on at that level for a reason.
-
Enter the number of minutes or hours you want bookings to have a maximum duration for.
-
Select the dropdown and select either:
-
minutes
-
hours
-
-
Select either of the following and the dialog will close to return you to the Locations and resources hierarchy:
-
Save to keep you changes.
-
Close to discard your changes.
-
-
Select Save changes.
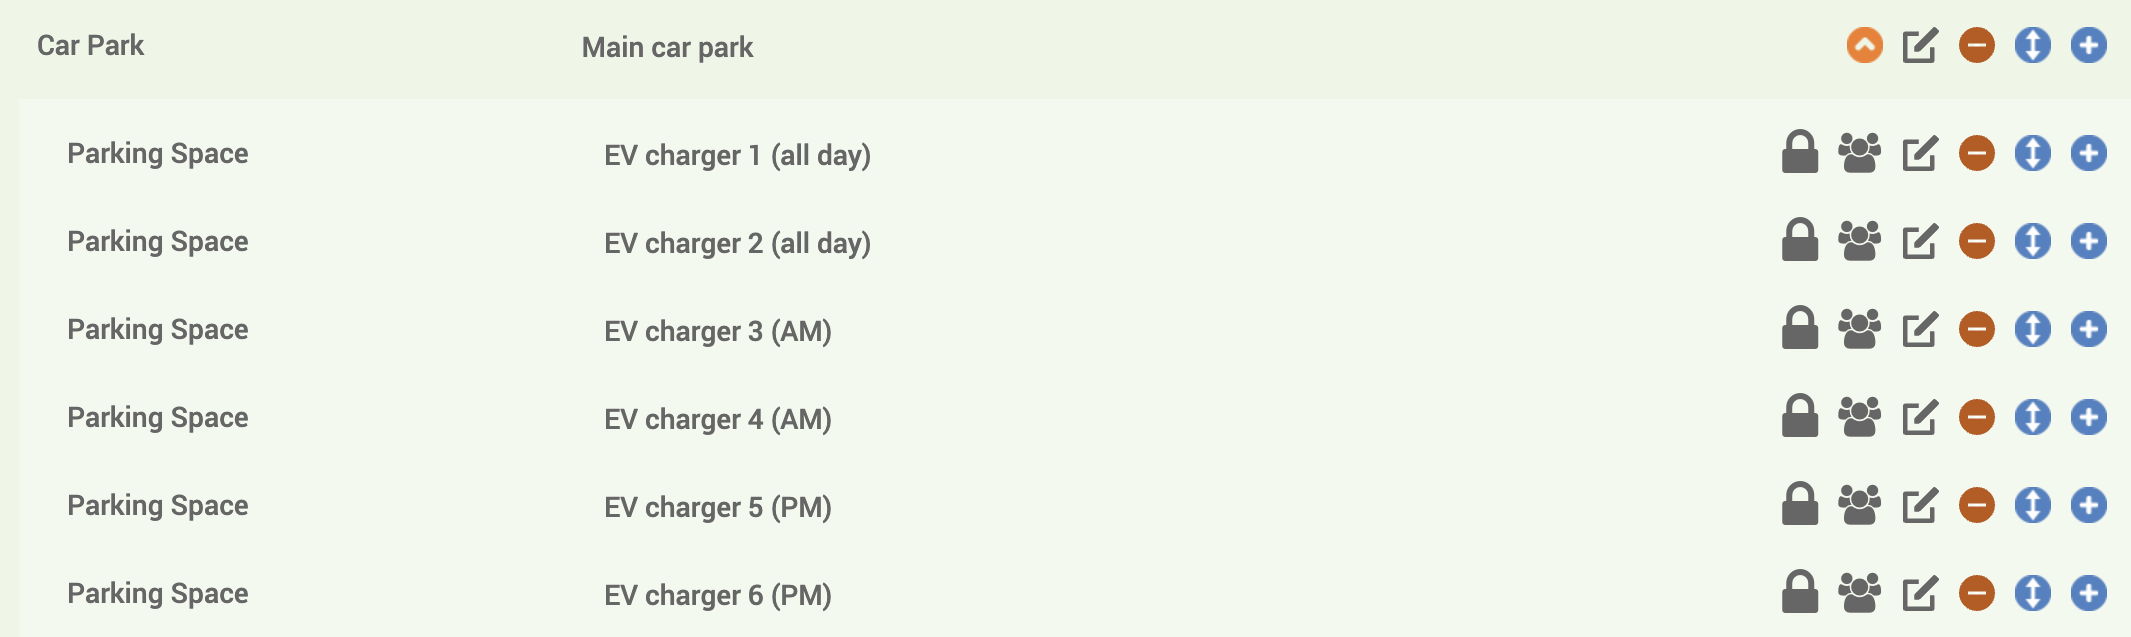
Repeat these steps for your other resources. A padlock symbol will appear next to each resource that had an availability constraint put on it.
Note: if you’re enabling settings in the Availability and Settings tab options, make sure that the settings in the different tabs don’t conflict.
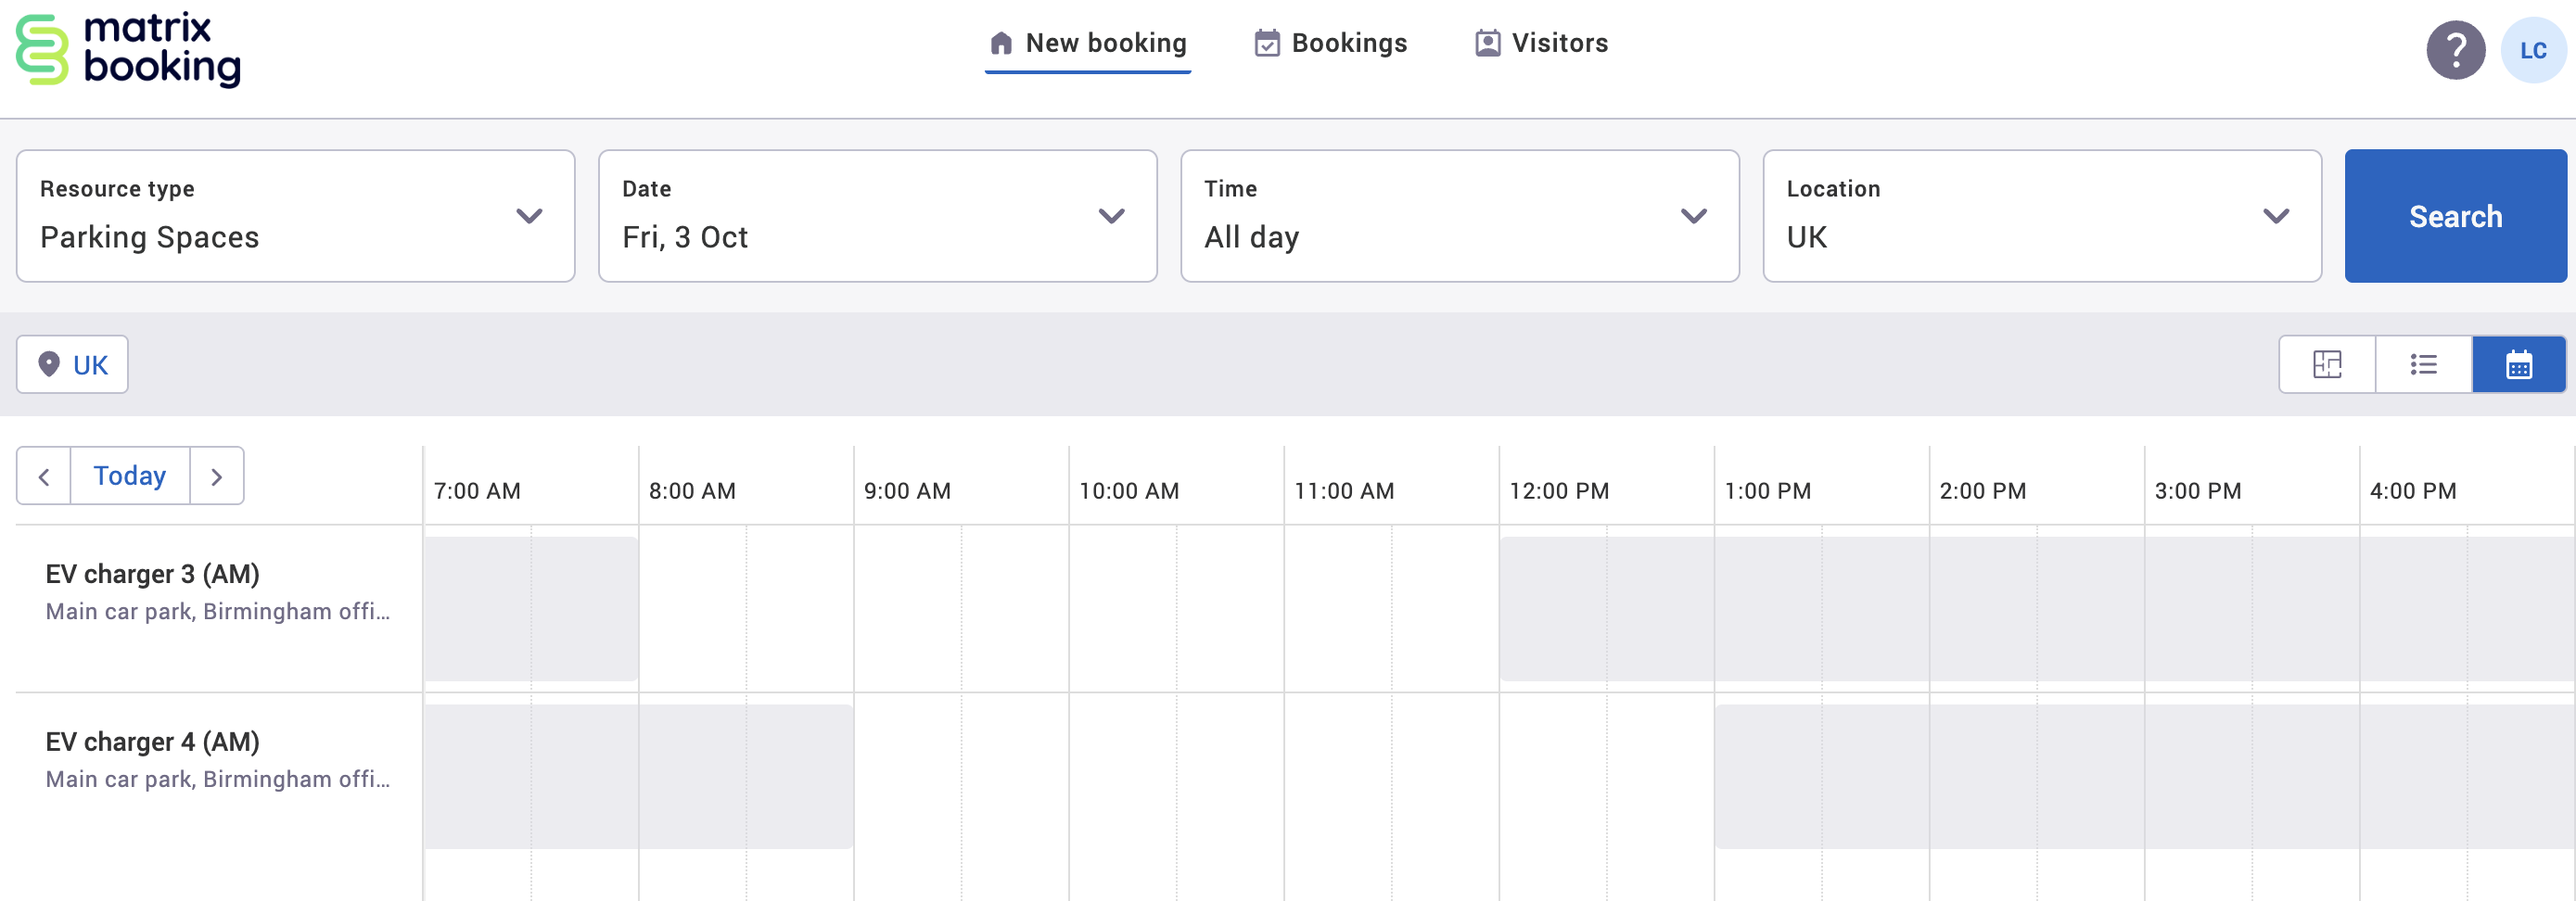
What it looks like when making a booking
If you restrict your resources to particular user groups, other users won’t be able to book them. If you set the availability of your resources to particular times of the day, users won’t be able to book them outside of those times.
For example, a user (Lewis Campbell) in the Afternoon (PM) EV charger user group only has access to EV chargers 3 and 4 as they are set for the morning. EV chargers 3 and 4 have been offset by an hour for those who go to the office earlier or later.
Note: if you have any questions around resource scheduling, contact your customer success manager.