This tab is where general information about a resource can be entered or changed. Some of this information will give you different options when you book that resource:
Access the General tab
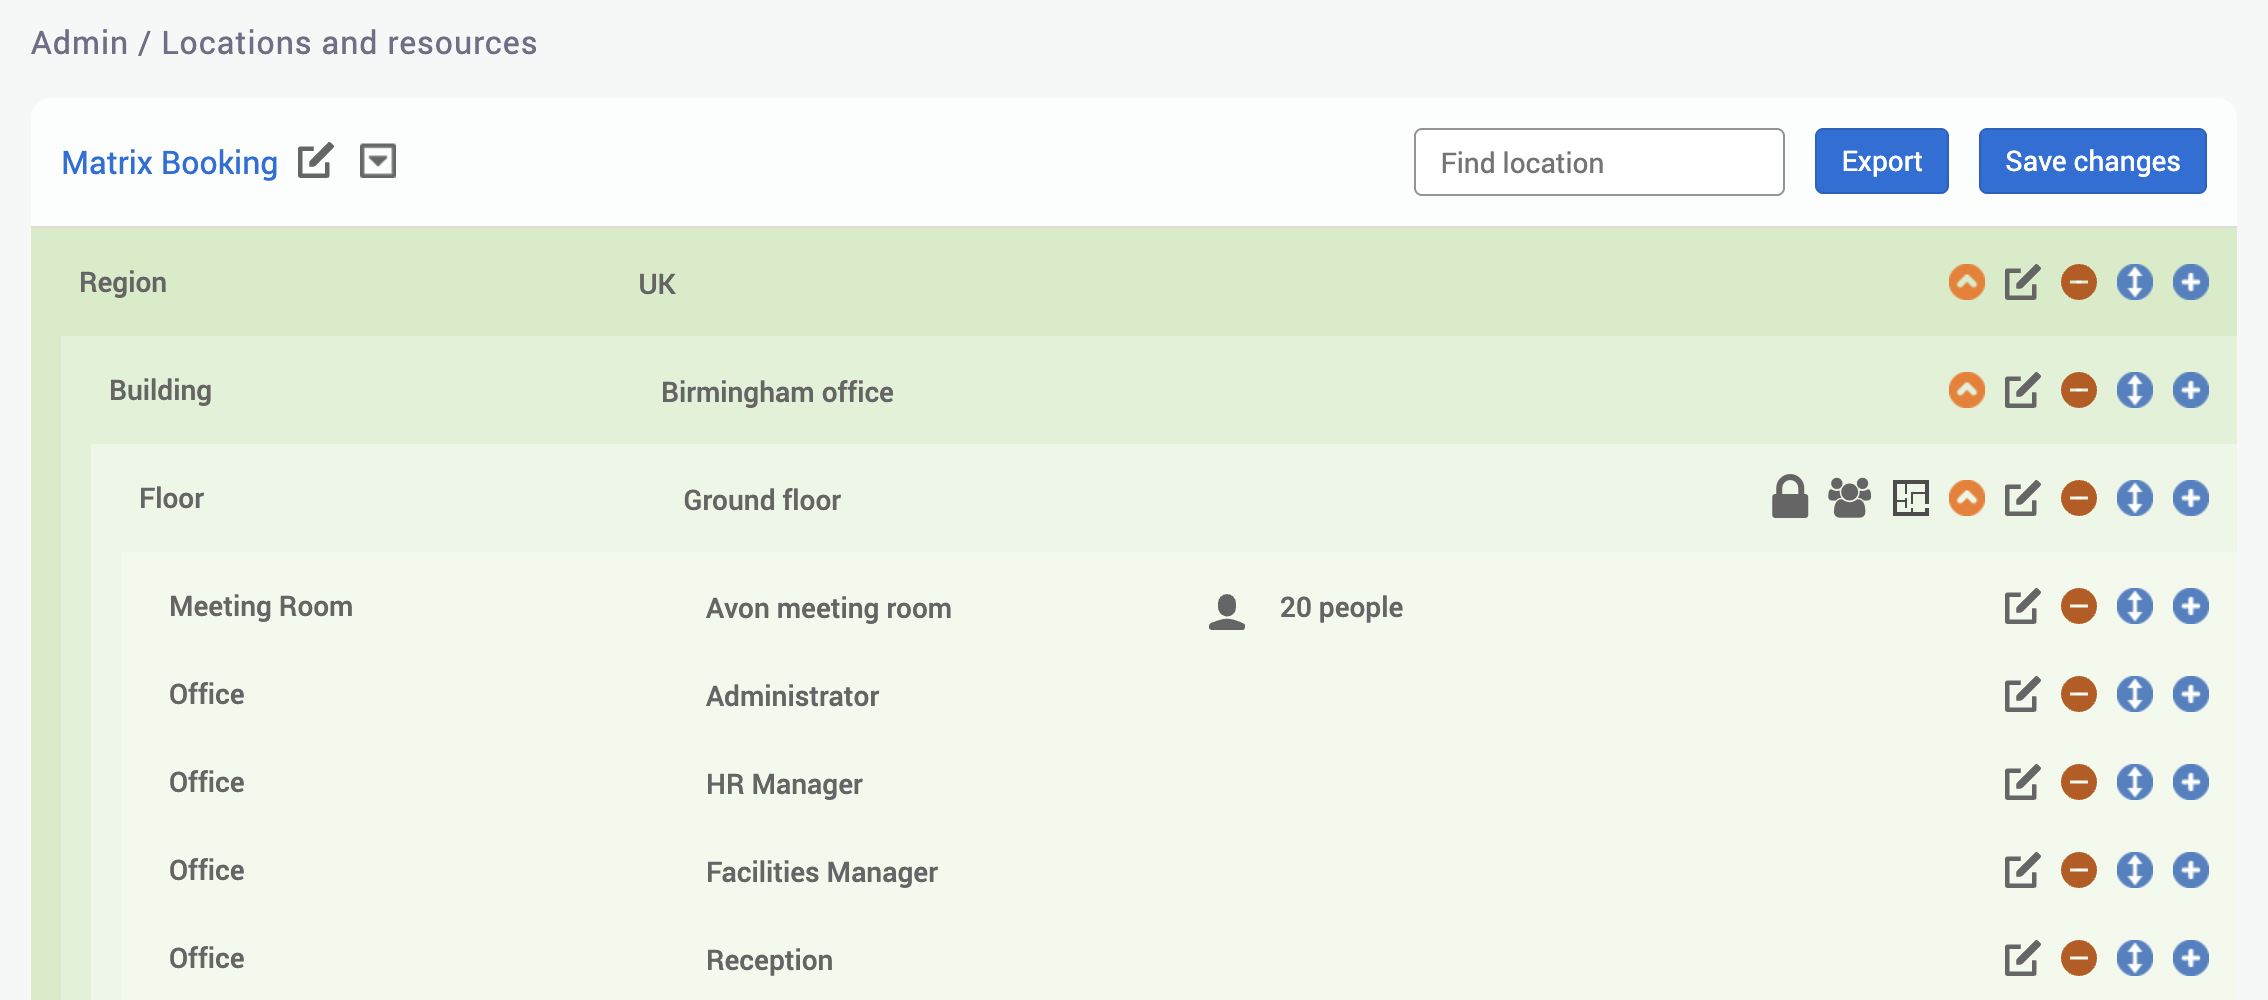
To access the General tab of a location or resource:
-
Select Admin in the navigation bar.
-
Select Locations and resources under the Location Settings section in the side menu.
-
Select Edit hierarchy. The Locations and resources hierarchy will appear.
-
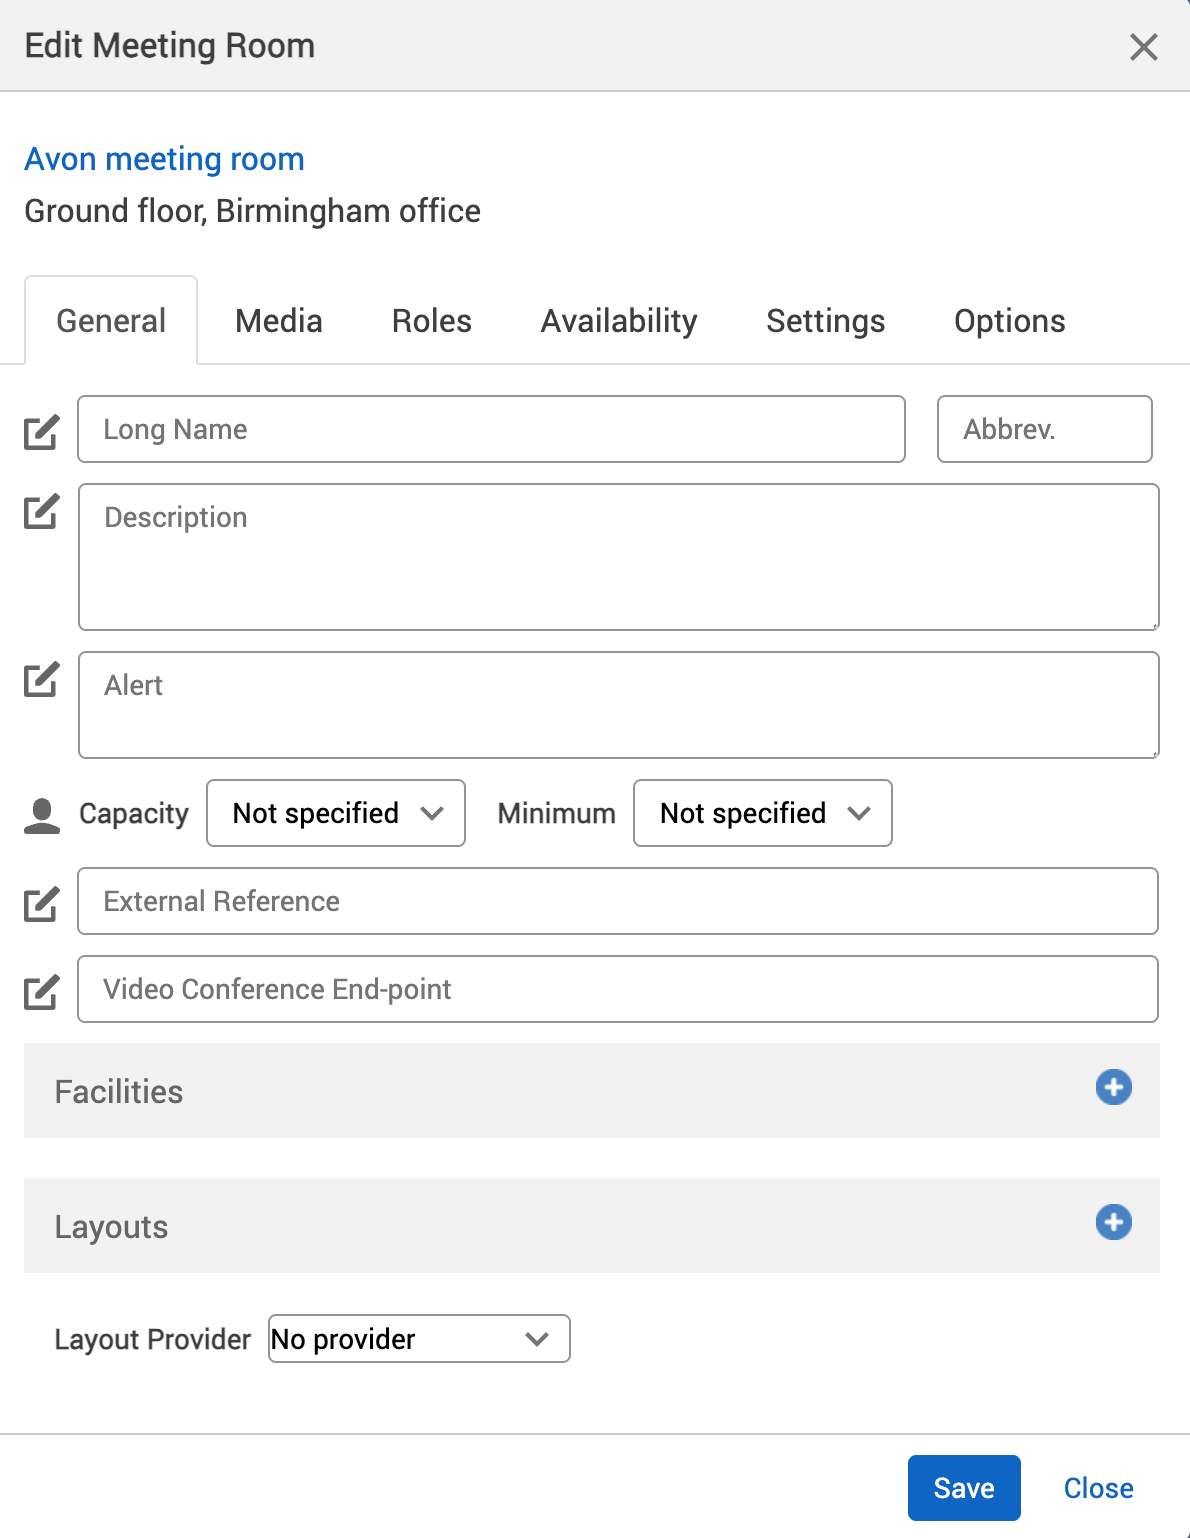
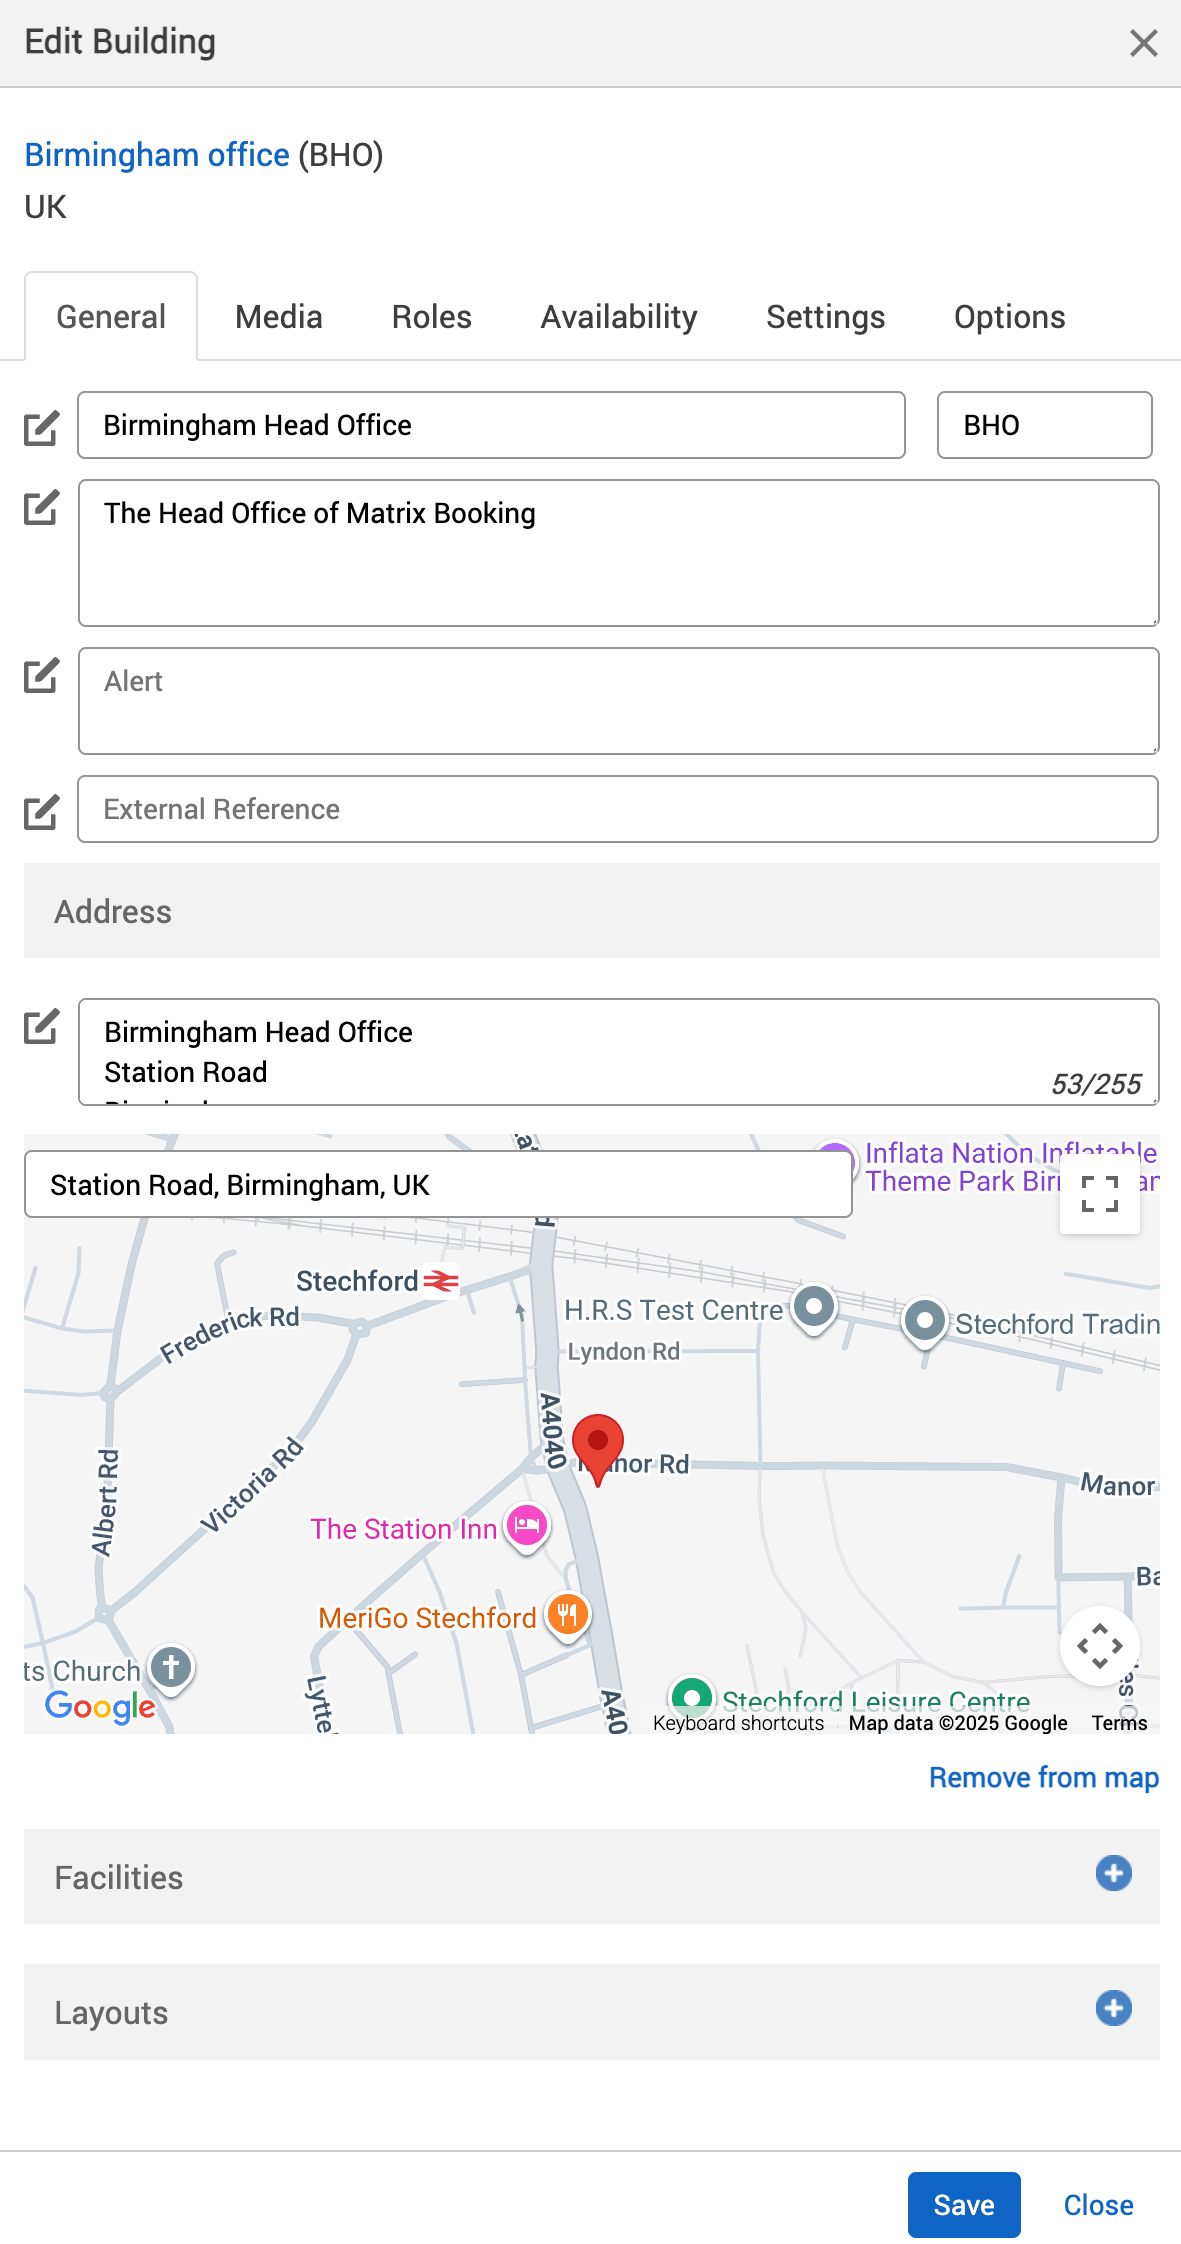
Select Edit next to the location or resource you want to change. The Edit [Location or Resource] dialog will appear with the General tab selected by default.
Add location or resource details
There are a number of details you can add to your locations and resources:
-
Long Name – full name of the location or resource.
-
Abbrev. – abbreviation of the location or resource.
-
Description – full description of the location or resource.
-
Alert – warn people about using the location or resource (for example, maintenance work).
-
Address – full address of the location or resource, with an optional map (locations only).
-
External Reference – used for third-party technologies (for example, occupancy sensors).
-
Video Conference End-point – email address for a resource (not a location) to be invited to a booking.
To add any of these details to your location or resource:
-
Enter the Long Name, Abbrev., Description, Alert, and External Reference in the corresponding text boxes. You can also enter the resource’s email address into the Video Conference End-point text box for resources (not locations).
-
Enter the address in the Address text box under the Address section.
-
To see the address on a map, select Add to map. A map will appear (provided by Google).
-
If the marker on the map isn’t in the right place, either:
-
Use the Quick Address Search.
-
Drag-and-drop the marker to where it needs to be.
-
-
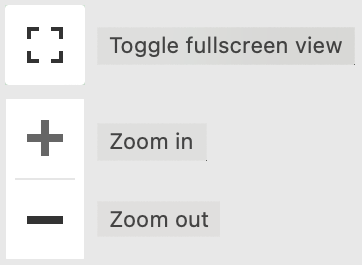
To expand the map to full screen, select the ⛶ Toggle fullscreen view button in the top-right corner.
-
To zoom in on the map, select the + Zoom in button in the bottom-right corner. To zoom out, select the - Zoom out button.
-
Select either of the following and the dialog will close:
-
Save to keep your changes.
-
Close to discard your changes.
-
Notes:
-
Only locations can have addresses; resources can’t.
-
Matrix Booking isn’t responsible for the Google Maps’ capabilities around accessibility.
Add or edit resource capacity
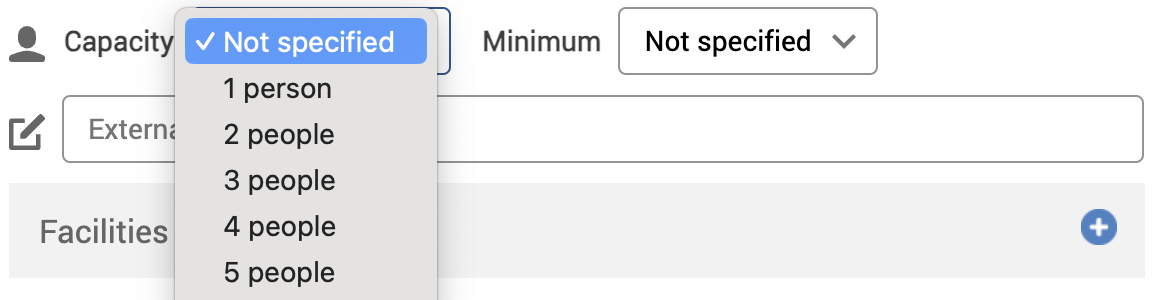
If you’ve set up your resource to have a capacity in Booking categories, you can set up what the capacity of your resource is under the General tab. You can also set a minimum number of people needed to book a resource.
To add or edit a capacity or a minimum capacity for a resource:
-
Select the Capacity dropdown. A dropdown for the number of people that your resource can hold will appear.
-
To add a minimum number of people that are needed to book your resource, select the Minimum dropdown. A dropdown for the number of people that your resource can hold will appear.
-
Select either of the following and the dialog will close:
-
Save to keep your changes.
-
Close to discard your changes.
-
-
Your resource’s capacity will be displayed on your Locations and Resources hierarchy.
-
When you make a booking for that resource and you haven’t reached the minimum capacity, you’ll get a warning message:

-
When you make a booking for that resource and you’ve exceeded the maximum capacity, you’ll get a warning message:

Notes:
-
Capacities and minimums are limited to 200 people.
-
Only resources (or Booking categories) can have capacities; locations can’t.
-
If you don’t have the minimum number of attendees needed to book a resource and you’re a location manager, location administrator, or administrator of the location where the resource is, you can ignore this warning and book the resource. If you’re a standard user, you won’t be able to book the resource unless you’ve reached the minimum number of attendees.
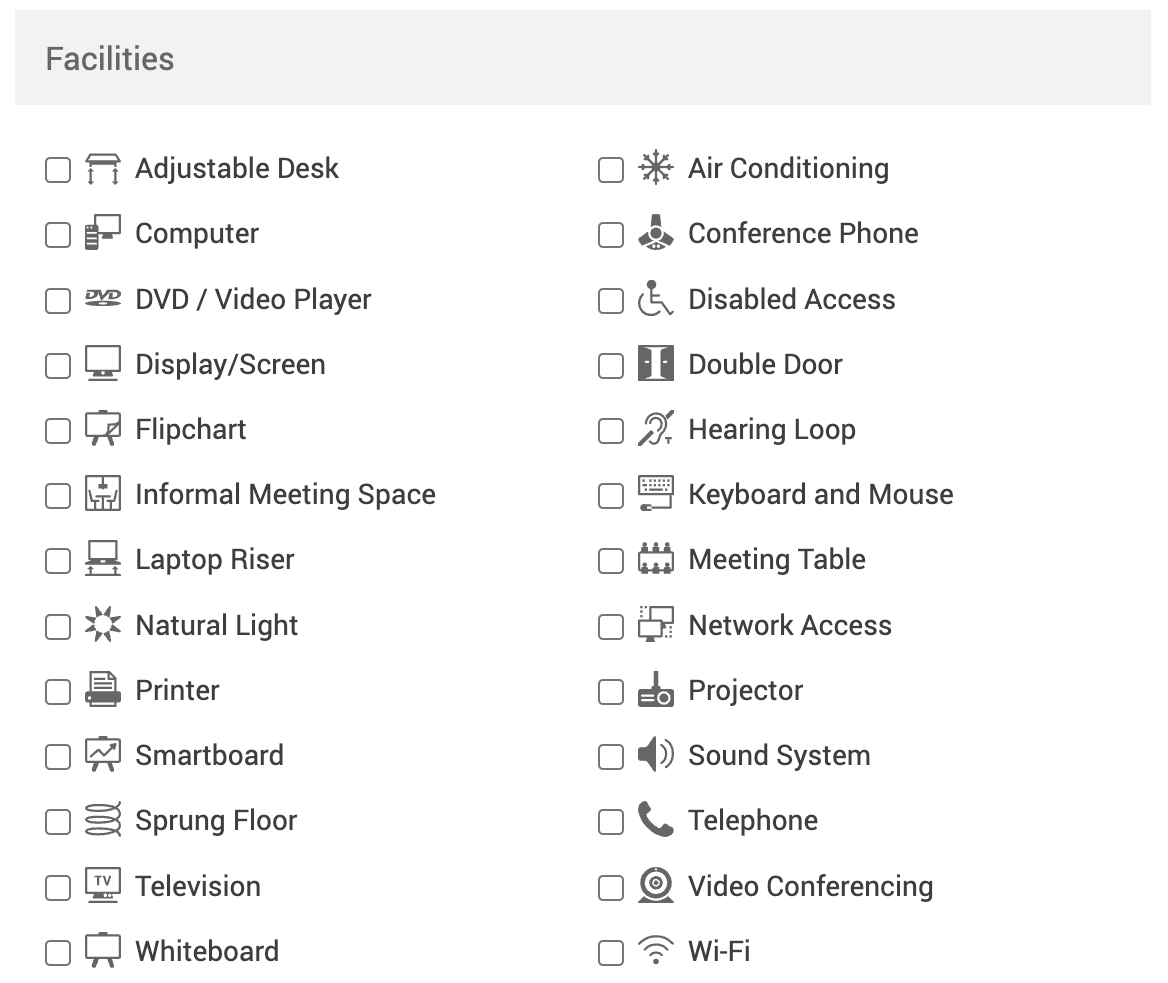
Add facilities to locations and resources
To add a facility to your location or resource:
-
Select the + Add facilities button next to Facilities.
-
A list of the different facilities you can add will appear under the Facilities section.
-
Select the tick boxes next to the facilities that your location or resource has.
-
Select either of the following and the dialog will close:
-
Save to keep your changes.
-
Close to discard your changes.
-
Note: if you can’t see a facility that you want, go back to the Facilities screen and add it there.
Add layouts to resources
If your resource can be changed around, you can set what layouts the resource can have. When you book that resource, the layout you want can be selected. For example, the tables in a meeting room can be changed from a layout for a conference meeting to a layout for a lecture.
To add a layout to a resource:
-
Select the + Add layouts button next to Layouts.
-
A list of the different layouts you can add will appear under the Layouts section.
-
If you have a provider that changes your resource’s layout for you, select the Provider dropdown.
-
Select the provider from the dropdown.
-
Select the layouts that your resource can be arranged to.

-
Select either of the following and the dialog will close:
-
Save to keep your changes.
-
Close to discard your changes.
-
Notes:
-
Although you can add layouts to locations, we recommend that you add layouts for each resource under your location as they aren’t inherited from locations.
-
The provider will be notified of the layout you need once you’ve made your booking.
-
A provider must be set up first before they will appear here in Provider dropdown.
❮ Back
Location and resource settings