
This page describes how to use the Import visitors screen:
Download the template
To import visitors as a receptionist, location manager, location administrator, or administrator, you need to use our template and complete the following columns:
-
First name and last name (mandatory).
-
Host email (mandatory for external visitors, but optional for internal visitors).
-
Email (mandatory for internal visitors, but optional for external visitors).
-
Company (optional).
-
Phone number (optional).
-
Car registration (optional).
-
Expected arrival time (optional, 24-hour format).
Download the import visitors template
Note: importing visitors supports reception sharing.
Access the Import visitors screen
To access the Import visitors screen:
-
Select Admin in the navigation bar.
-
Select Import visitors under the Tools section in the side menu.
Note: the Import visitors screen can also be accessed from Visitors list tab in the Visitors screen.
Import visitors
To import visitors in the Import visitors screen as an administrator:
-
Contact your customer success manager to ask about adding the enhanced visitor module to your subscription.
-
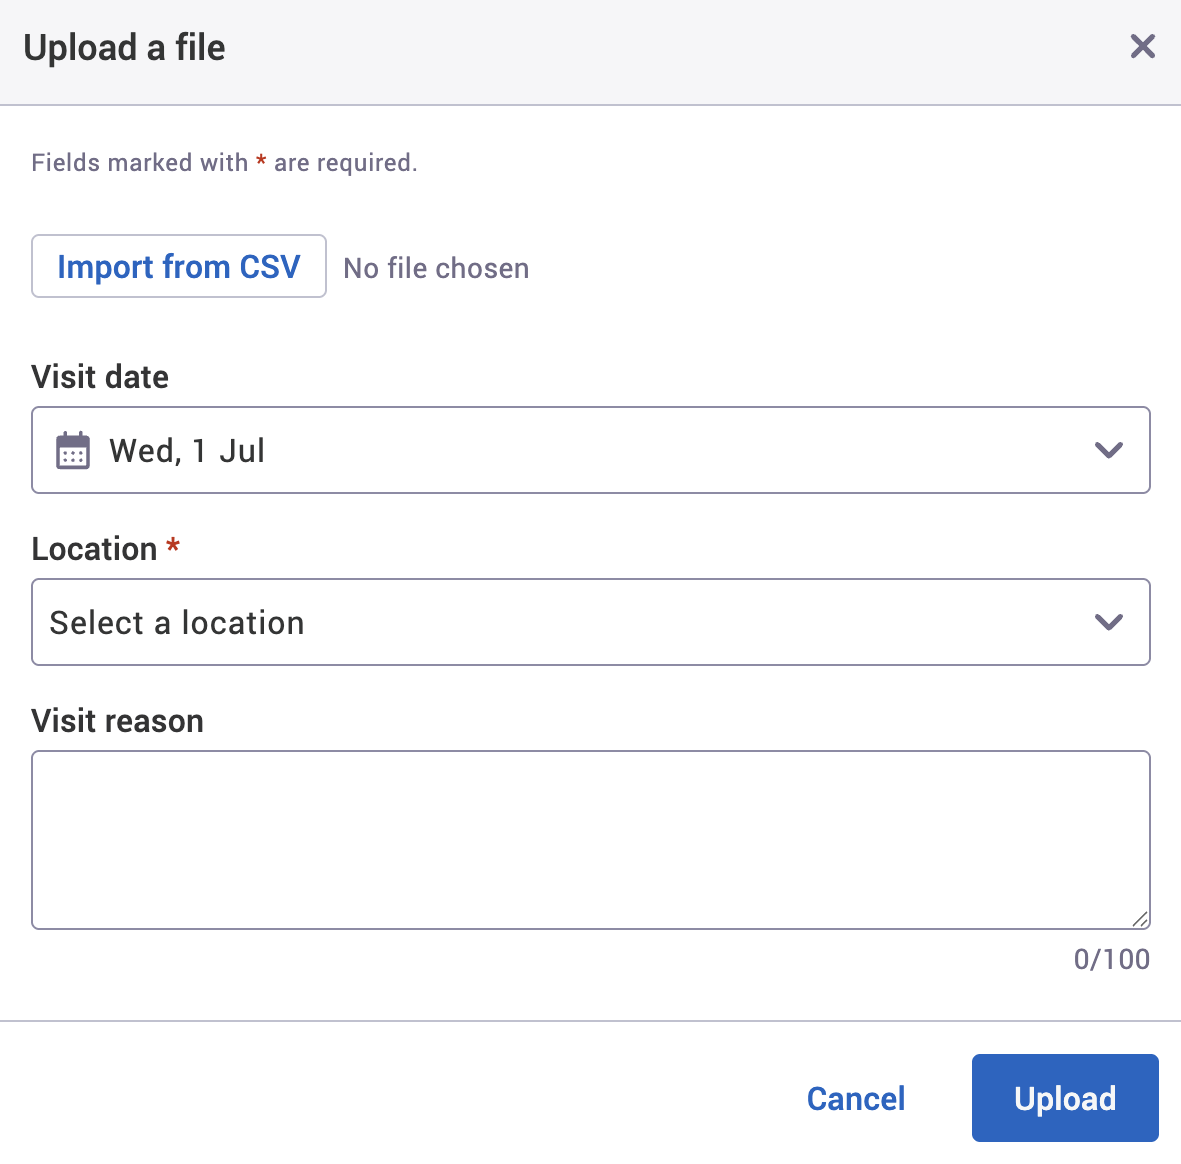
Select Upload a file. The Upload a file dialog will appear.
-
Select Import from CSV. Your file explorer will open.
-
Locate the completed template.
-
Select Open (or equivalent). This will close the file explorer and you’ll return to the Upload a file dialog.
-
Optional: select the Visit date from the Visit date dropdown.
-
Select the Reception from the Location dropdown.
-
Optional: enter a reason in the Visit reason text box.
-
Select either of the following and the dialog will close to return you to the Import visitors screen:
-
Upload to upload your completed template with the additional information entered.
-
Cancel to discard your upload.
-
Troubleshooting
If any errors occur, the error message should display the reason and solution to fix the error. If the error occurs again after fixing and retrying, raise a support ticket.