Problem / Question
I have a lot of staff in my organisation. Is there any way I can import them into Matrix Booking in bulk?
Solution / Answer
If you have a lot of users in your organisation, you can import them in bulk. By default, this functionality is switched off. Additionally, to import users, a template is used.
To import users in bulk:
-
Raise a change setup support ticket to get the Import user feature switched on.
-
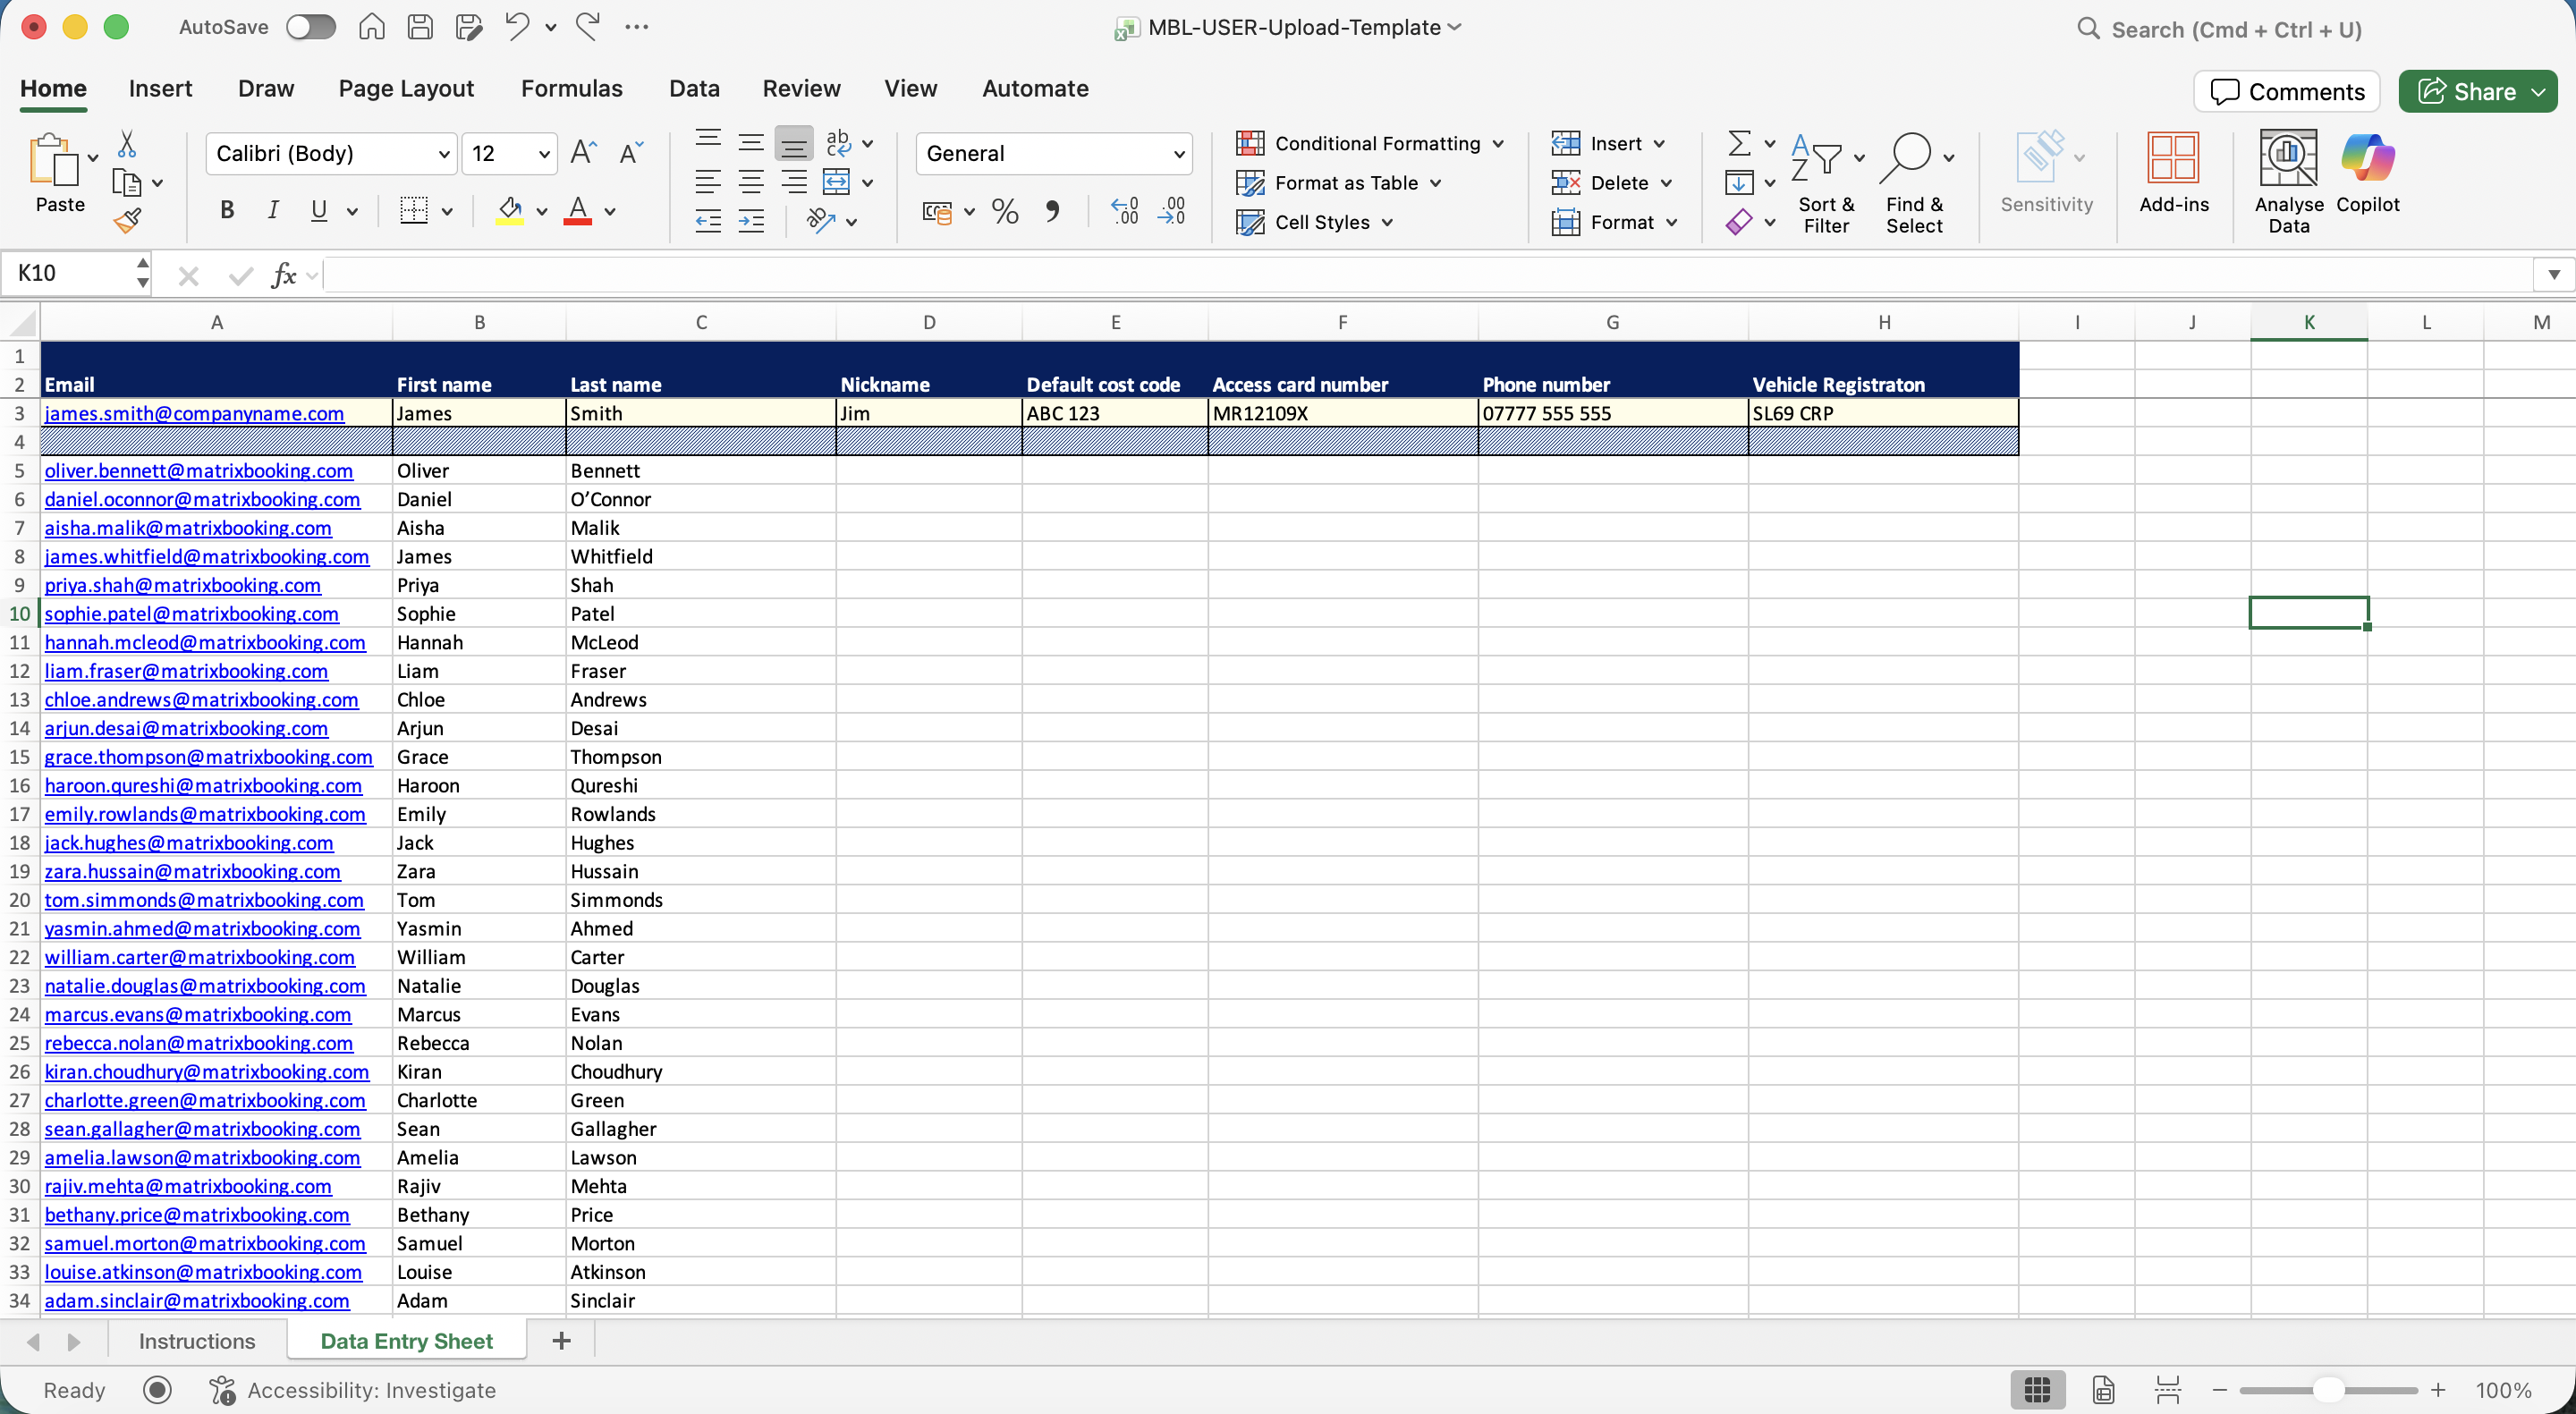
Open the template to the Data Entry Sheet tab.
-
Enter the details for each user in the spreadsheet. The first 3 columns are mandatory (email address, first name, and last name). All other fields are optional and can be left blank.
-
Delete the row with the example user (James Smith) at the top of the spreadsheet.
-
Delete the Instructions tab.
-
Once the template is complete, save the file as a
.csvfile.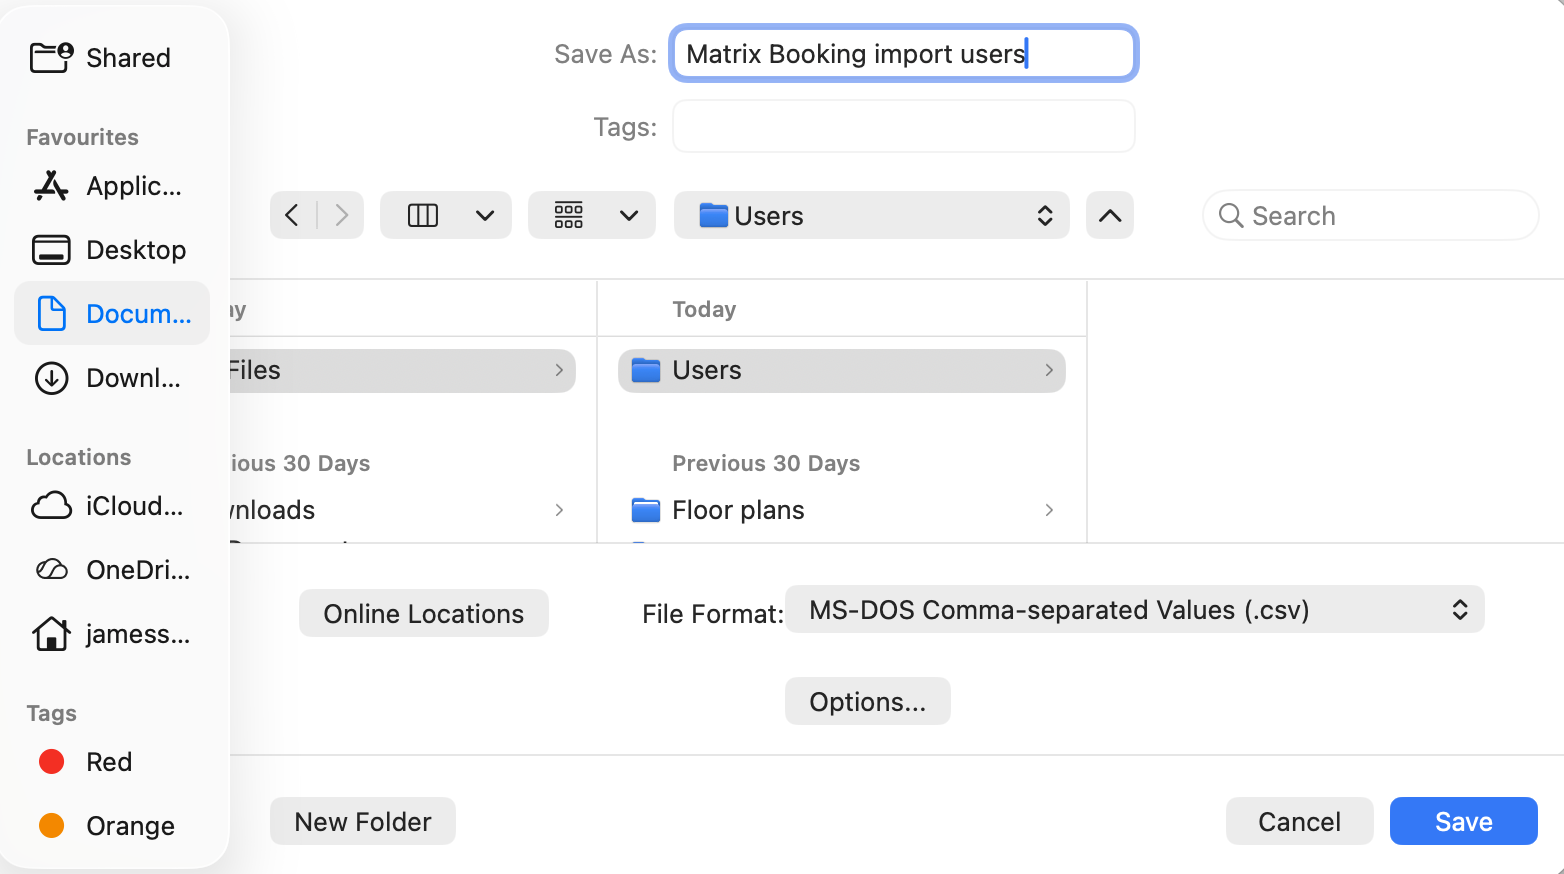
-
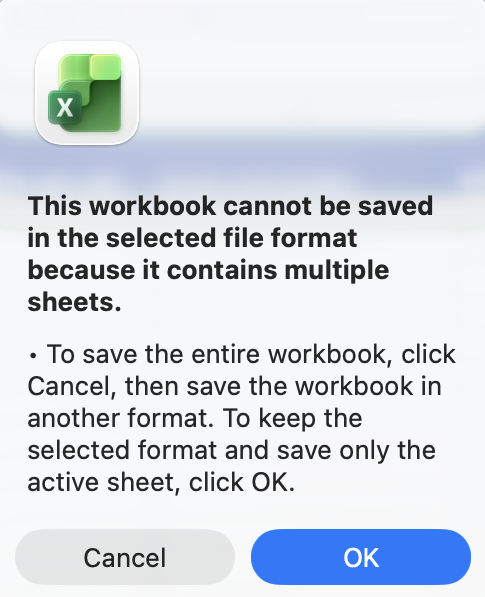
Microsoft Excel may state that you can only save the currently active worksheet. If this happens, select OK (or equivalent).
-
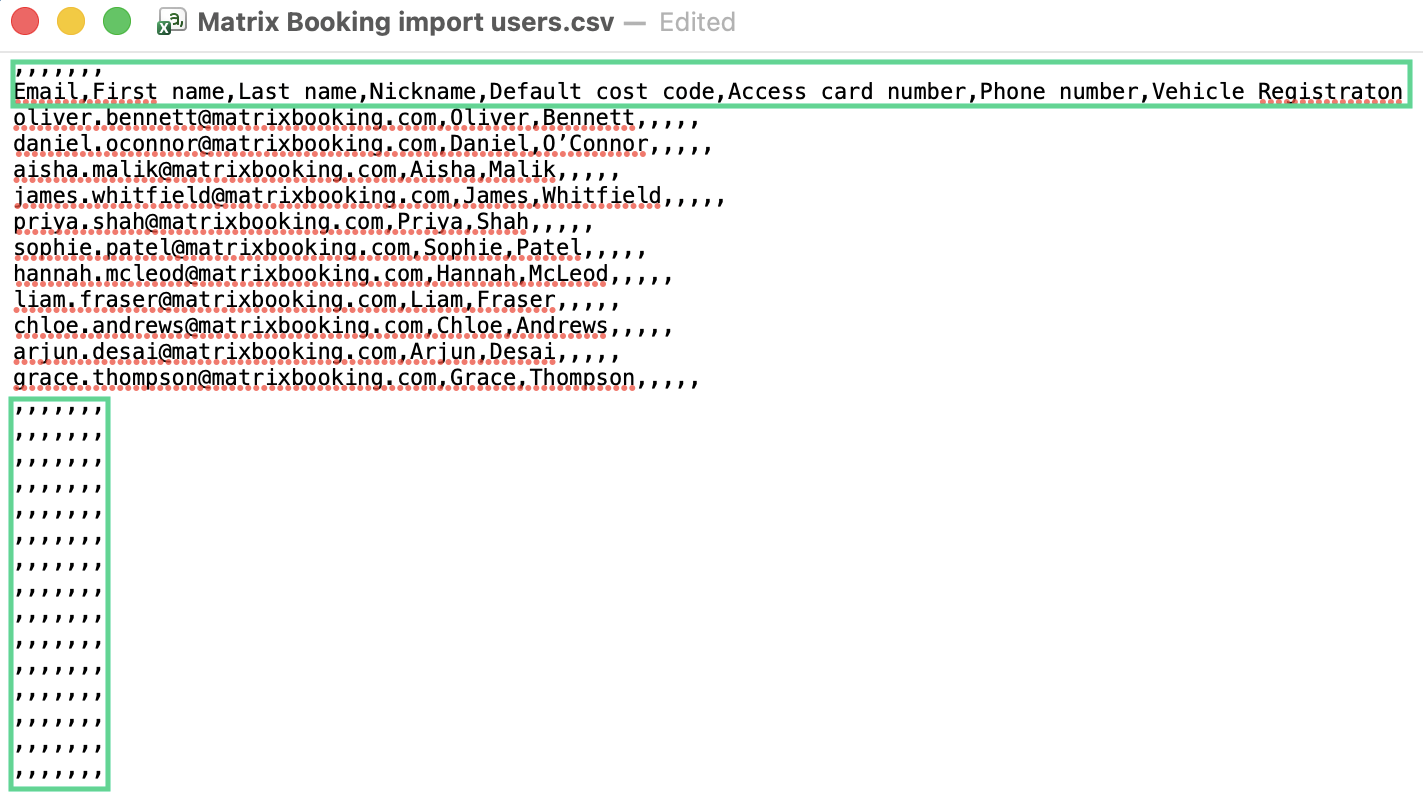
Once saved, avoid opening the file again in Microsoft Excel. The programme will attempt to reformat it.
-
Open the file with a text editor (for example, Notepad on Windows or Textedit on Mac). Microsoft Word or Notes on Mac add formatting which interferes with the
.csvfile. -
Delete the commas (,,,,,,,) on the top line and the column header row underneath.
-
If there are any commas (,,,,,,,) or spaces underneath your user list, delete them too.
-
Make there aren’t any spaces after the final user’s entry in the list
-
Save the text editor file. This may have saved automatically.
-
Select Admin in the navigation bar.
-
Select Import users under the Tools section.
-
Select + Upload a file. The Upload a file pop-up will appear.
-
Select Import from CSV. The file explorer will appear.
-
Locate your
.csvfile and select Open (or equivalent). The file explorer will close.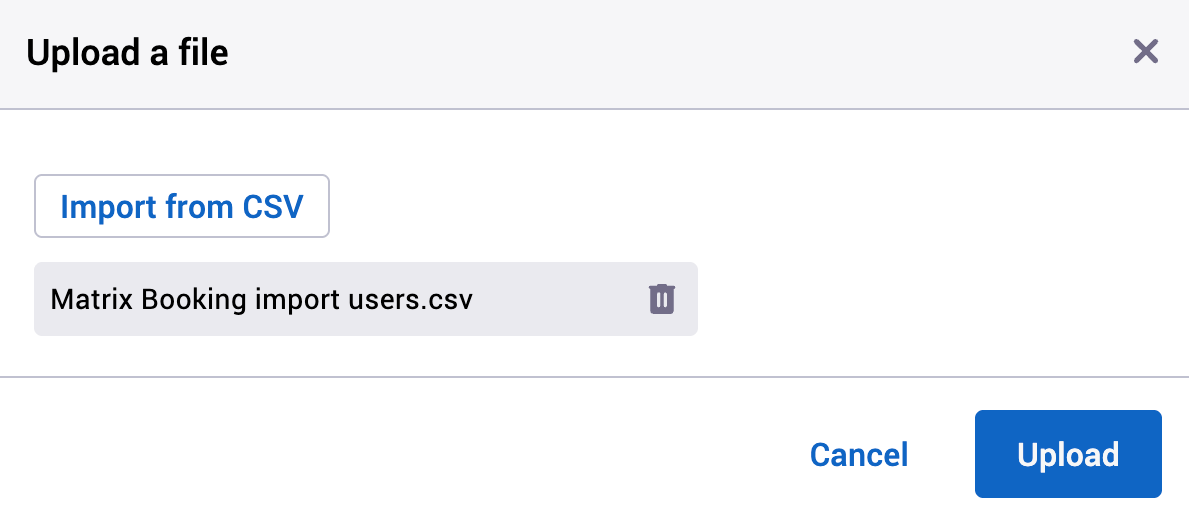
-
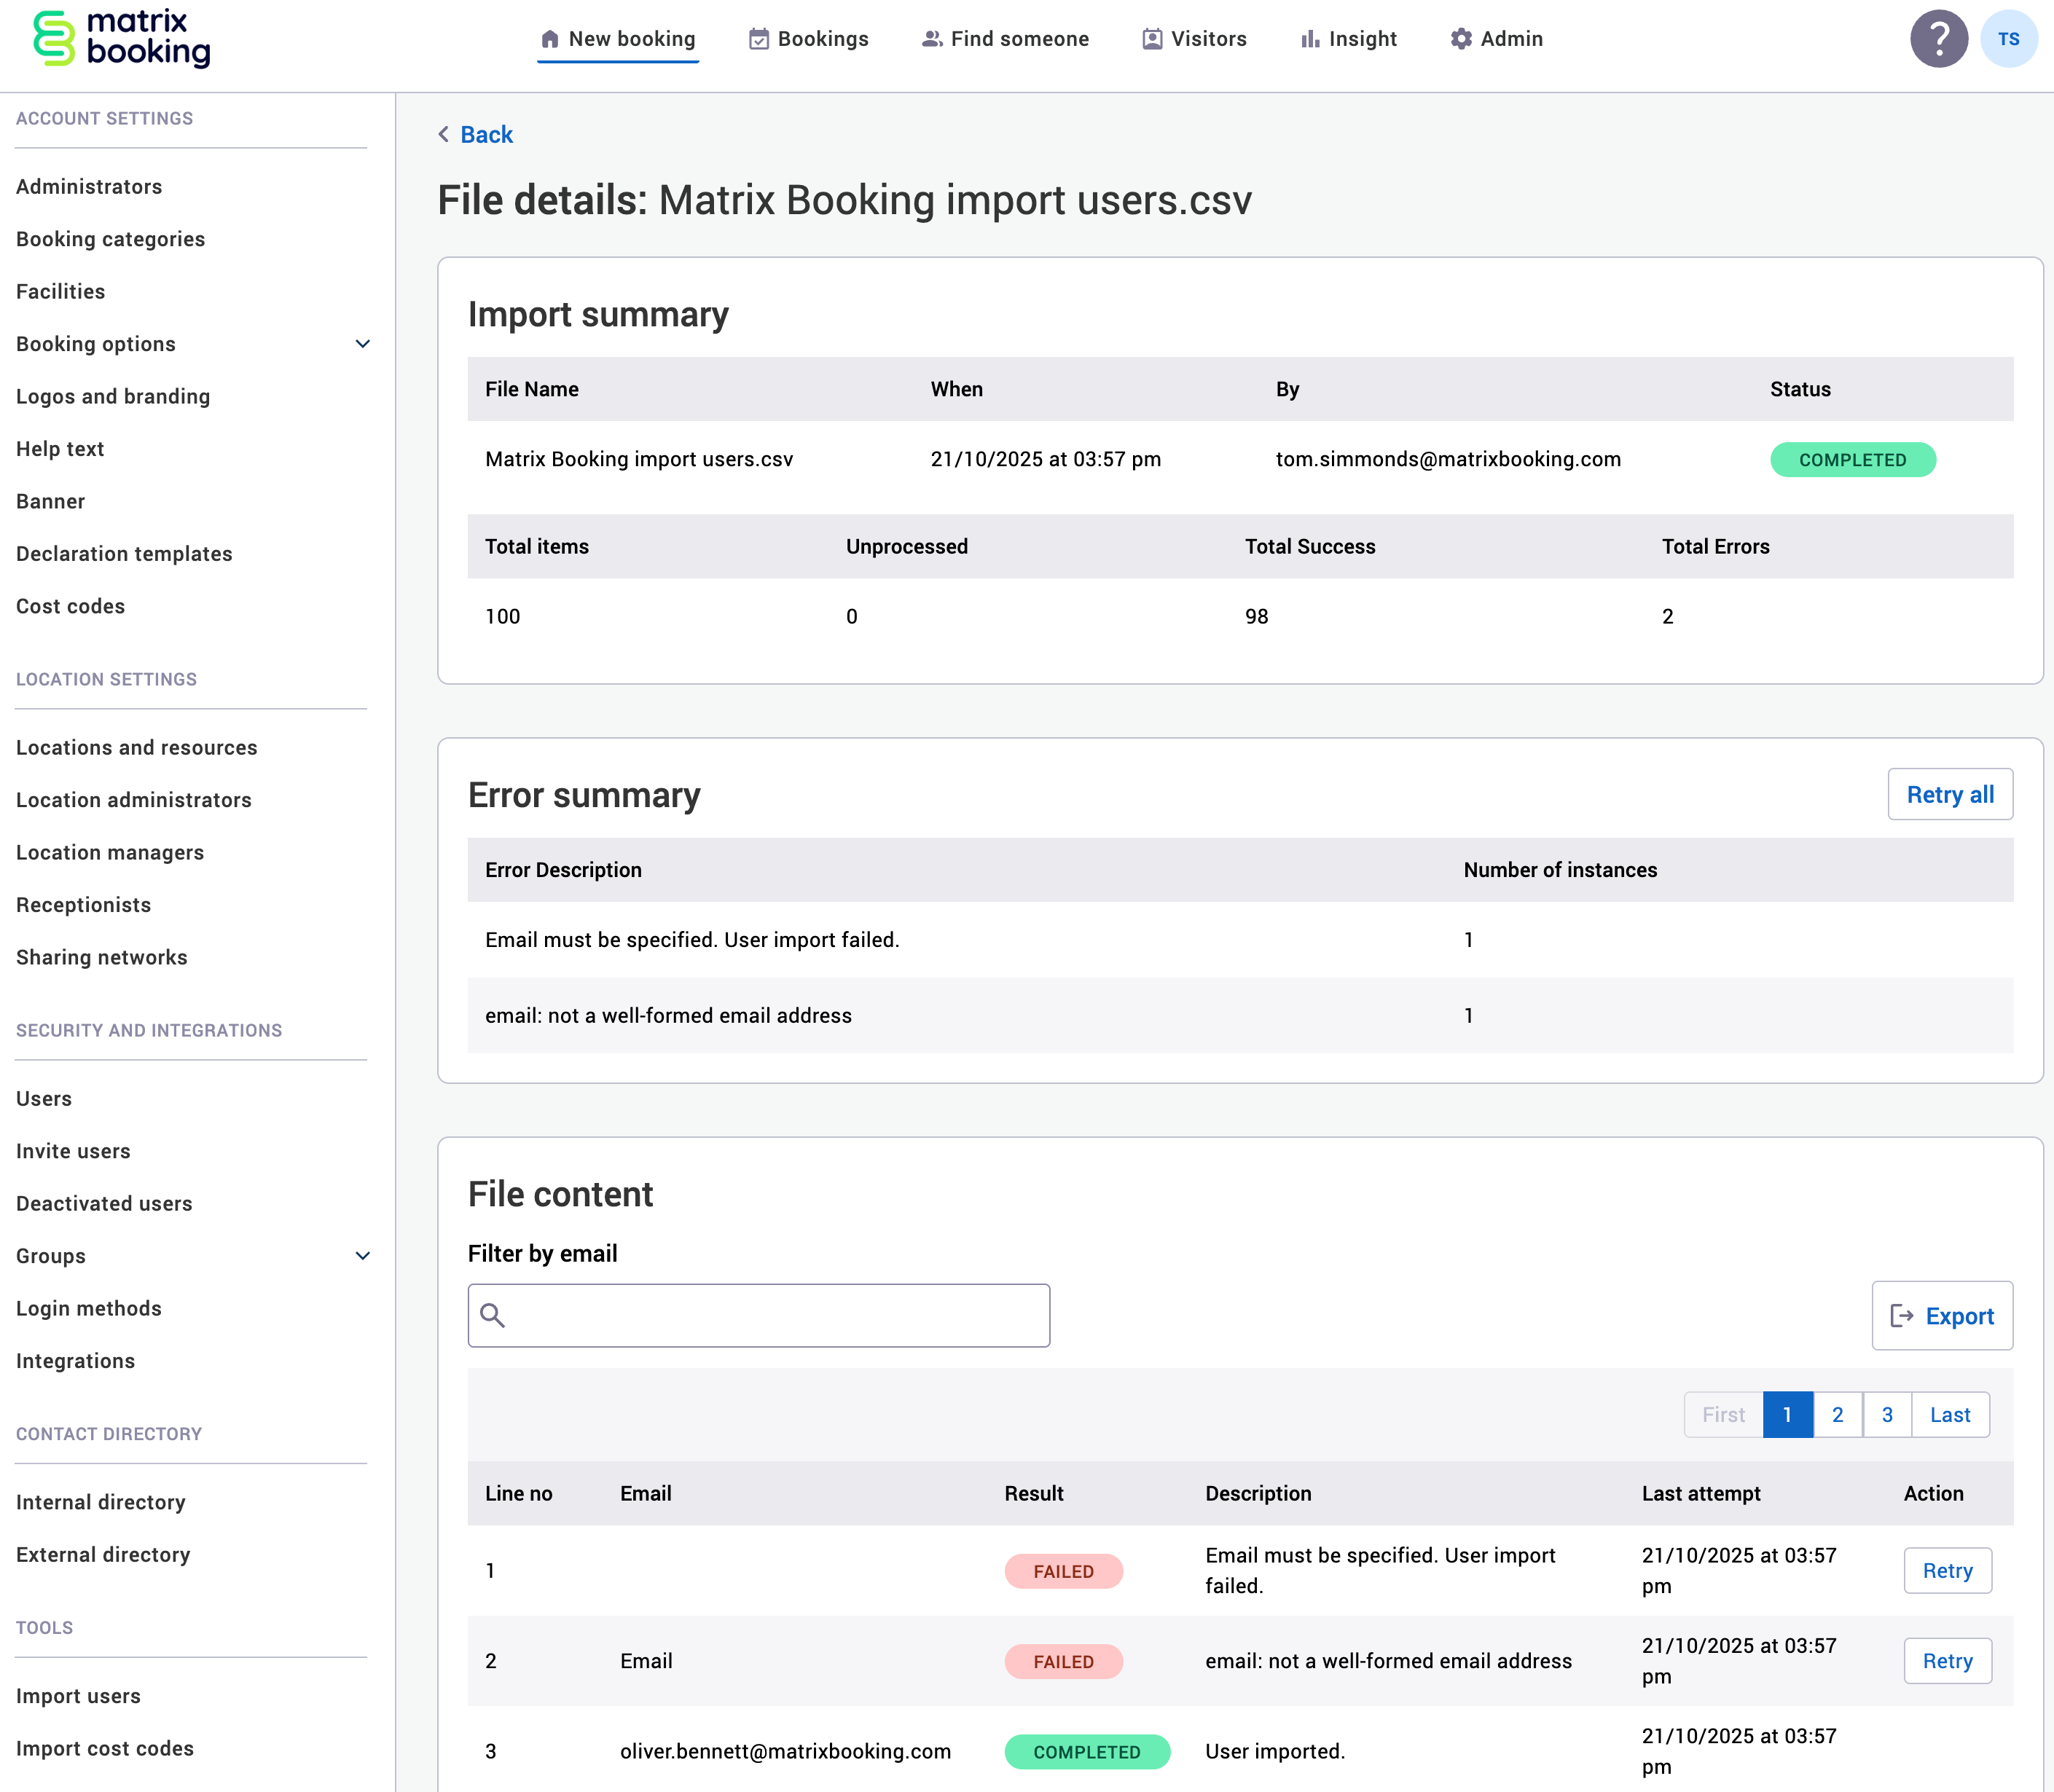
Select Upload. Your file will begin to upload and Matrix Booking will import your users. You’ll be redirected to the File details screen
-
Depending on how many users you had in the file, it may take some time.
-
Once the upload has finished, the STARTED status will have changed to COMPLETED. The imported users can be found on the Users screen.
-
If the status has changed to FAILED, the error messages will guide you on what the issues may be (for example, not removing the commas on the top line or column header row will produce the error messages above).
Notes:
-
If you only have a few users, we recommend inviting users or adding users manually.
-
We strongly recommend that the template and its formatting are followed exactly. If other columns are added or the formatting is changed, the import will fail.
-
If your import has failed, we recommend that you start the process again with a fresh spreadsheet to avoid errors being carried forward from the previous spreadsheet.
-
If you have any issues with the import, raise an administrator issue support ticket and attach both the
.xlsxfile you edited and the.csvfile you uploaded. -
The upload users function can’t be used if your organisation has 1 of our directory synchronisation integrations. If your organisation uses our Microsoft Entra ID integration or our SCIM integration, see our guidance:
-
Select Admin in the navigation bar.
-
Select Users under the Security & Integrations section in the side menu.
-
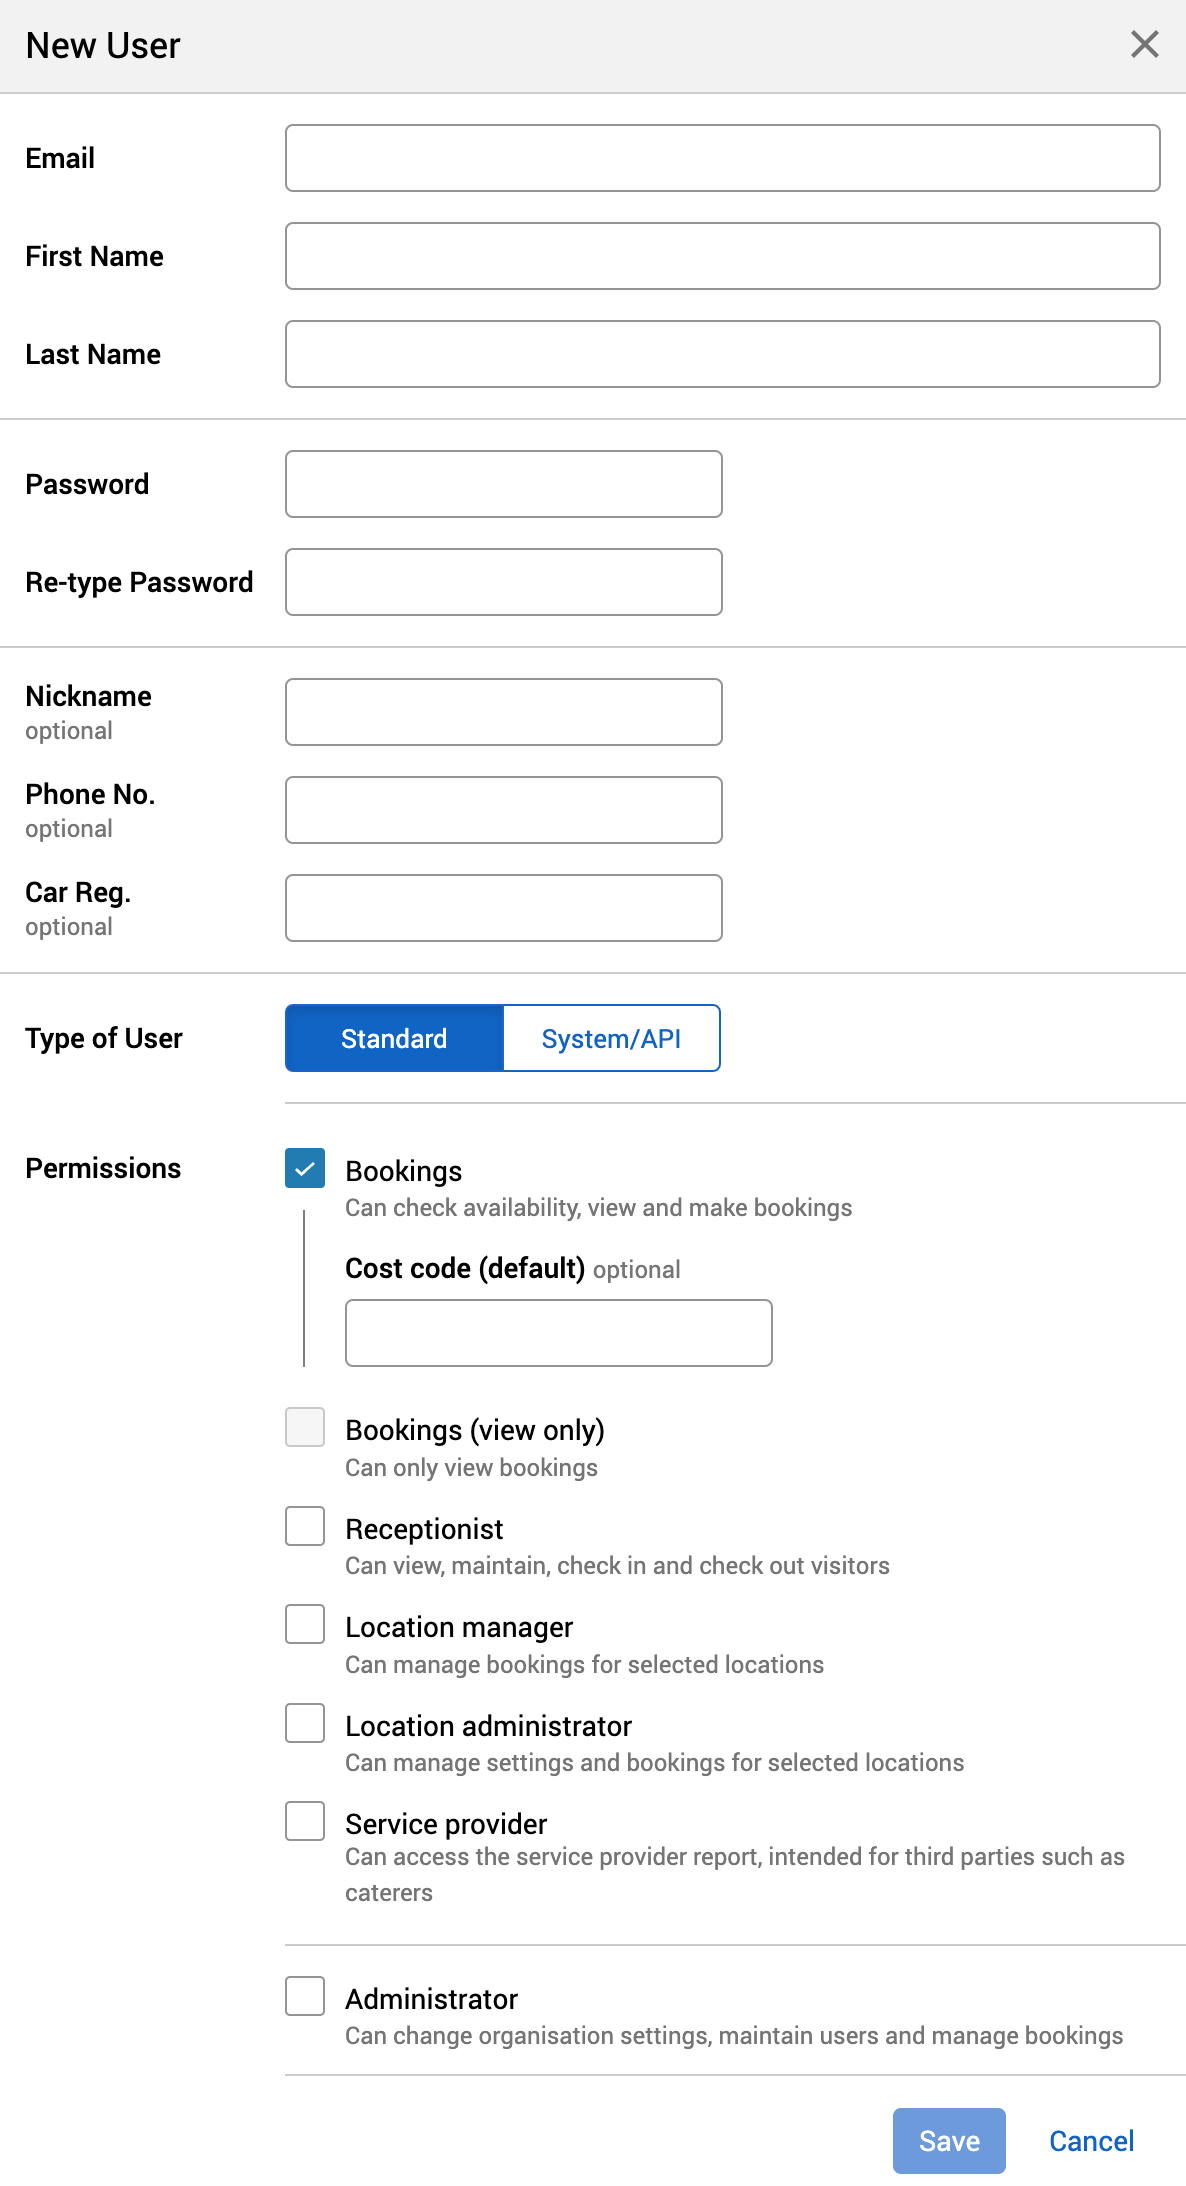
Select New User in the filters ribbon. The New User pop-up will appear.
-
Enter their email address.
-
If the first and last names can be extracted from the email address, they will be auto populated.
-
Enter their first and last names if the auto populated results are incorrect.
-
-
Enter and re-enter a password for them.
-
Enter their other details you have available (for example, phone number).
-
Select the type of user they need to be based on the type of access they need ( see Access profiles and user accounts ).
-
For a normal user, select Standard.
-
For an app account (for example, Signage app), select System/API.
-
If required, enter the cost code and access card number.
-
-
Select Save when finished.