This page explains how to get and use the Outlook add-in for Matrix Booking.
Notes:
-
This guide was written for our Outlook add-in v2.6 and above.
-
Our add-in is compatible with Microsoft Outlook 2016 for Windows. Earlier versions of Microsoft Outlook aren’t supported. This is driven by the versions that Microsoft currently supports. For more information, see Microsoft’s guidance on end of support.
-
This add-in is for Windows OS and the Outlook app only. The add-in doesn’t work for the in-browser version of Outlook.
-
This add-in isn’t compatible with our Microsoft 365 calendar integration.
-
If you already have our Microsoft 365 calendar integration set up, see Microsoft 365 add-in guide.
Introduction
The Matrix Booking Outlook add-in makes it easier to book resources, such as meeting rooms and desks, straight from Outlook. Users who have access to book meetings in other people’s Outlook calendars and have access to book meetings on behalf of other people in Matrix Booking can make bookings using the add-in.
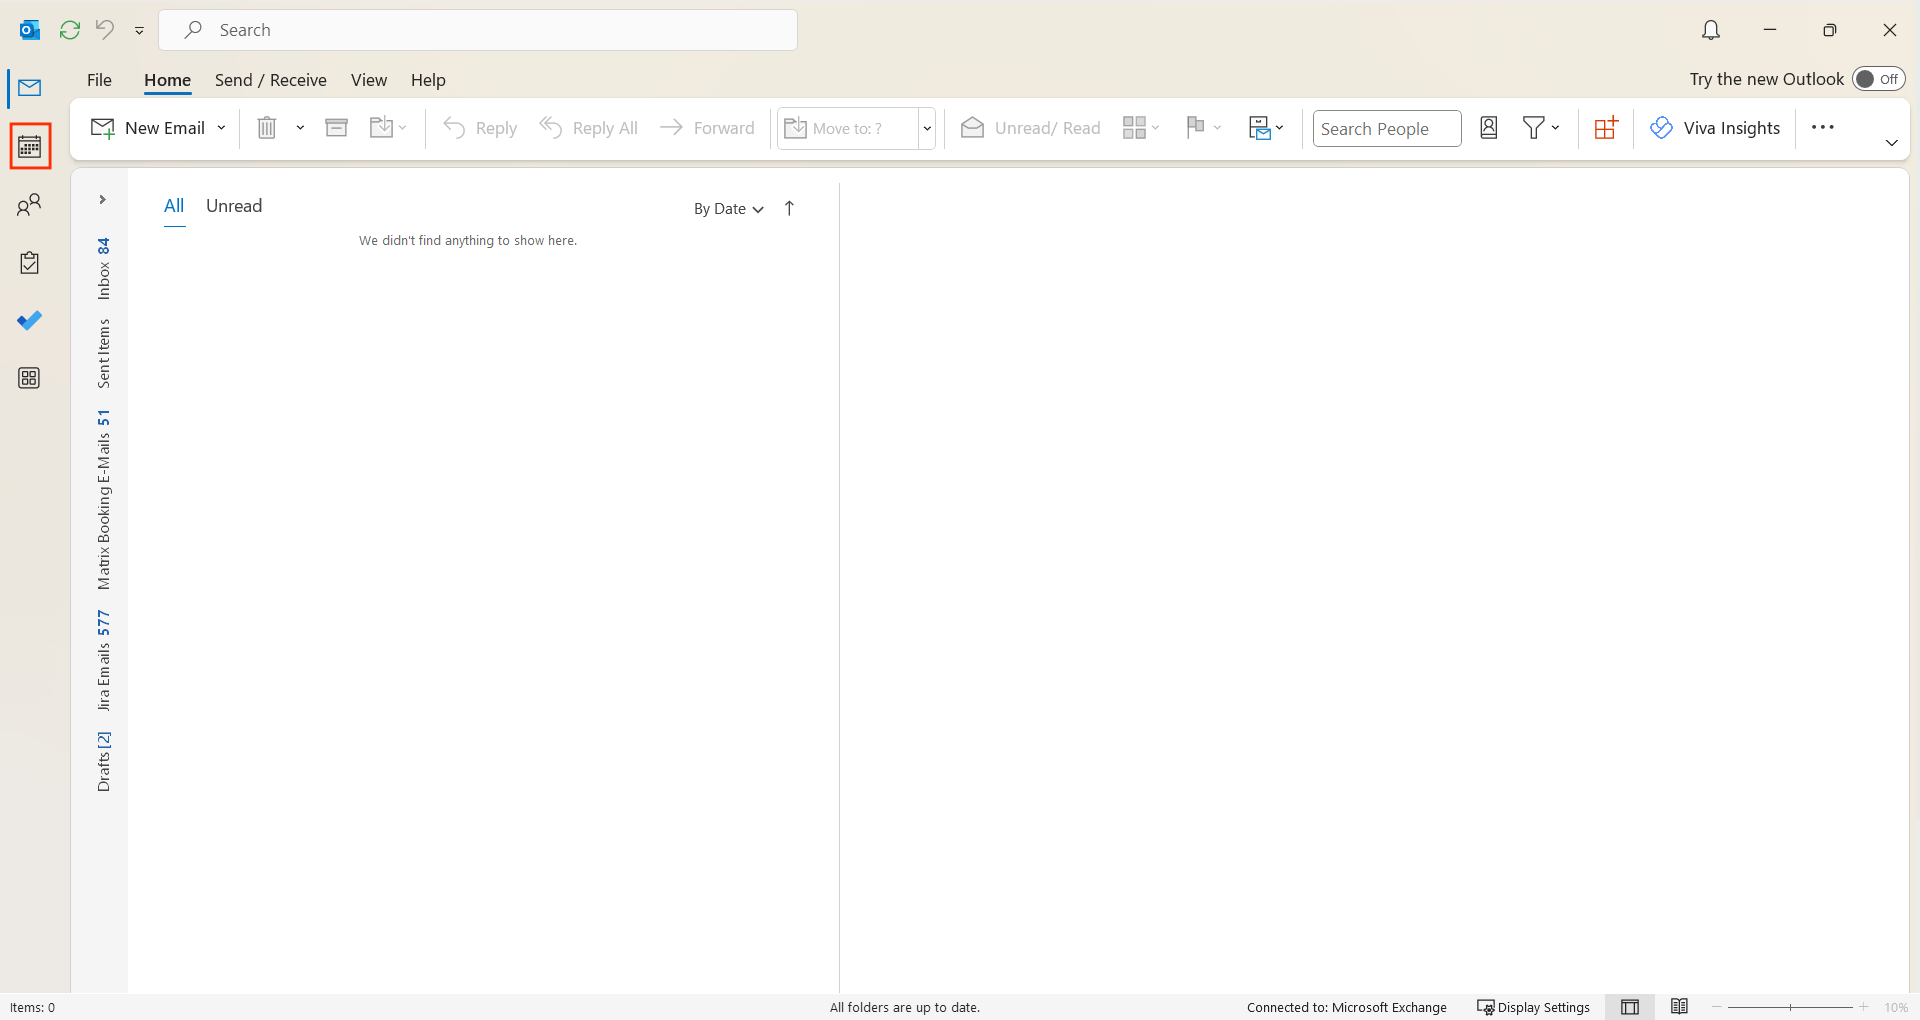
Within Outlook, Matrix Booking is accessible in 2 ways:
-
Matrix Booking ribbon.
-
Matrix Booking icon.
Notes:
-
You must ask your IT team to install our Outlook add-in first.
-
Our add-in works in the current Outlook app. You can switch between the old and new designs for Outlook, but our add-in doesn’t work for the new Outlook.

Set up the Matrix Booking ribbon
A “meeting” is when your Outlook event has attendees and an “appointment” is when your Outlook event doesn’t have attendees. To set up the Matrix Booking ribbon, raise a support ticket and ask for 1 of the following:
-
The ribbon always displays.
-
The ribbon displays when the Outlook event is associated with an existing Matrix booking or a new meetings only (appointments with attendees).
-
The ribbon to display when the Outlook appointment or meeting is associated with an existing Matrix booking or for new appointments only (meetings without attendees).
-
The ribbon to only display when the Outlook appointment or meeting is associated with an existing Matrix booking.
-
The ribbon never displays.
If you don’t specify your choice, the default is that the ribbon always displays.
Make a booking using the Matrix Booking ribbon
Notes:
-
You must be logged in to Matrix Booking using the add-in before you can use it.
-
You must book your resources from Outlook’s Calendar view.
-
The resources you can book via the add-in are those that have been created in your organisation’s resource hierarchy in Matrix Booking.
-
If you book a resource on behalf of someone else and they don’t have access to that resource, the booking will be successful as it’s the booking organiser’s access to the resource that’s considered by Matrix Booking.
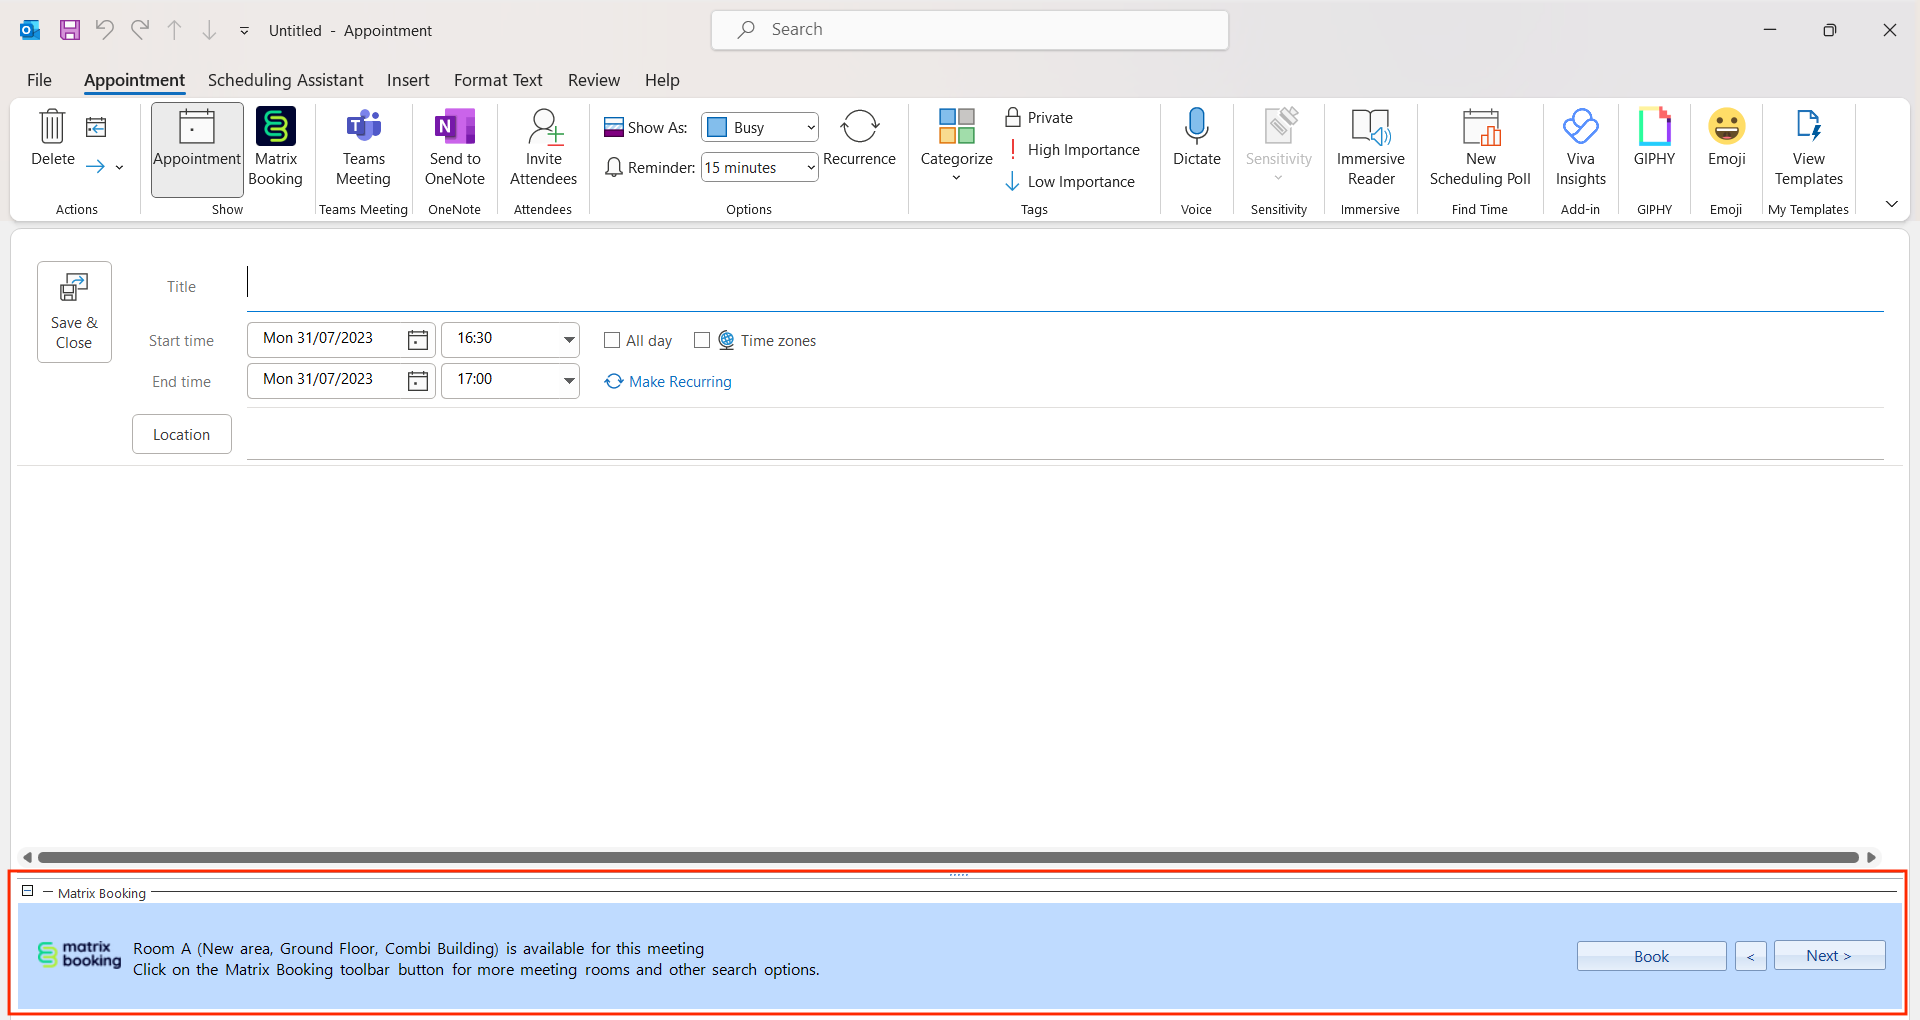
To make a booking using the Matrix Booking ribbon:
-
Select Appointment (for a booking without attendees) or New Meeting (for a booking with attendees) in Outlook’s ribbon.

-
Enter the time, date, location, and attendees information as normal.

-
The Matrix Booking ribbon will suggest a room based on the information you entered.

-
Select Next > for a different suggestion.
-
Select Book on the ribbon.

-
To hide the ribbon, select Hide (- button) in the top left of the ribbon. To unhide the ribbon, select Unhide (+ button).
Make a booking using the Matrix Booking icon
You can book multiple resources and different types of resources in 1 booking. To make a booking using the Matrix Booking icon:
-
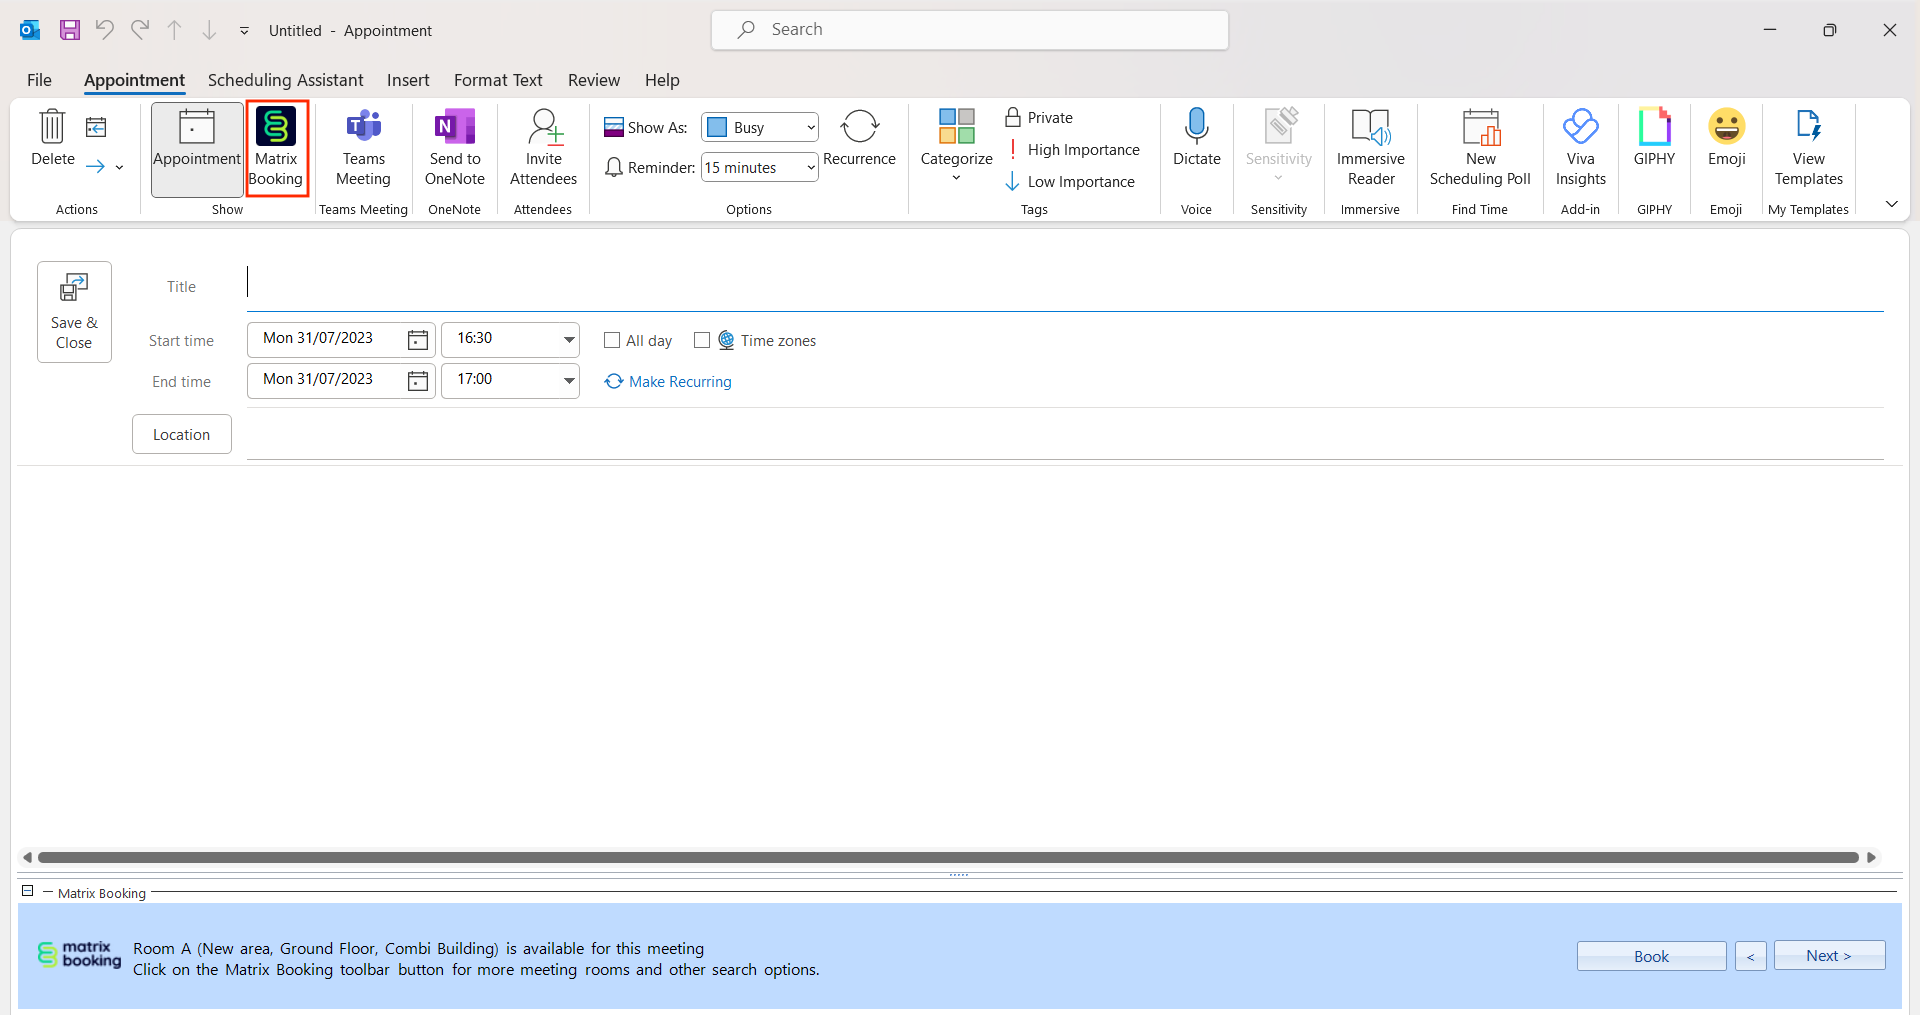
Select Appointment in the navigation bar to open the New Appointment screen.
-
Select Appointment (for a booking without attendees) or New Meeting (for a booking with attendees) in Outlook’s ribbon.
-
Enter the time, date, location, and attendees information as normal.
-
Select the Matrix Booking icon in Outlook’s ribbon.
-
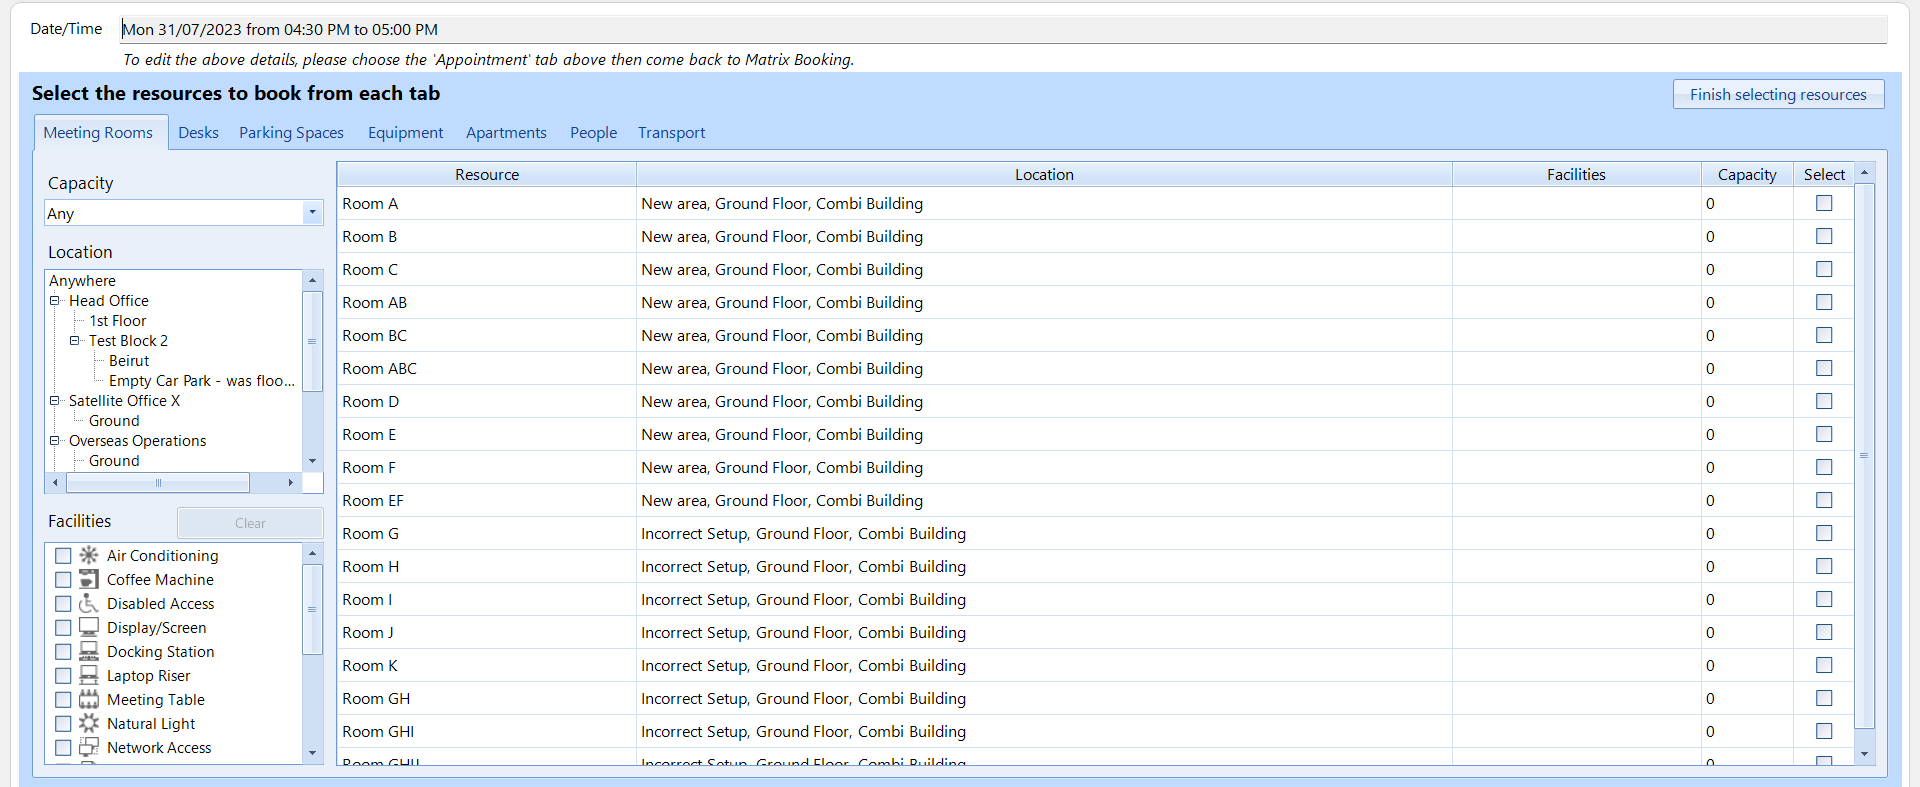
Select the type of resource you want from the tabs at the top of the screen. The availability of that resource type will be shown based on the information you entered.
-
You can filter the capacity you want your resource to have by using the Capacity dropdown.
-
You can filter where you want your resource by selecting the location you want using the Location filter.
-
You can filter the facilities you want your resource to have want by using the Facilities filter checkboxes.
-
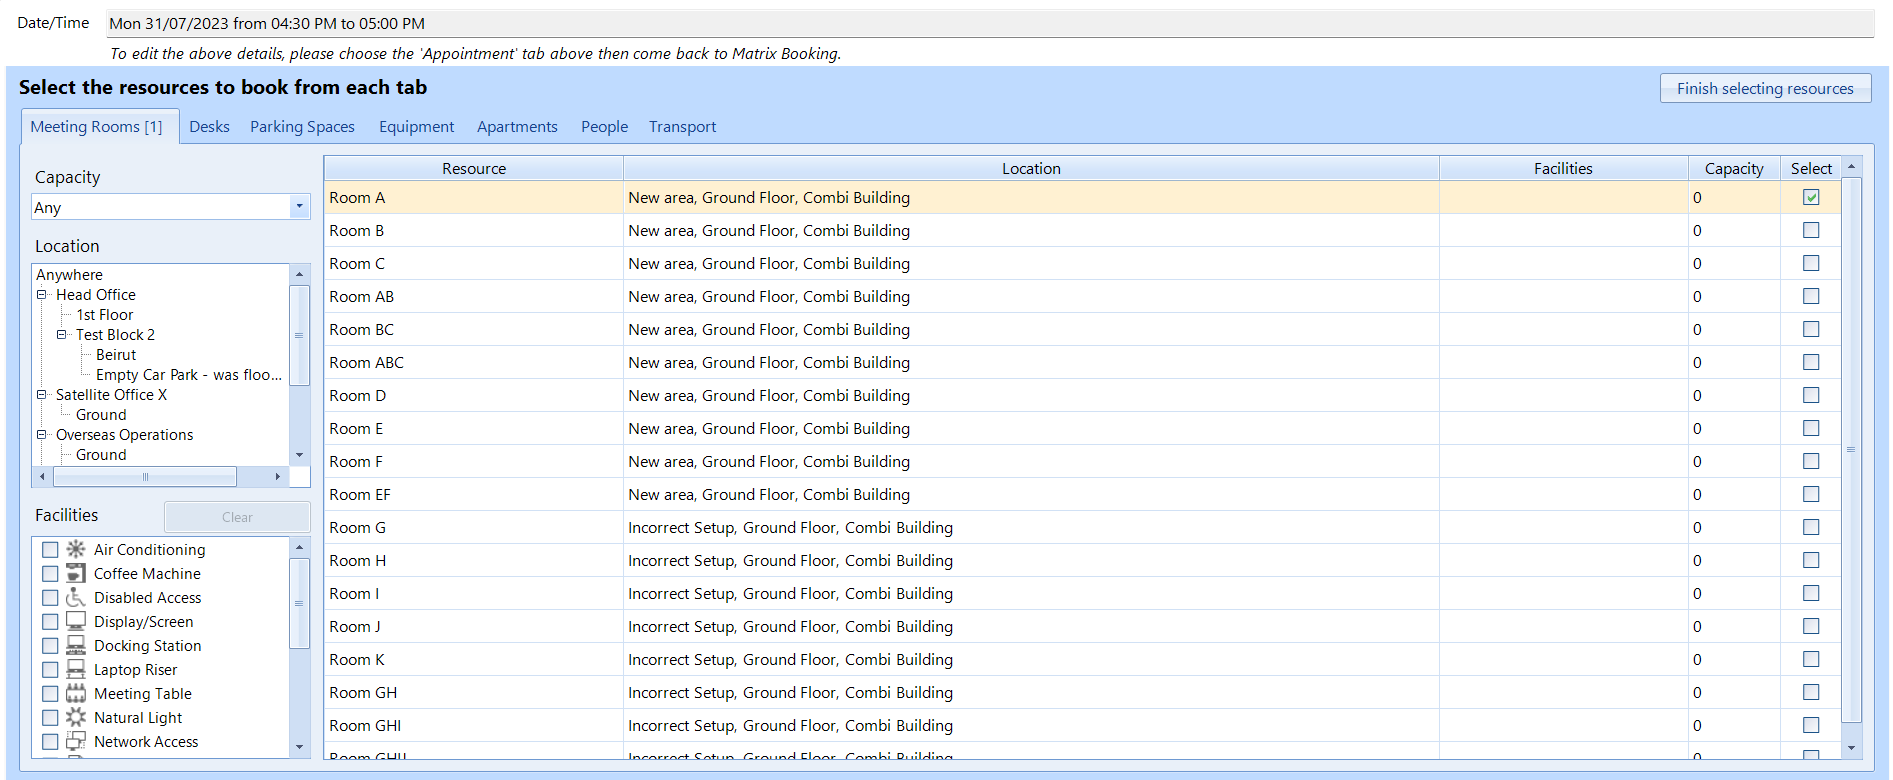
Select the checkbox next to the resources you want to book under the Select column.
-
If you don’t want to book another type of resource, skip to step 11. If you want to book another type of resource, select it from 1 of the other tabs at the top of the screen and repeat steps 4 to 8.
-
Select Finish selecting resources.
-
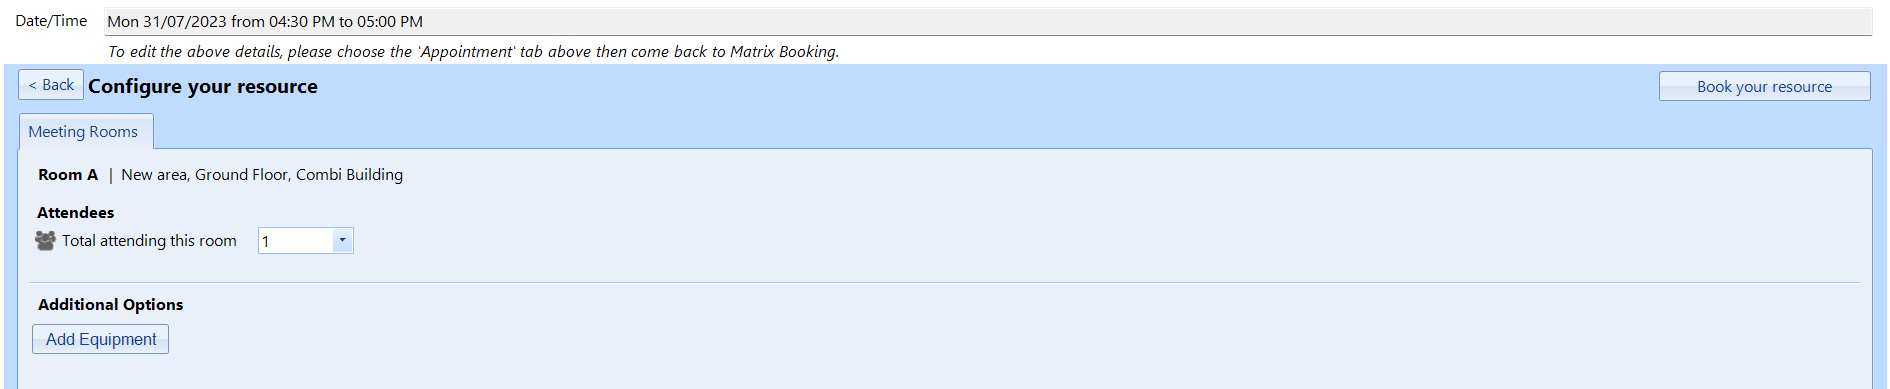
The Configure your resources page will appear.
-
Enter the optional booking information required (for example, cost code, layout, or catering). Depending on the resource type, there may not be any configurable options.
-
Select Book your resources.
-
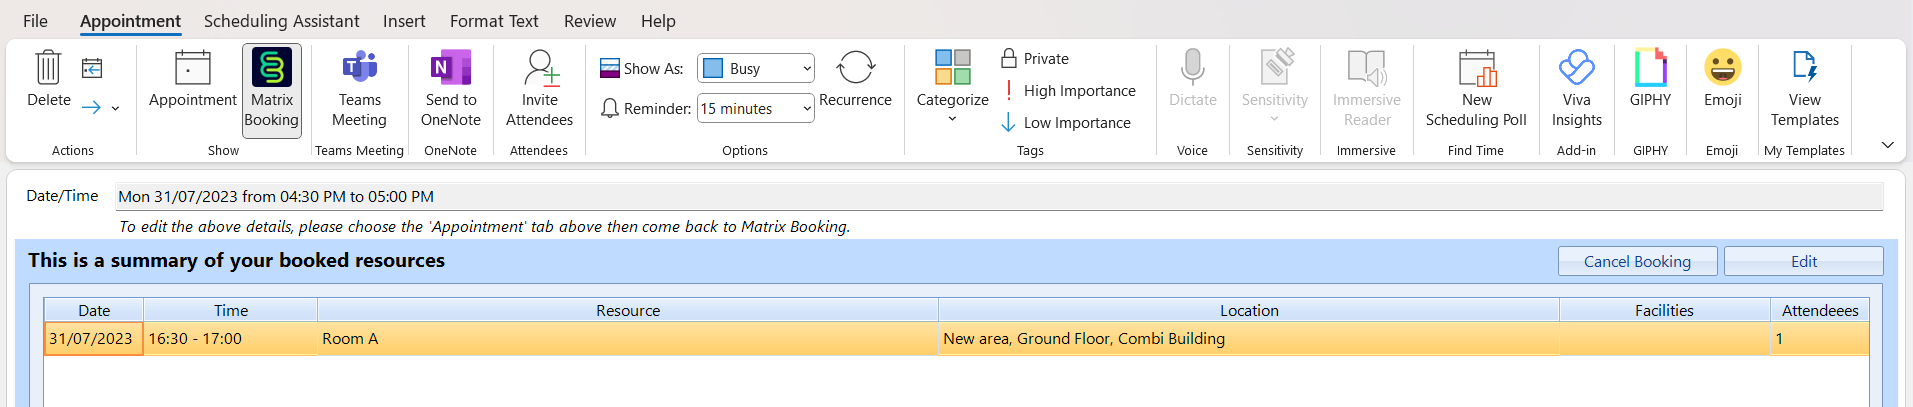
A summary of your booked resources will be displayed.

-
For a booking with attendees, select Appointment in Outlook’s ribbon.
-
Make sure the booking title and recipients’ email addresses have been entered.
-
Select Send.

-
Your booking will be in your Outlook app and Matrix Booking calendars.
Notes:
-
If you book a resource on behalf of someone else and they don’t have access to that resource, the booking will be successful as it’s the booking organiser’s access to the resource that’s considered by Matrix Booking.
-
Once delegated user permissions are set up and you try to book on behalf of someone else in Outlook, the Matrix Booking add-in button on the booking won’t be available. This is a limitation of the add-in.
Edit a booking
To edit a booking:
-
Select the Matrix Booking icon in Outlook’s ribbon to view your bookings.
-
Double select the booking you wish to edit or select Edit.
-
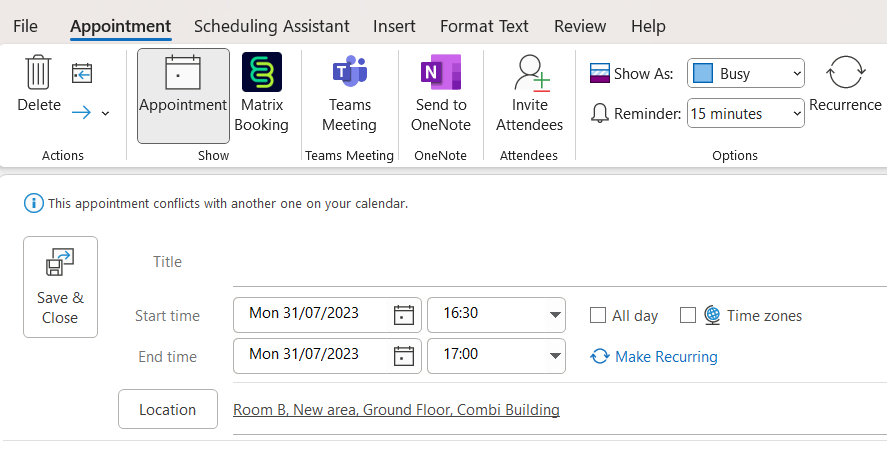
Make the relevant changes to your booking (for example, switching from Room A to Room B). This can include selecting multiple resources and of different types.
-
The Matrix Booking ribbon may suggest that the resource you select is no longer suitable based on your new criteria.
-
If you don’t want to change, add, or remove resources, select Cancel Booking in the Matrix Booking ribbon and skip to step 7.
-
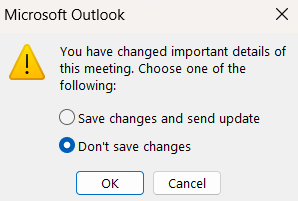
If you want to book a different resource type, select Cancel Booking in the Matrix Booking ribbon and go through Make a booking using the Matrix Booking icon steps. When you select Book your resources, a warning dialog will appear asking you if you want to:
-
Save changes and send update.
-
Don’t save changes.
-
-
Select Save changes and send update.
-
Select OK. The summary of your booked resources page will appear.

-
Select Appointment in Outlook’s ribbon.
-
Select Save & Close or Send update.
Cancel a booking using the Matrix Booking ribbon
To cancel a booking using the Matrix Booking ribbon:
-
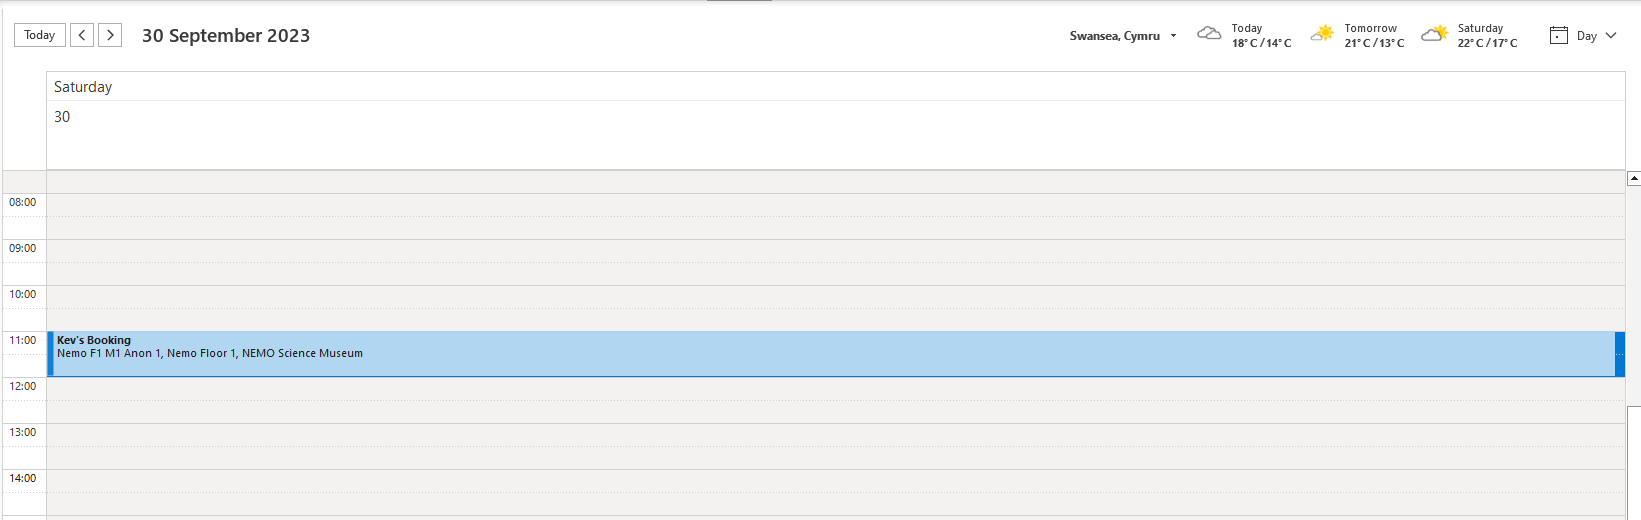
Select Outlook’s calendar view in the side menu.
-
Select the booking you wish to cancel twice.
-
Select Cancel Booking on the Matrix Booking ribbon.
-
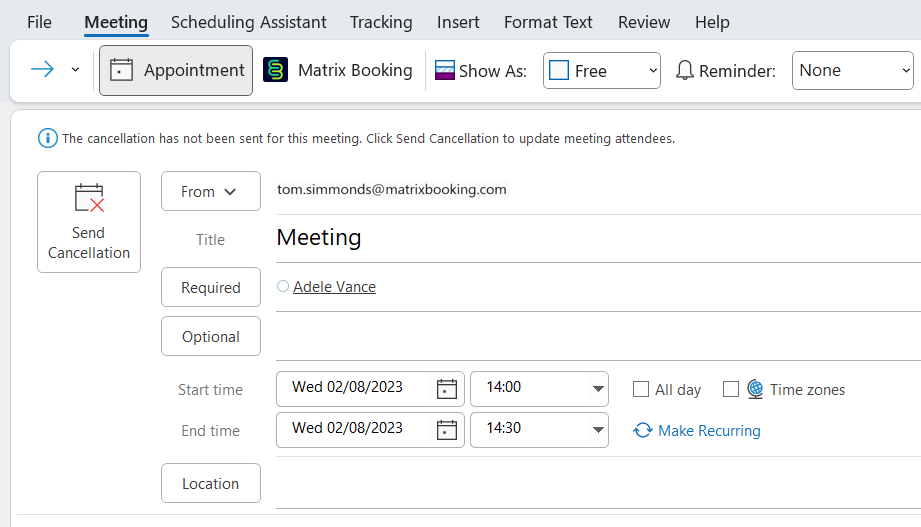
Select Appointments in Outlook’s ribbon.
-
Select Save & Close (if your booking had no attendees) or Send Cancellation to let your attendees know.
Note: cancellations may require the Outlook event to be cancelled separately.
Cancel a booking using the Matrix Booking icon
To cancel a booking using the Matrix Booking icon:
-
Go to your calendar.
-
Select the booking you want to cancel.
-
Select the Matrix Booking icon in Outlook’s ribbon to view your bookings.
-
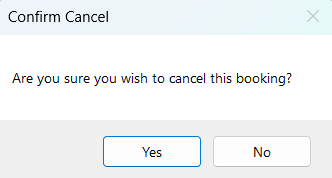
Select Cancel Booking. A warning dialog will appear.
-
Select Yes.
-
If your booking has attendees, select Appointments in Outlook’s ribbon.
-
Select Send Cancellation to let your attendees know.
Note: cancellations may require the Outlook event to be cancelled separately.