Problem
-
Why can't I get the data for all my resources?
-
I can get some resources' data, but not all of them. What can I do?
Solution
You may be finding that data from certain resource types or booking categories can only be exported. This is because the user account you have isn’t the right type for exporting data.
If you have a System/API user account, you need to ask your Matrix Booking administrator to switch this to a location manager user account and assign you to a location.
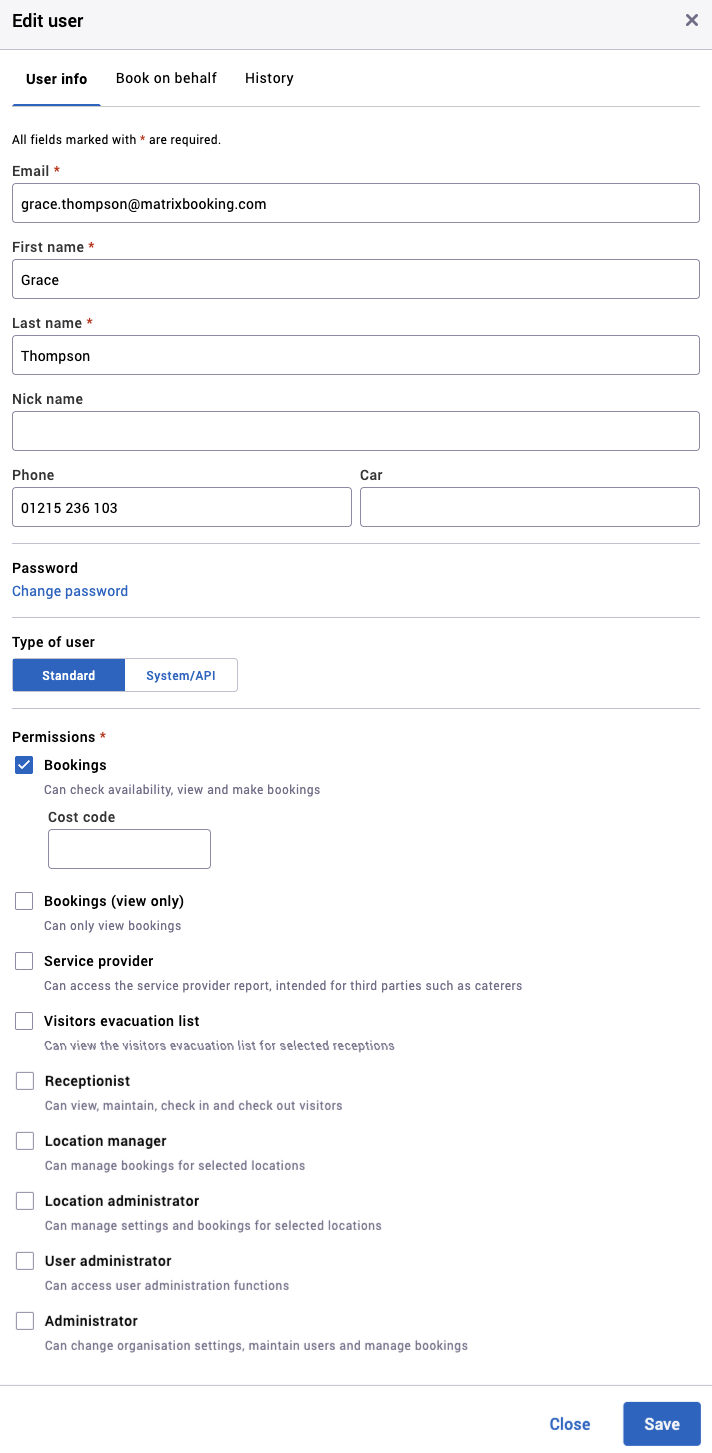
Edit a user
-
In the Filter results search bar, enter the user’s name or other identifying details.
-
Select the vertical three-dots icon next to the user to open the more options menu.
-
Select Edit [user]. The Edit [user] dialog will appear.
-
Make the changes you need to on the User Info tab:
-
Update their email address.
-
Select Change Password to update their password.
-
Enter any optional details that may be required.
-
Change their permissions and account type if required.
-
-
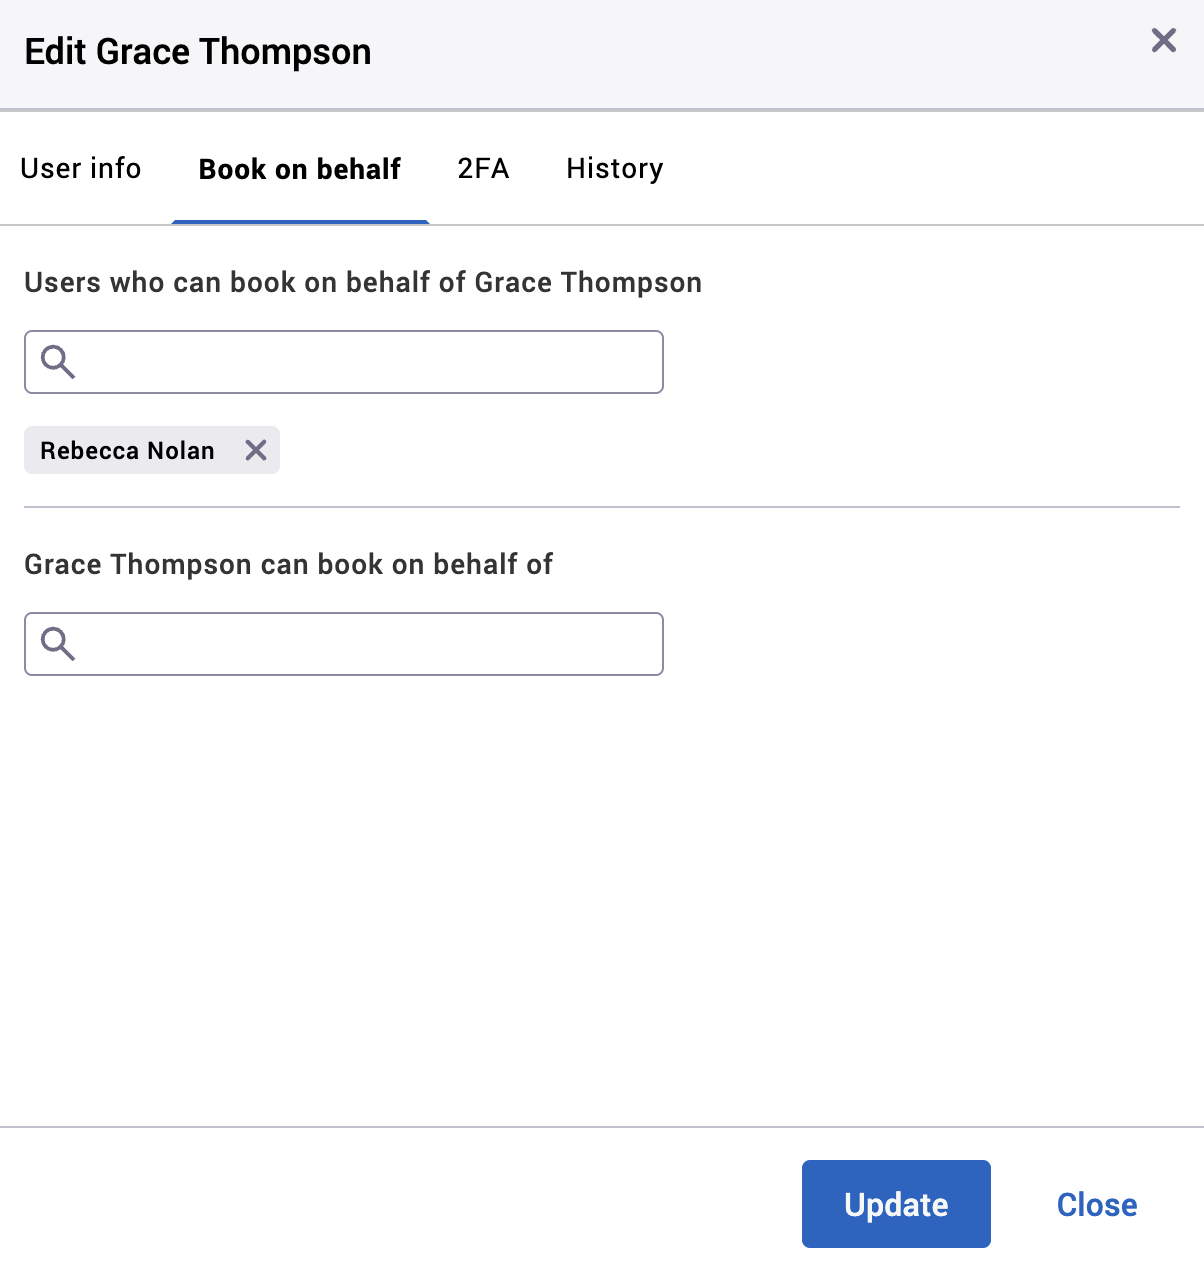
Select the Book on behalf tab.
-
Enter the other users’ names that you want to book on behalf of the user you’re editing.
-
Enter the other users’ names that you want the user you’re editing to book on behalf for.
-
Select the History tab for more information on what’s happened to that user (for example, date created or deactivated).
-
Select Save.
-
To discard any changes, select Cancel.
Notes:
-
If you change any of a user’s details, remember to notify them as they won’t receive any automated notifications.
-
If your organisation uses SSO to log in, it’s not possible to update email addresses through Matrix Booking. Our SSO integration synchronises with your directory (for example, Microsoft Entra ID). Contact your IT team to request this change. Once any change happens in your directory, Matrix Booking will automatically sync and any updates to users’s email addresses will be reflected in the Users screen.
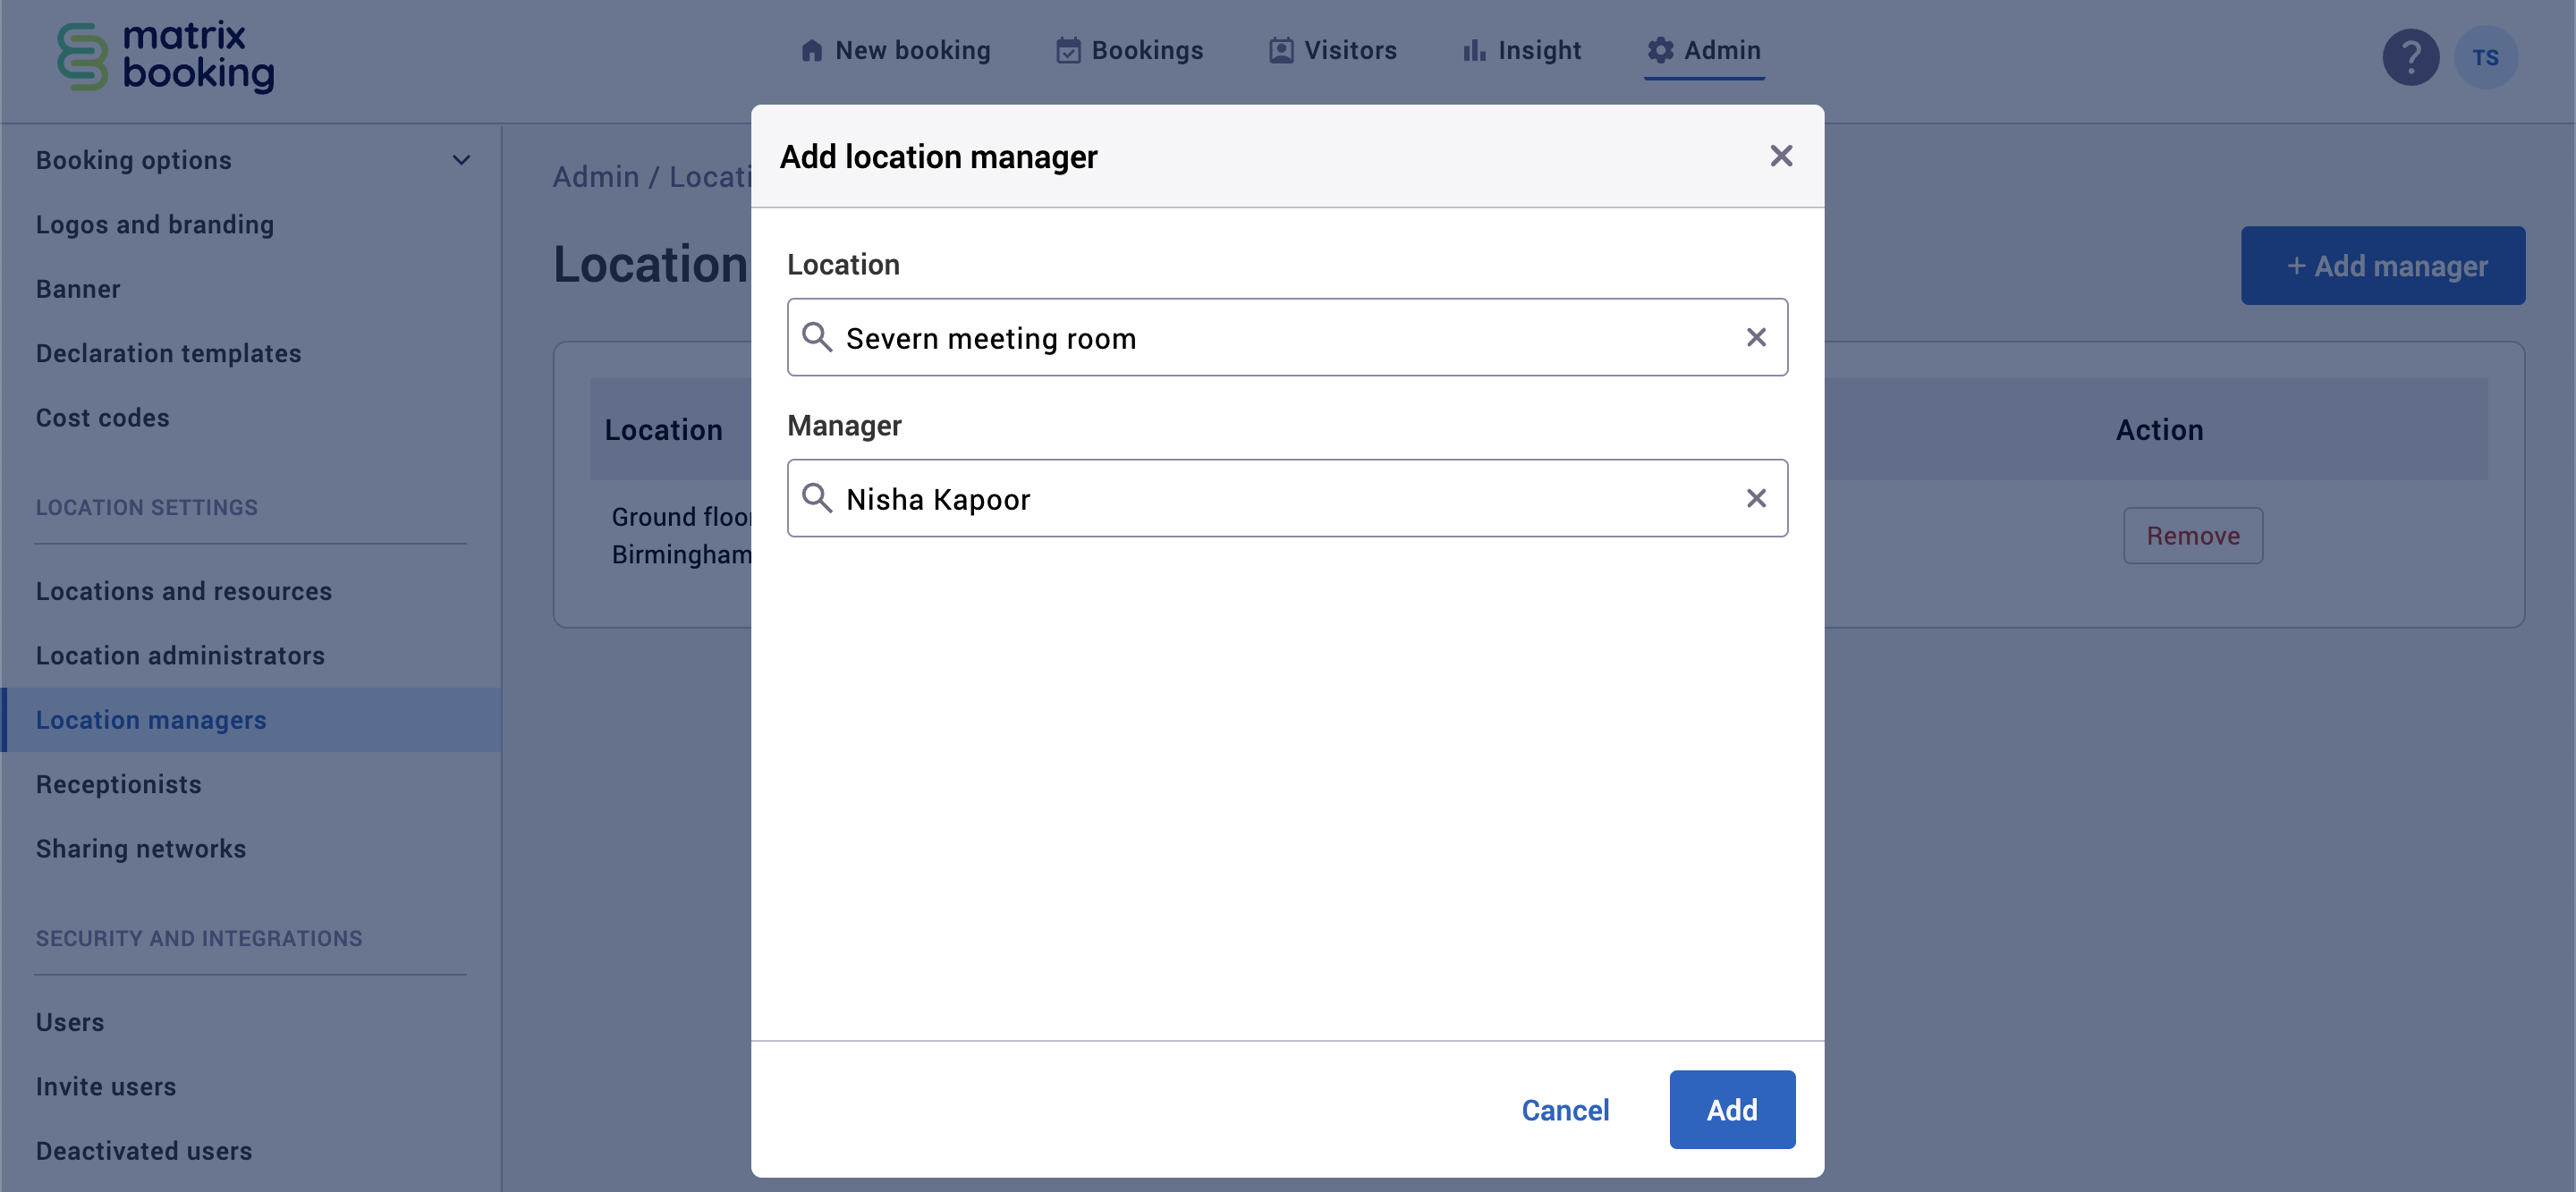
Assign a location manager to a location
To assign a location manager to a location:
-
If you haven’t already:
-
Select Admin in the navigation bar.
-
Select Location managers under the Location Settings section in the side menu.
-
Select + Add manager. The Add location manager dialog will appear
-
Begin to enter the specific location they are going to be a manager of into the Location text box. A dropdown will appear.
-
Select the location.
-
Begin to enter the name of the person in the Who text box. A dropdown will appear.
-
Select the manager’s name.
-
Select Add.
Now that you’re a location manager, you should be able to export all the data of all the locations and resources that you’re a manager of.