Problem
-
How do I make a room need approval?
-
How do I make someone be a room approver?
-
How do I get notifications / emails that a room needs approving?
-
Where can I see all the room or desk requests that I need to approve?
Solution
There are 3 key steps to set up approvals:
-
Set up Approvals in the Settings tab of the location or resource.
-
Assign a location manager (or location administrator) – the approver.
-
Optional: the location manager or location administrator may want to set up notifications for the resources that need to be approved.
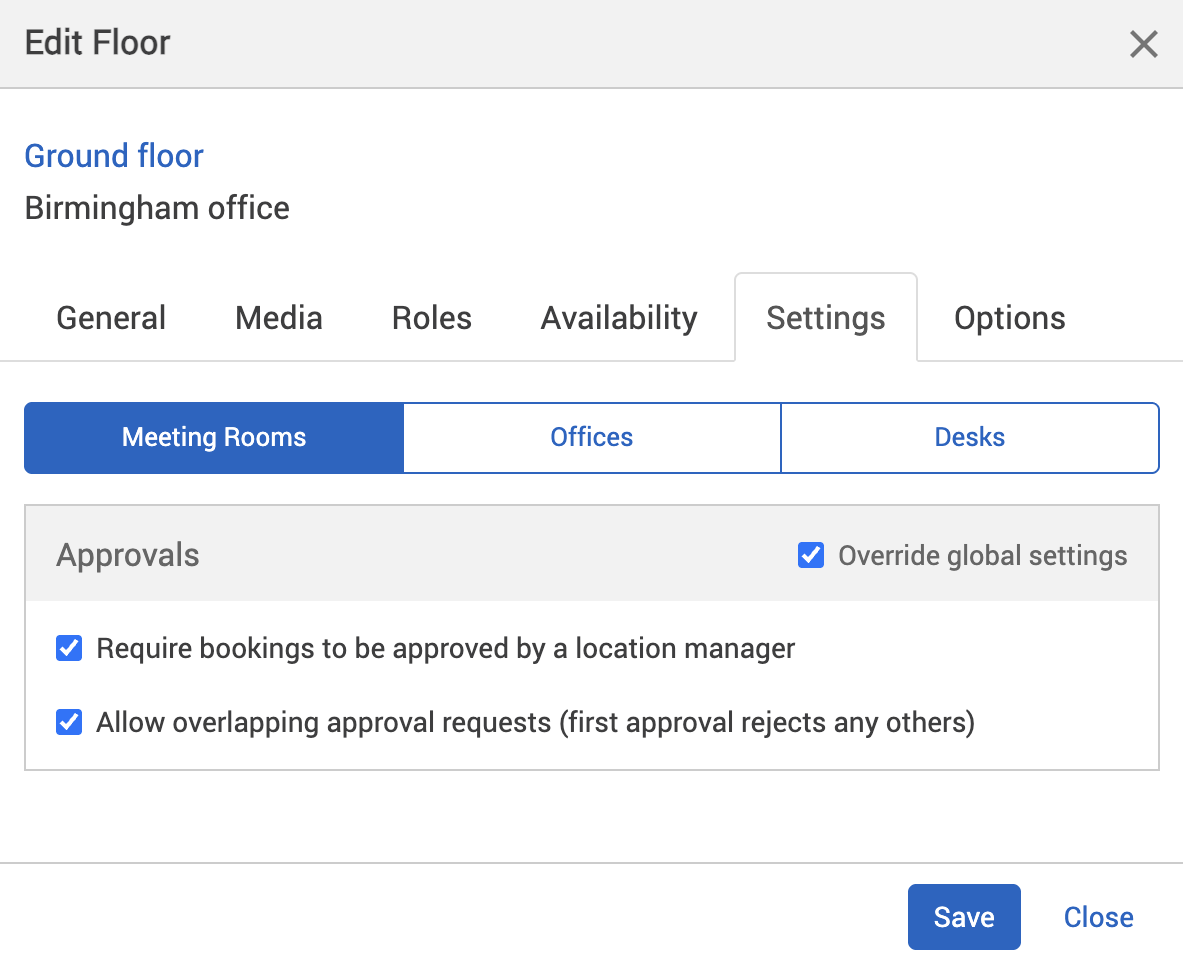
Set up Approvals settings
To set up the Approvals settings of a location or resource:
-
Select Admin in the navigation bar.
-
Select Locations and resources under the Location Settings section in the side menu.
-
Select Edit hierarchy. The Locations and resources hierarchy will appear.
-
Select Edit next to the location or resource you want to change. The Edit [Location or Resource] dialog will appear with the General tab selected by default.
-
Select the Settings tab.
-
Select the correct resource using the booking category selector.
-
Select the Override global settings or Override [location or resource] checkbox under the Approvals section.
-
Check if any of the checkboxes are greyed out. If they are, this means that these settings are inherited from a higher level in your resource hierarchy. You may have them switched on at that level for a reason.
-
The Require bookings to be approved by a location manager checkbox will be automatically selected for you.
-
If you want more than 1 approval request for each resource, select the Allow overlapping approval requests (first approval rejects any others) checkbox.
-
If you want to remove either setting, select the checkboxes again to uncheck them.
-
Select either of the following and the dialog will close to return you to the Locations and resources hierarchy:
-
Save to keep you changes.
-
Close to discard your changes.
-
-
Select Save changes.
Notes:
-
Settings from a location or resource that’s higher in your hierarchy will be inherited by locations and resources below it. These settings will appear greyed out in the locations or resources lower in the hierarchy. If they are, this means that these settings are inherited from a higher level in your resource hierarchy. You may have them switched on at that level for a reason.
-
Changing the settings described above may affect other features you have for your organisation.
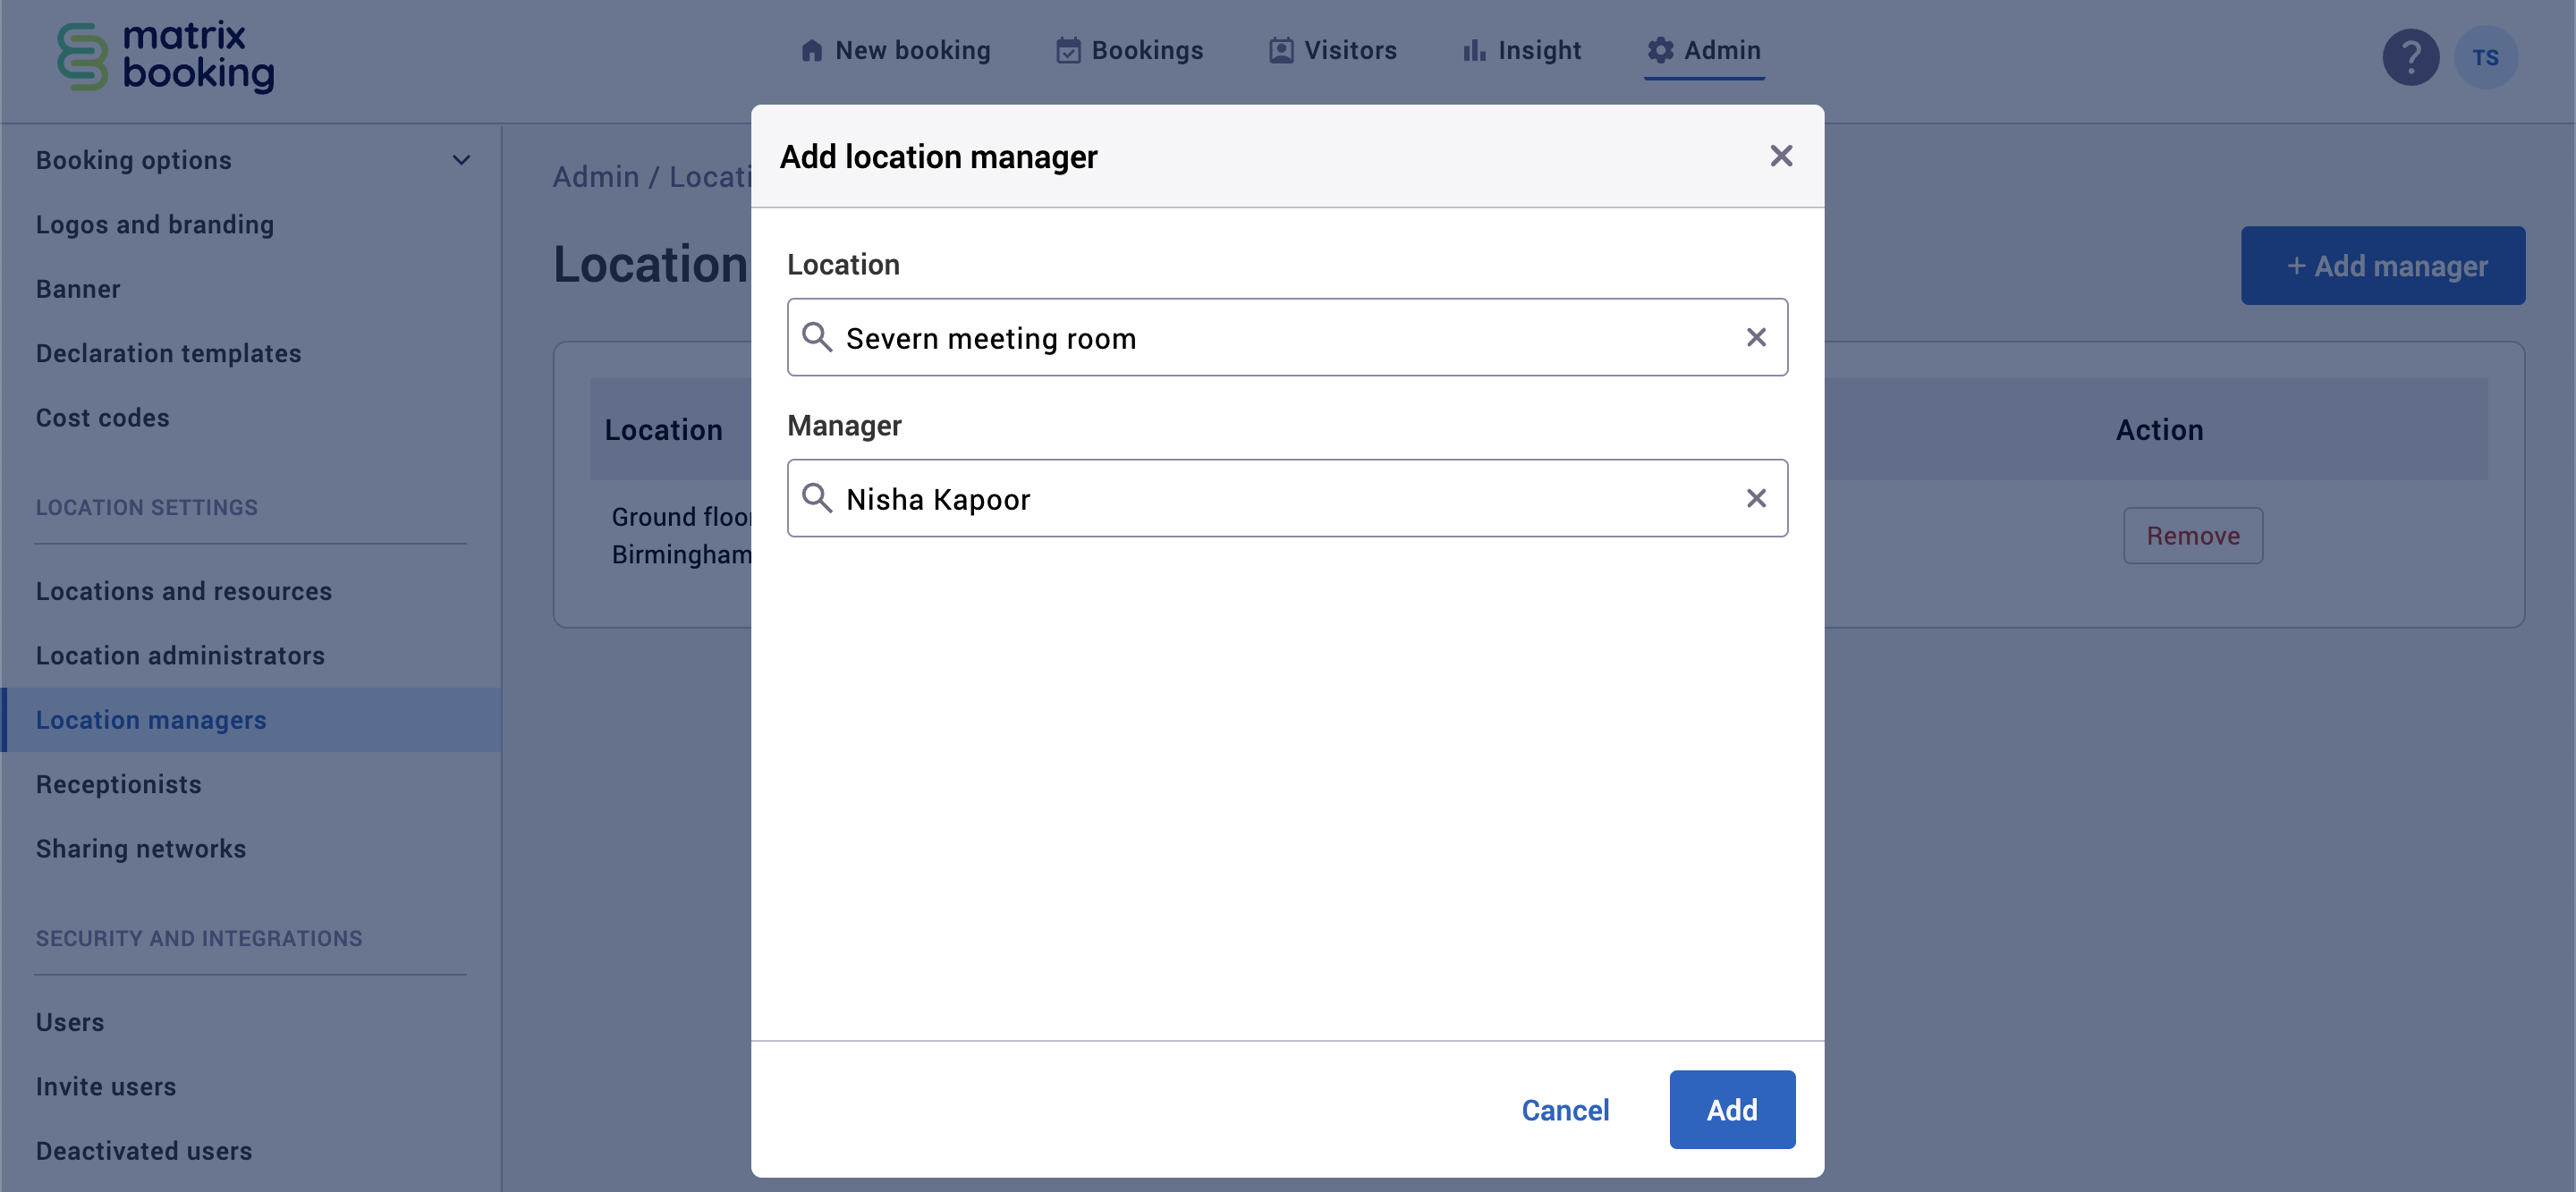
Assign a location manager
To assign a location manager to a location:
-
If you haven’t already:
-
Select Admin in the navigation bar.
-
Select Location managers under the Location Settings section in the side menu.
-
Select + Add manager. The Add location manager dialog will appear
-
Begin to enter the specific location they are going to be a manager of into the Location text box. A dropdown will appear.
-
Select the location.
-
Begin to enter the name of the person in the Who text box. A dropdown will appear.
-
Select the manager’s name.
-
Select Add.
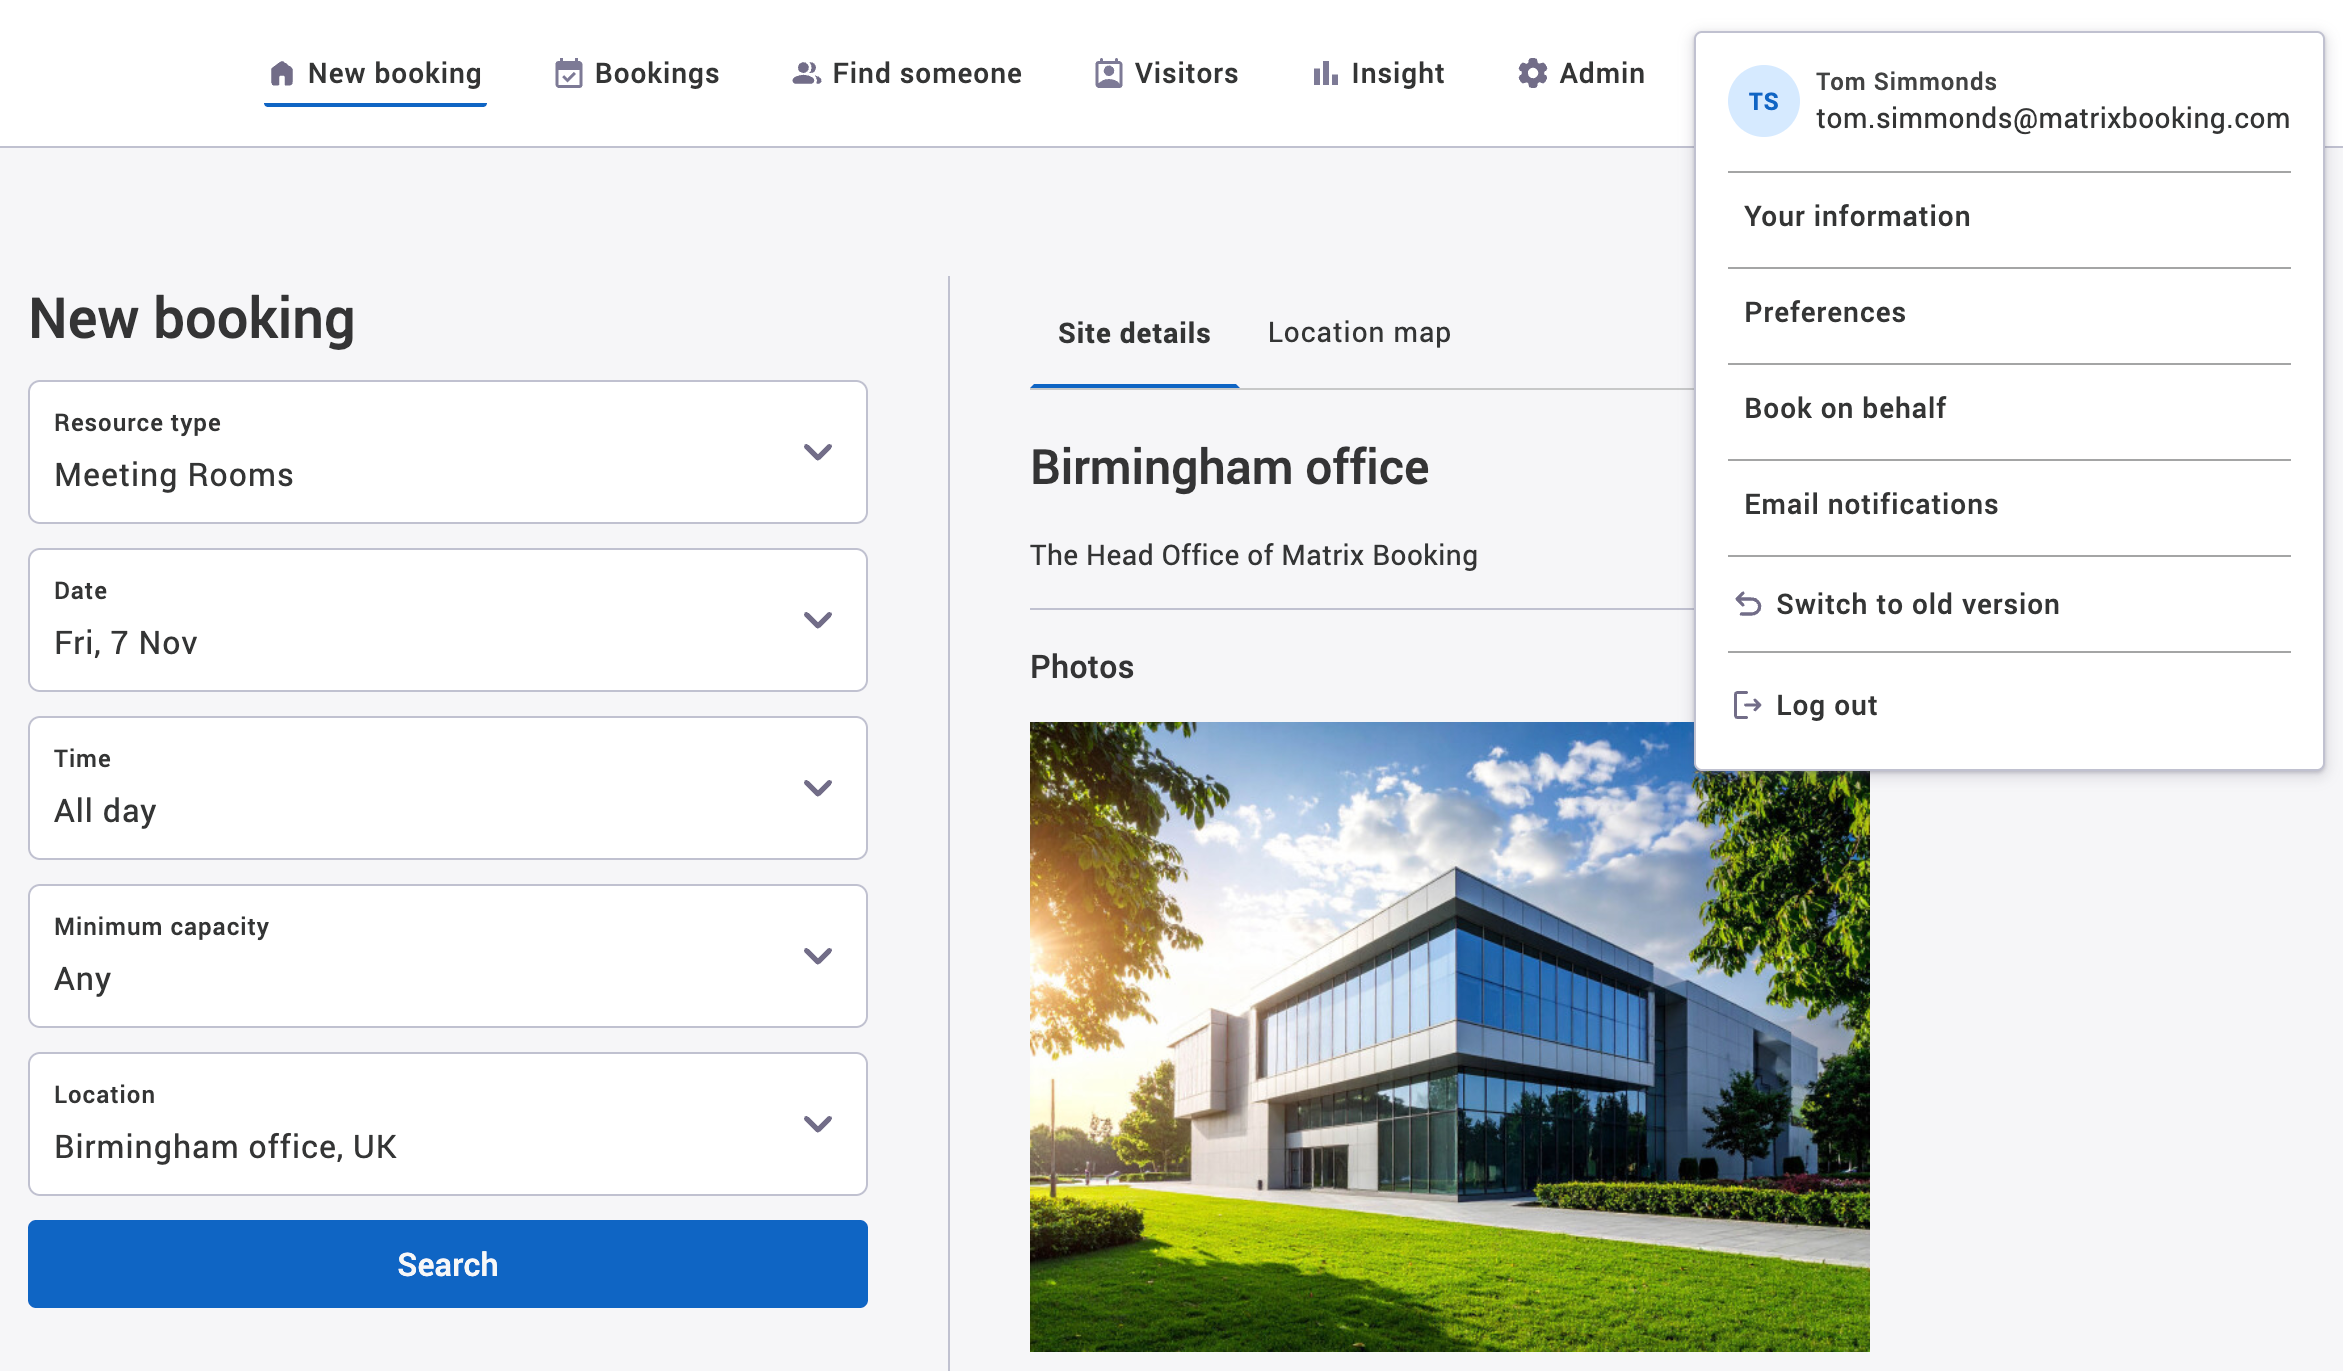
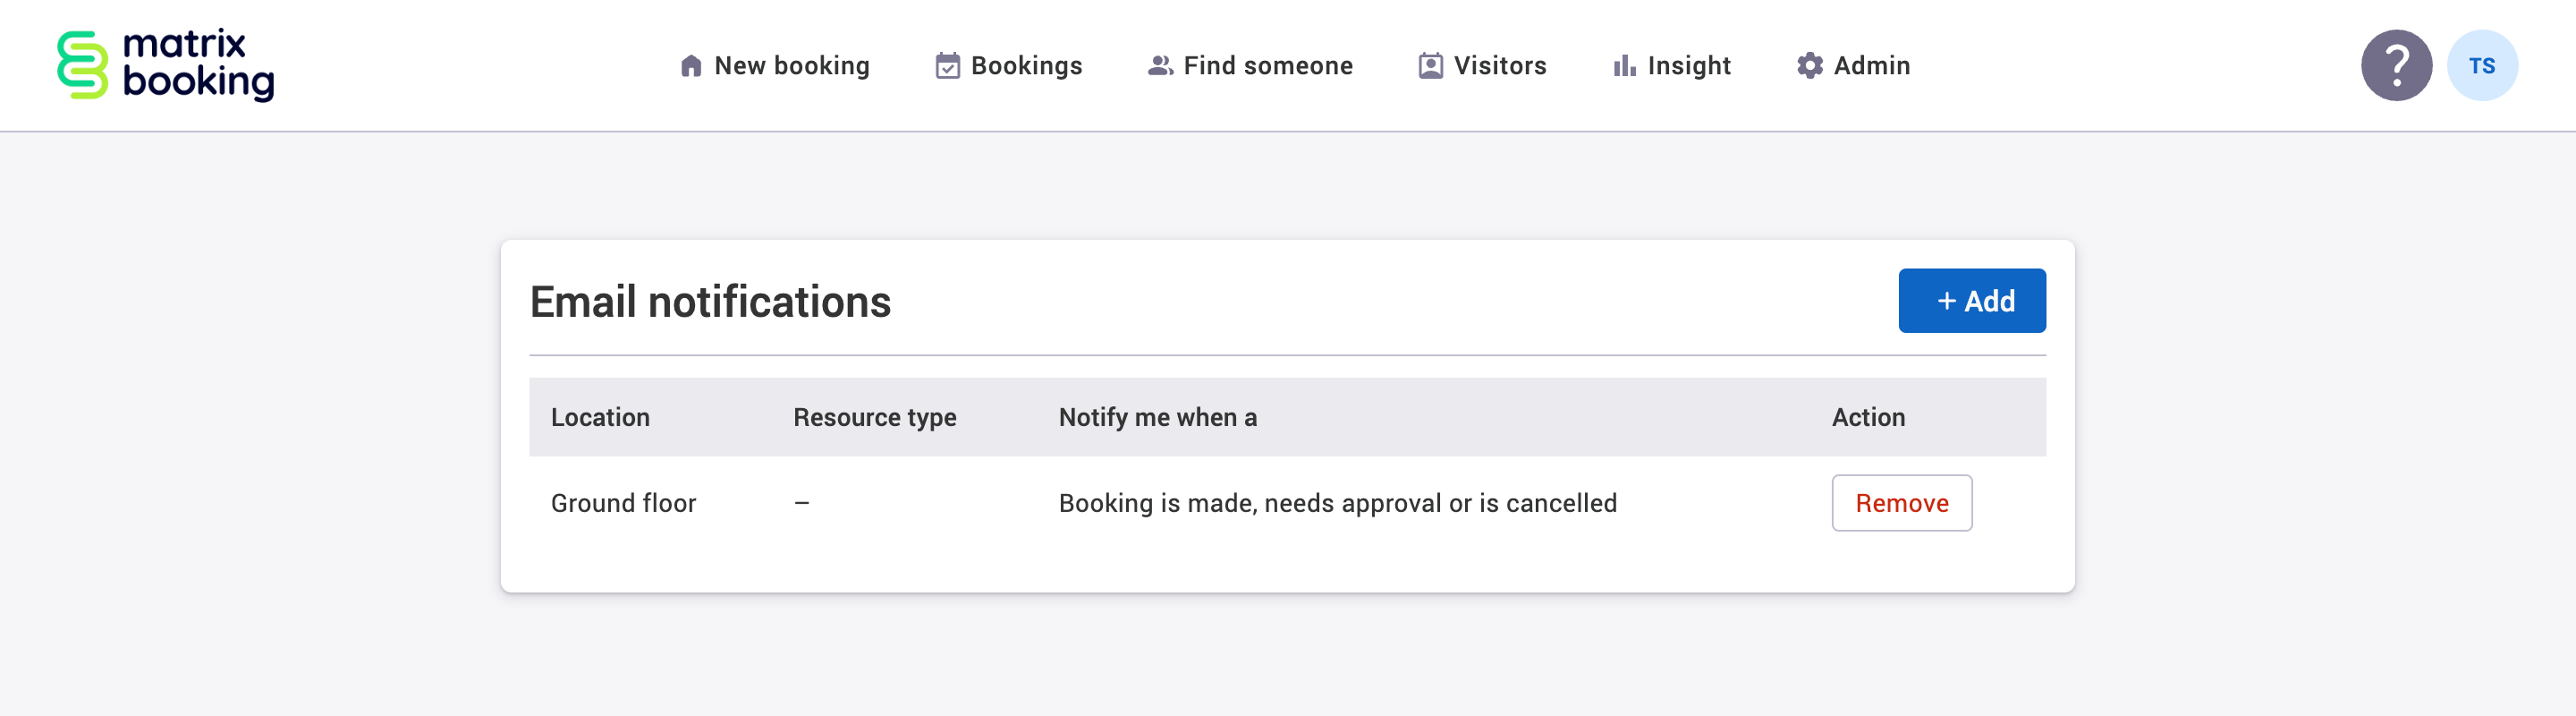
Optional: set up notifications
To set up email notifications for resources or locations:
-
Select the User profile dropdown (your initials).
-
Select Email notifications. The Email notifications screen will appear.
-
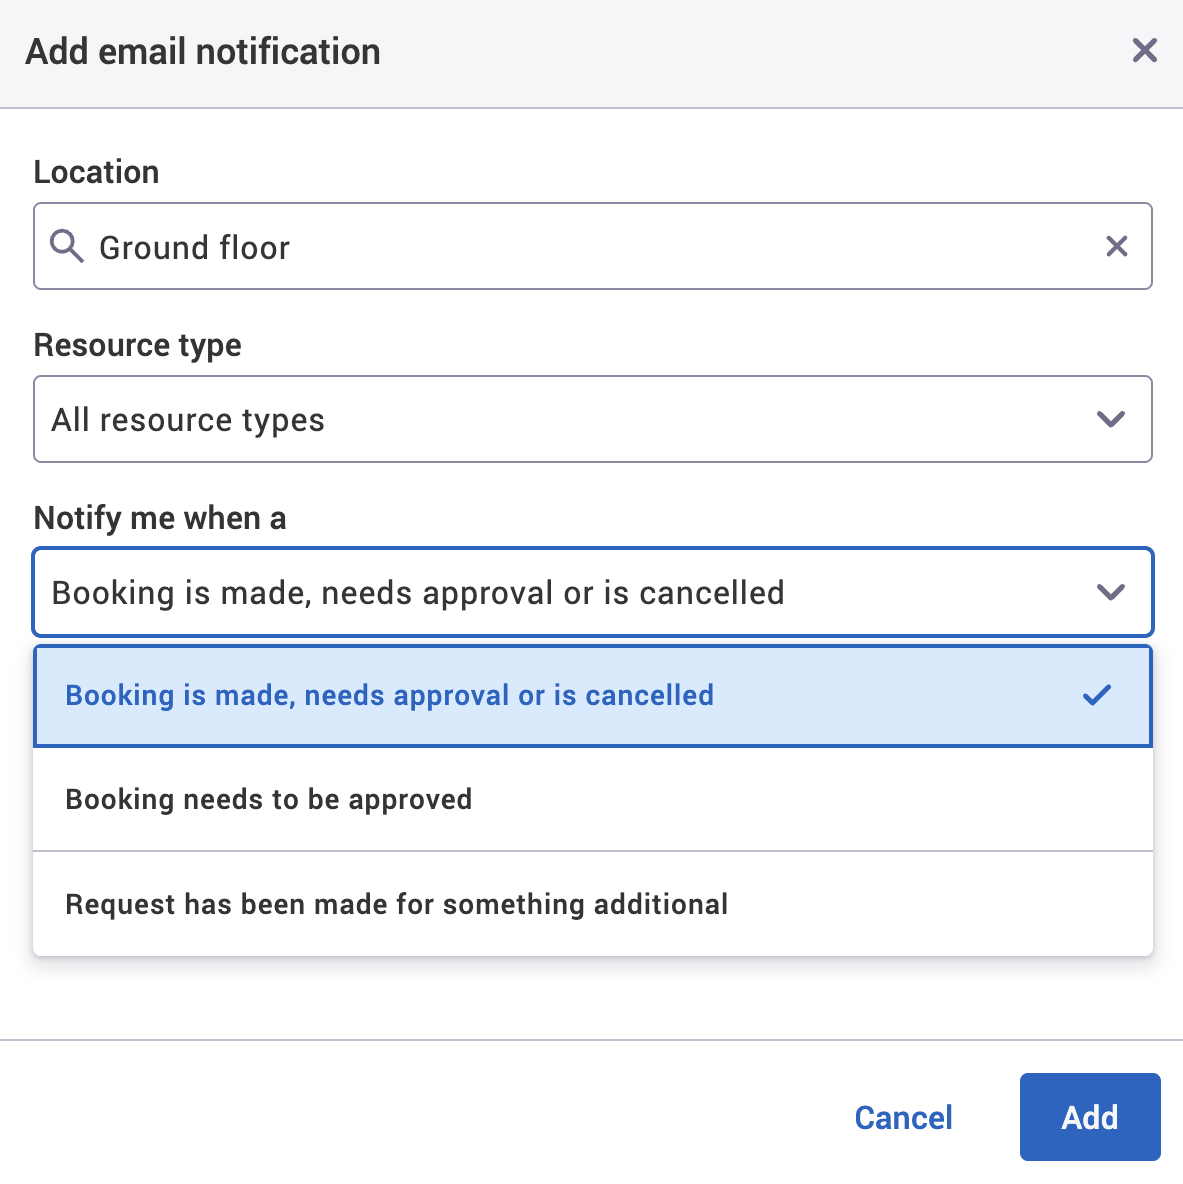
Select + Add. The Add email notification dialog will appear.
-
Begin to enter the location you want to be notified about in the Location search bar.
-
Select your location from the dropdown.
-
Select either All resource types (default) or 1 of the resources available in that location from the Resource type dropdown.
-
Select 1 of the following from the Notify me when a dropdown:
-
Booking is made, needs approval, or is cancelled
-
Booking needs to be approved
-
Request has been made for something additional
-
-
Select either of the following and the dialog will close to return you to the Locations and resources hierarchy:
-
Add to add this email notification.
-
Close to discard it.
-
-
The new email notification will appear in the Email notifications screen.
-
To delete this email notification, select Remove.
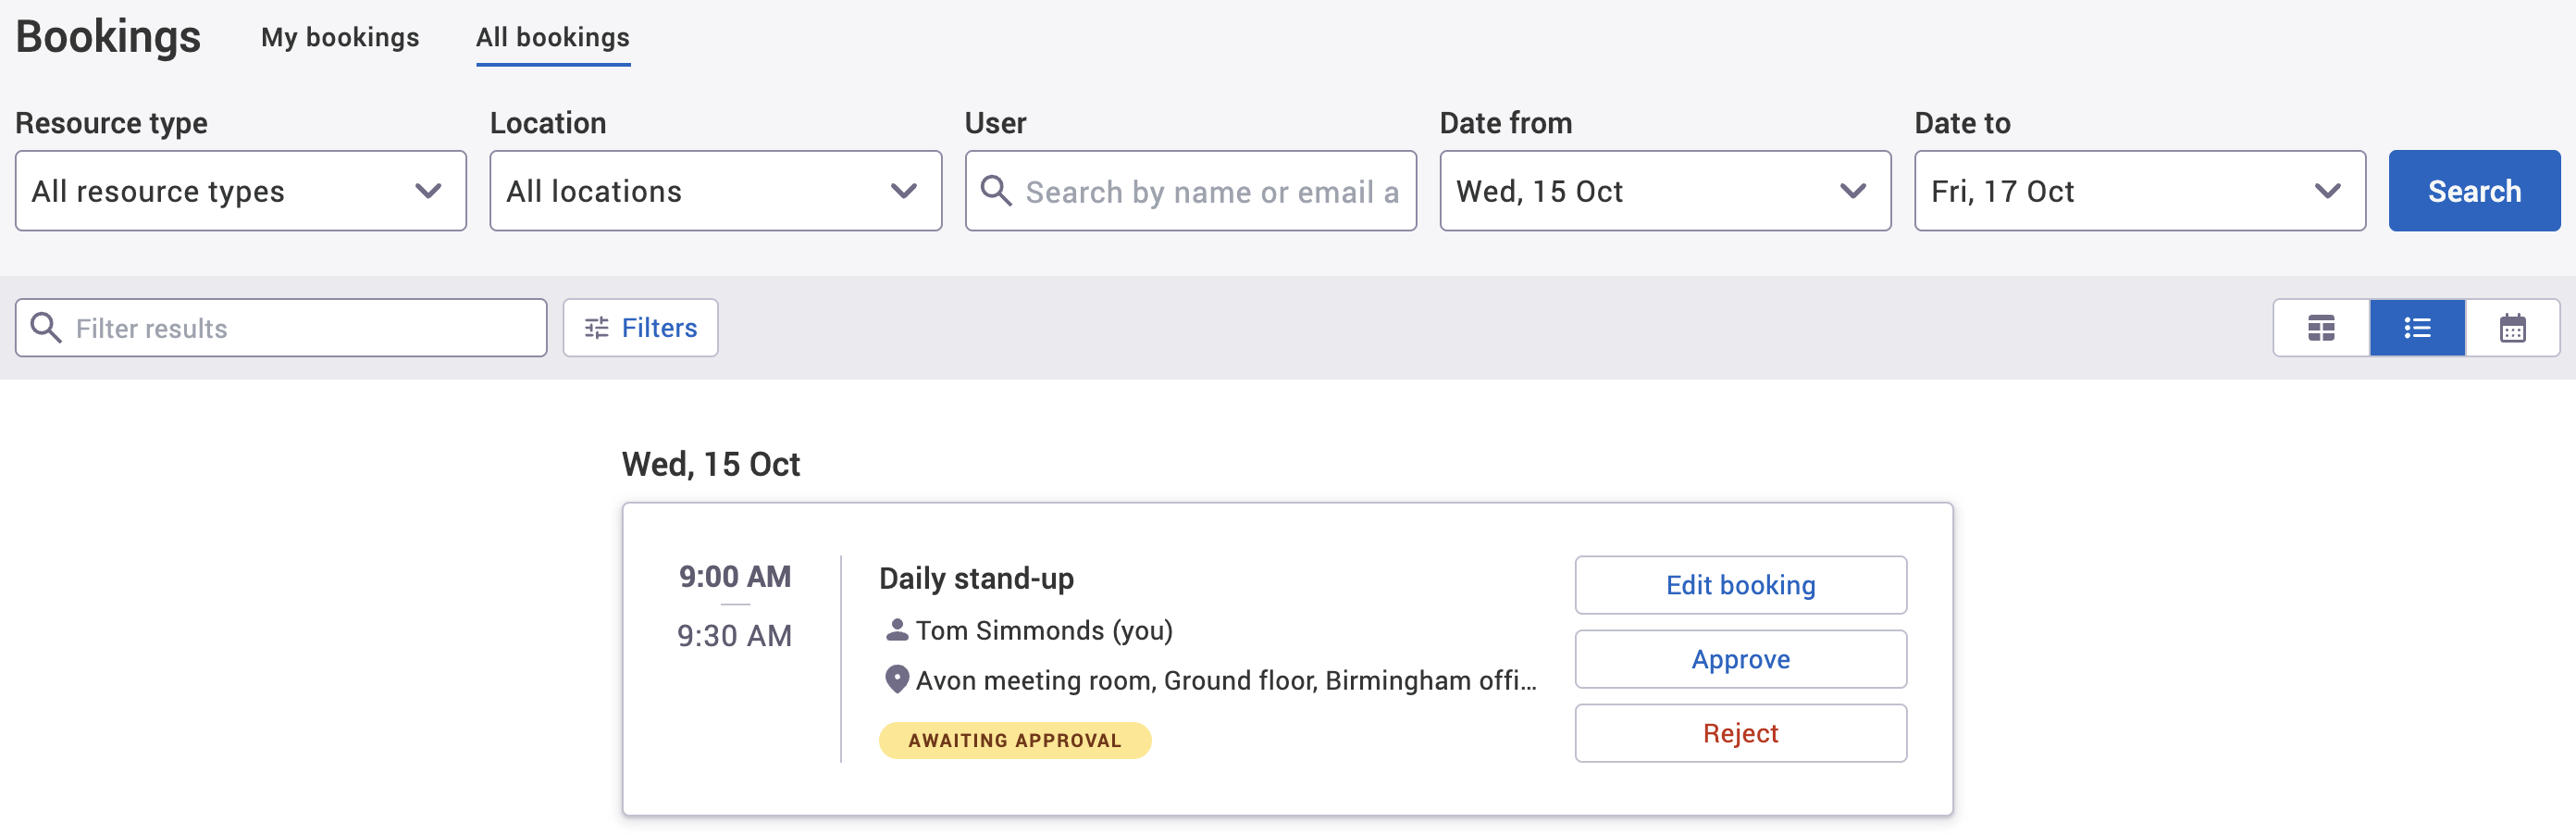
Approve a booking
To approve a booking in the All bookings tab:
-
Depending on the view you’ve selected, a different step may need to be taken:
-
For the List view, select Approve next to your chosen booking (see image below).
-
For the Calendar view, select the vertical three-dots icon to open the more options menu.
-
In the Edit booking dialog, select the vertical three-dots icon to open the more options menu.
-
-
Select Approve. The Approve booking dialog will appear.
-
Select either of the following and the dialog will close to return you to the Bookings screen:
-
Select Approve booking to approve the booking.
-
Select Close to not continue to approve the booking.

-